Configure Default Root Object
Objective: Configure
index.htmlas the Default Root Object for the CloudFront DistributionStudentWebsiteDistribution(section 7.1) so that CloudFront automatically serves theindex.htmlfile from the S3 Bucketstudent-management-website-2025when users access the CloudFront domain (e.g., https://d12345678.cloudfront.net). This ensures the static web interface (form, student table, functional buttons) displays correctly and integrates with thestudentAPI (stageprod, section 4.8) to perform functions like saving, viewing, and backing up data.
Overview of Default Root Object
- Role of Default Root Object:
- Specifies the default file (
index.html) that CloudFront returns when users access the root URL of the distribution (e.g., https://d12345678.cloudfront.net). - Similar to the Index document in S3 Static Website Hosting (section 6.3), but applied at the CloudFront layer.
- Ensures the main interface displays without the need for a specific path (e.g., /index.html).
- Specifies the default file (
- Integration with the system:
- CloudFront distributes static files (
index.html,styles.css,scripts.js, section 6.2) from the S3 Bucketstudent-management-website-2025(sections 6.1–6.4) via Origin Access Identity (OAI) (section 7.1) to restrict access. - The web interface calls the
studentAPI (section 4.8) with the Invoke URL (e.g., https://abc123.execute-api.us-east-1.amazonaws.com/prod) andStudentApiKey(section 4.2). - The functions include:
- POST /students: Save records to DynamoDB
studentDataand send a confirmation email via SES. - GET /students: Display data in the table.
- POST /backup: Create a file in the S3 Bucket
student-backup-20250706(section 6.5) and send notification emails via SES.
- POST /students: Save records to DynamoDB
- CORS is configured (section 4.7) to support requests from the CloudFront domain (e.g., https://d12345678.cloudfront.net).
- CloudFront distributes static files (
Initial Requirements
You need to complete section 7.1 (create the CloudFront Distribution StudentWebsiteDistribution), section 6.1 (create the student-management-website-2025 bucket), section 6.2 (upload index.html, styles.css, scripts.js), section 6.3 (enable Static Website Hosting), section 6.4 (configure Bucket Policy), section 6.5 (configure the student-backup-20250706 bucket), section 5 (build the web interface), section 4.1 (create the student API), section 4.2 (create the StudentApiKey), section 4.3 (create the StudentUsagePlan), section 4.4 (create the GET /students method), section 4.5 (create the POST /students method), section 4.6 (create the /backup resource and POST /backup method), section 4.7 (enable CORS), section 4.8 (deploy the API to the prod stage), section 4.9 (link the StudentApiKey to StudentUsagePlan). Ensure your AWS account has cloudfront:UpdateDistribution, s3:GetObject, and the AWS region is us-east-1 for related services.
Detailed Actions
-
Access the AWS Management Console
- Log in to the AWS Management Console with your AWS account.
- In the search bar, type CloudFront and select the Amazon CloudFront service.
- Check the AWS region: CloudFront is a global service, but ensure the S3 Bucket
student-management-website-2025,studentAPI, Lambda, DynamoDB, and SES are inus-east-1.
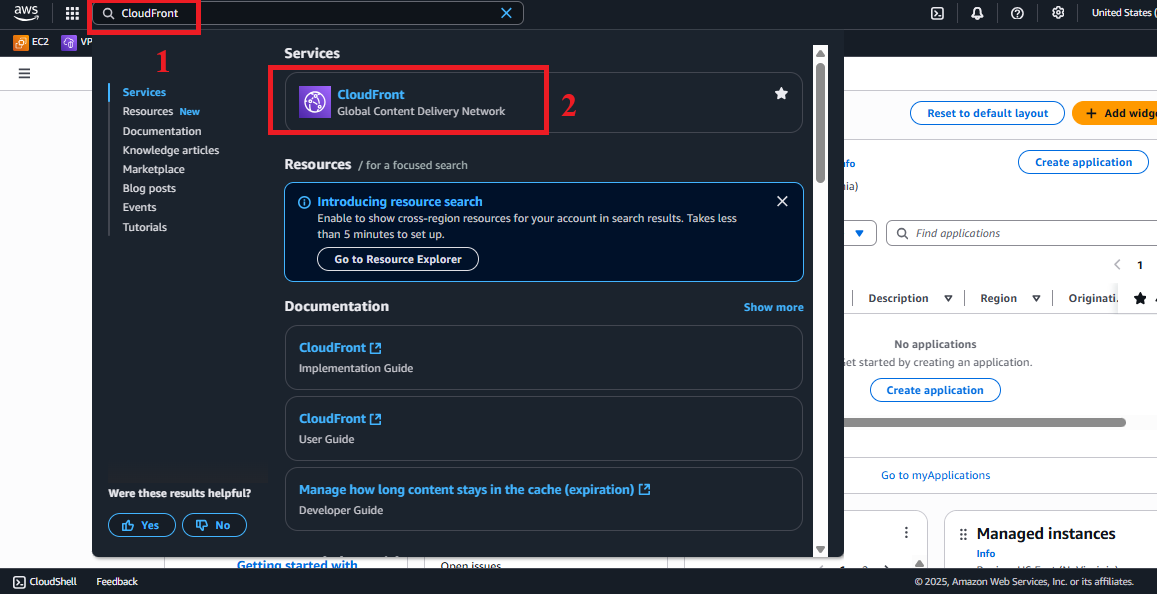
Figure 1: AWS Console Interface with the CloudFront search bar.
-
Select the CloudFront Distribution
- In CloudFront > Distributions, find and select the distribution named
StudentWebsiteDistribution(created in section 7.1).- Identification: The distribution ID starts with
E...and the Domain name is of the formatd12345678.cloudfront.net.
- Identification: The distribution ID starts with
- Click the ID or distribution name to enter the distribution details interface.
- Check the status: Ensure the distribution is in the Enabled state. If it is still In Progress, wait 5–15 minutes for the deployment to complete.
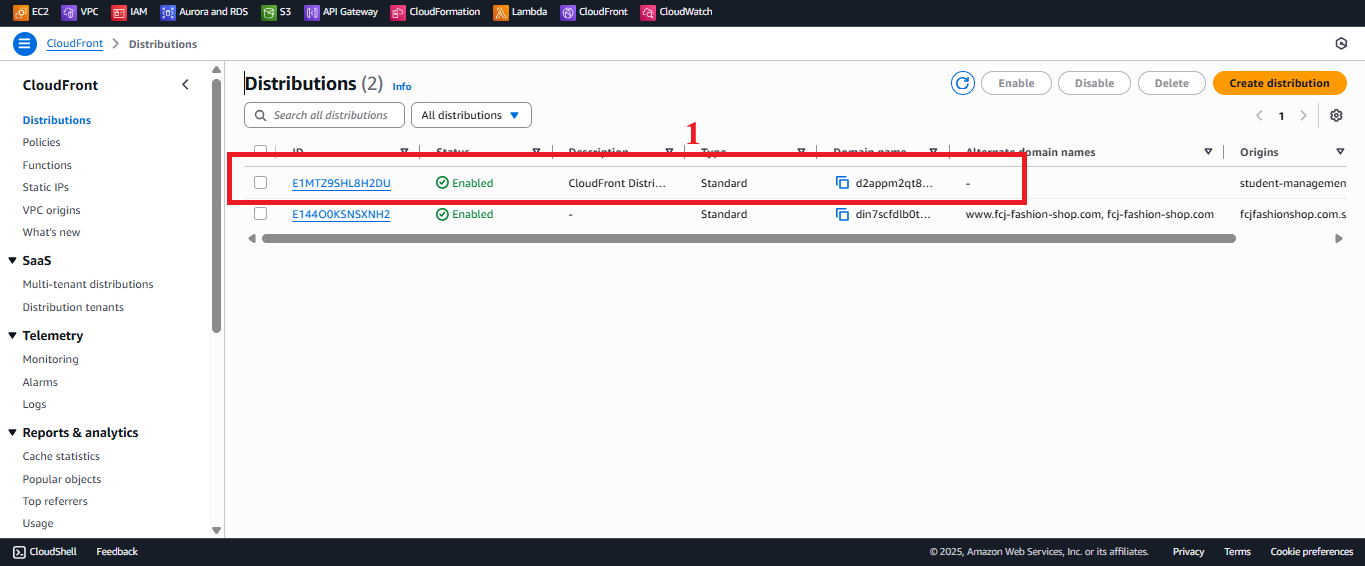
Figure 2: Select CloudFront Distribution.
- In CloudFront > Distributions, find and select the distribution named
-
Edit Default Root Object
- In the details interface of
StudentWebsiteDistribution, select the General tab. - Find the Settings section and click the Edit button next to Default root object (usually shows the current value if set).

Figure 3: Find and Click Edit in the Settings Section. - In the Default root object field, enter
index.html.- Reason:
index.htmlis the main file containing the web interface (input form, student table, save/view/backup functional buttons) uploaded to the S3 Bucketstudent-management-website-2025(section 6.2). When users access the CloudFront domain, CloudFront will requestindex.htmlfrom S3 through OAI (section 7.1).
- Reason:
- Review before saving:
- Ensure
index.htmlhas been uploaded to the root directory of the S3 Bucketstudent-management-website-2025(section 6.2). - Verify Static Website Hosting is enabled with
index.htmlas the Index document (section 6.3). - Check the Bucket Policy (section 7.1) allows OAI access:
{
    "Version": "2012-10-17",
    "Statement": [
        {
            "Sid": "AllowCloudFrontOAI",
            "Effect": "Allow",
            "Principal": {
                "AWS": "arn:aws:iam::cloudfront:user/CloudFront Origin Access Identity EXXXXXX"
            },
            "Action": "s3:GetObject",
            "Resource": "arn:aws:s3:::student-management-website-2025/*"
        }
    ]
}
- Ensure
- In the details interface of
-
Save Changes
- Click Save changes to apply the configuration.
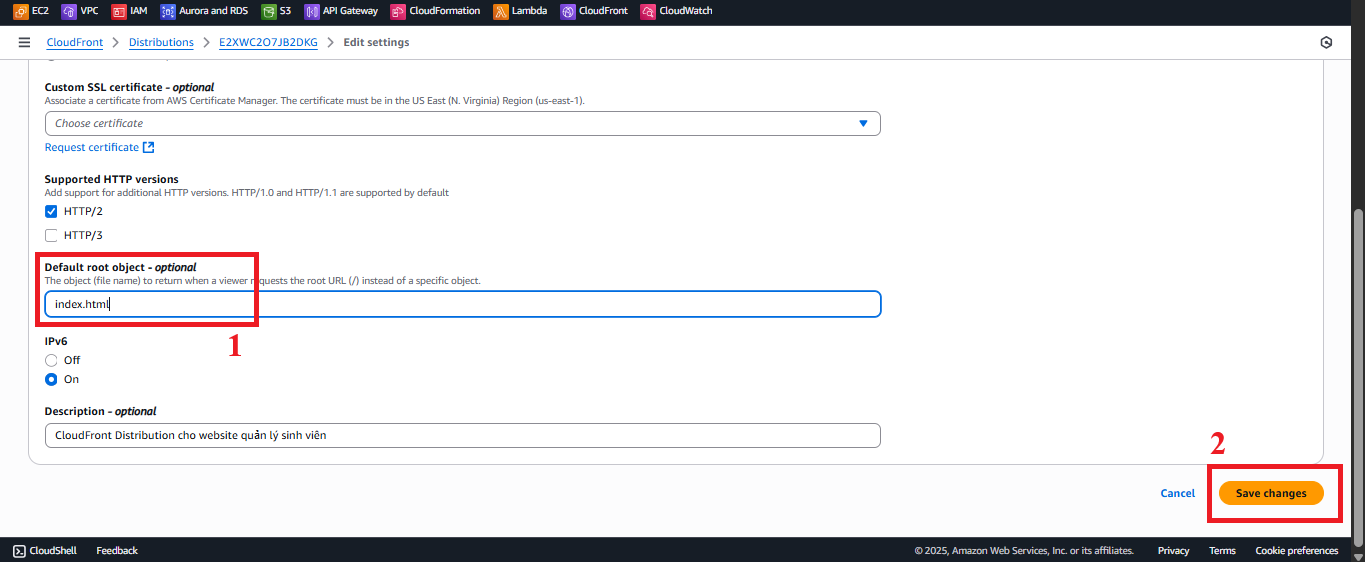
Figure 4: Click Save Changes to Save Configuration. - Expected result: CloudFront will start updating the configuration (takes 5–10 minutes). Once completed, the distribution status will return to Enabled, and AWS will display the message “Successfully updated distribution settings”.
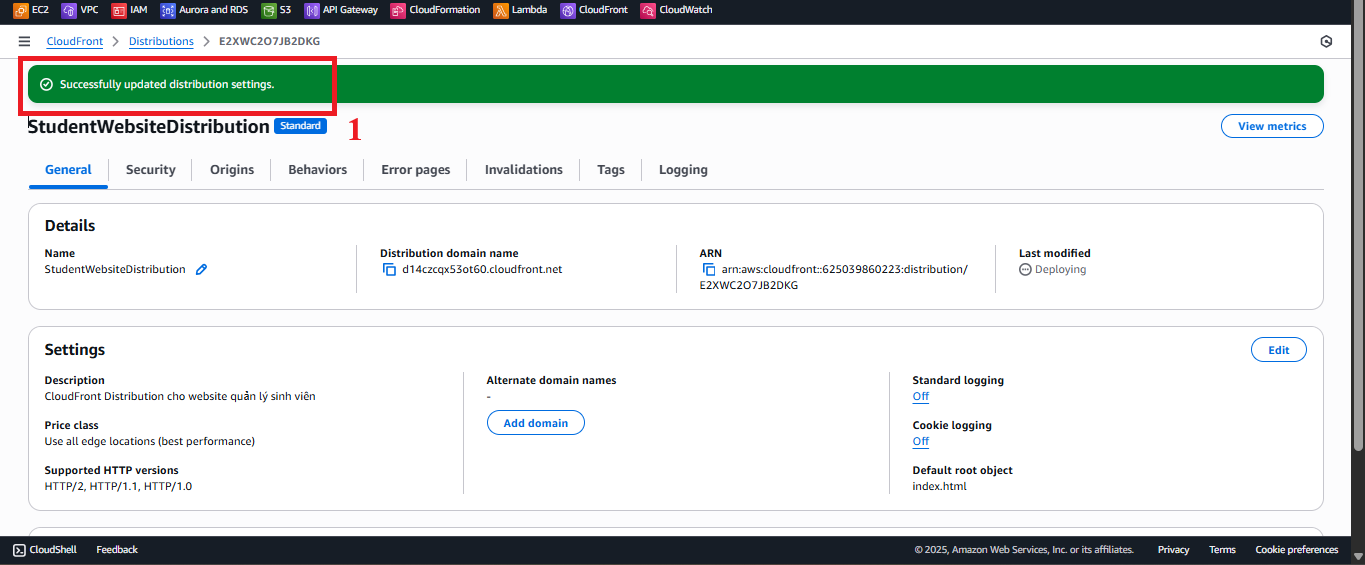
Figure 5: Update Success Message. - Error Handling:
- “AccessDenied”: Check if the IAM role has
cloudfront:UpdateDistributionpermissions:{ "Version": "2012-10-17", "Statement": [ { "Effect": "Allow", "Action": "cloudfront:UpdateDistribution", "Resource": "arn:aws:cloudfront::<AWS_ACCOUNT_ID>:distribution/<DISTRIBUTION_ID>" } ] }- Replace
<AWS_ACCOUNT_ID>and<DISTRIBUTION_ID>with actual values (found in CloudFront > Distributions).
- Replace
- Update not applied:
- Check the distribution status and wait for it to return to Enabled.
- Verify that the Default root object field shows
index.htmlin the General tab.
- “AccessDenied”: Check if the IAM role has
- Click Save changes to apply the configuration.
-
Test Default Root Object
- In CloudFront > Distributions, copy the Distribution domain name (e.g.,
https://d12345678.cloudfront.net). - Open your browser and access this URL.
- Expected result:
- The web interface should display with the input form, student table, and functional buttons (Save, View, Backup) using Tailwind CSS and Poppins font.
- The
styles.cssandscripts.jsfiles should load correctly over HTTPS, and the interface should display as expected. - API requests (GET /students, POST /students, POST /backup) should work if CORS is correctly configured (section 4.7).
- In CloudFront > Distributions, copy the Distribution domain name (e.g.,
