Create CloudFront Distribution
Objective: Create a CloudFront Distribution to serve static content from the S3 Bucket
student-management-website-2025(sections 6.1–6.4), using Origin Access Identity (OAI) to restrict bucket access only from CloudFront, enabling Web Application Firewall (WAF) for increased security, and providing HTTPS for the web interface (index.html,styles.css,scripts.js). The distribution will integrate with thestudentAPI (stageprod, section 4.8) to support the GET /students, POST /students, and POST /backup endpoints, usingStudentApiKey(section 4.2) with CORS (section 4.7).
Overview of CloudFront Distribution
- Role of CloudFront:
- Provides HTTPS for the web interface (S3 Static Website Hosting only supports HTTP, section 6.3).
- Speeds up load times by caching content at global edge locations.
- Uses OAI for security, replacing the public access policy (
Principal: "*"from section 6.4). - Enables WAF to protect against attacks (e.g., SQL injection, DDoS).
- Integration with the system:
- Serves static files (
index.html,styles.css,scripts.js, section 6.2) from the S3 Bucketstudent-management-website-2025. - The web interface calls the
studentAPI (section 4.8) with the Invoke URL (e.g., https://abc123.execute-api.us-east-1.amazonaws.com/prod) andStudentApiKey. - The functions include:
- POST /students: Save records to DynamoDB
studentDataand send a confirmation email via SES. - GET /students: Display data in the table.
- POST /backup: Create a file in the S3 Bucket
student-backup-20250706(section 6.5) and send notification emails via SES.
- POST /students: Save records to DynamoDB
- CORS is configured (section 4.7) to support requests from the CloudFront domain (e.g., https://d12345678.cloudfront.net).
- Serves static files (
Initial Requirements
You need to complete section 6.1 (create the student-management-website-2025 bucket), section 6.2 (upload index.html, styles.css, scripts.js), section 6.3 (enable Static Website Hosting), section 6.4 (configure Bucket Policy), section 6.5 (configure the student-backup-20250706 bucket), section 5 (build the web interface), section 4.1 (create the student API), section 4.2 (create the StudentApiKey), section 4.3 (create the StudentUsagePlan), section 4.4 (create the GET /students method), section 4.5 (create the POST /students method), section 4.6 (create the /backup resource and POST /backup method), section 4.7 (enable CORS), section 4.8 (deploy the API to the prod stage), section 4.9 (link the StudentApiKey to StudentUsagePlan). Ensure your AWS account has cloudfront:CreateDistribution, cloudfront:CreateInvalidation, s3:PutBucketPolicy, and the AWS region is us-east-1 for related services.
Detailed Actions
-
Access the AWS Management Console
- Log in to the AWS Management Console with your AWS account.
- In the search bar, type CloudFront and select the Amazon CloudFront service.
- Check the AWS region: CloudFront is a global service, but ensure the S3 Bucket
student-management-website-2025,studentAPI, Lambda, DynamoDB, and SES are all inus-east-1.
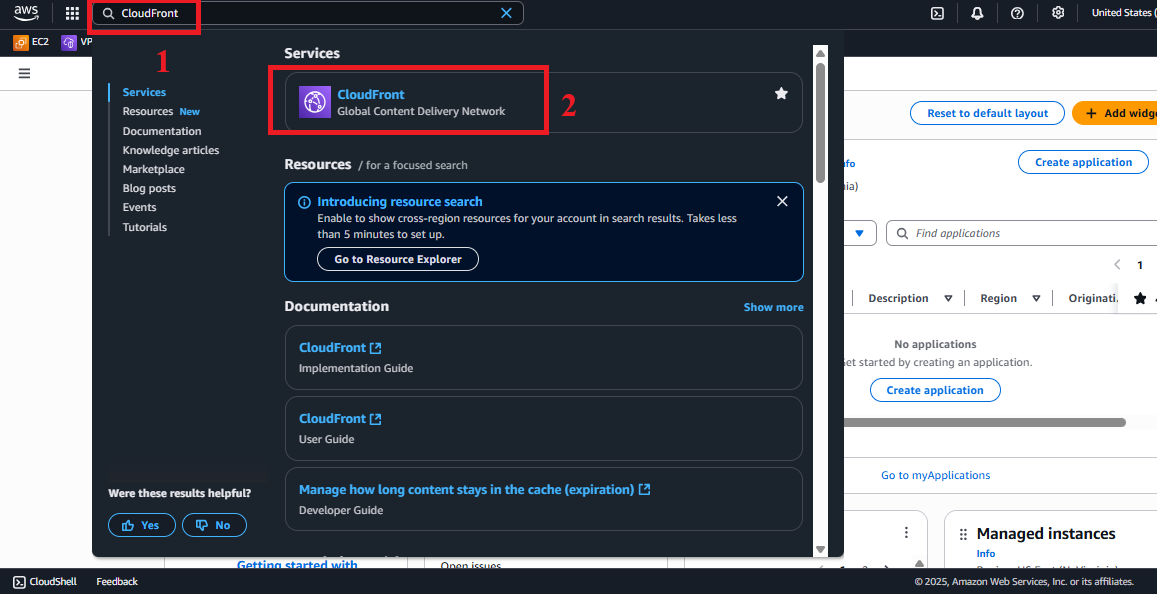
Figure 1: AWS Console Interface with CloudFront search bar.
-
Open the Create Distribution Interface
- In CloudFront > Distributions, click Create distribution.
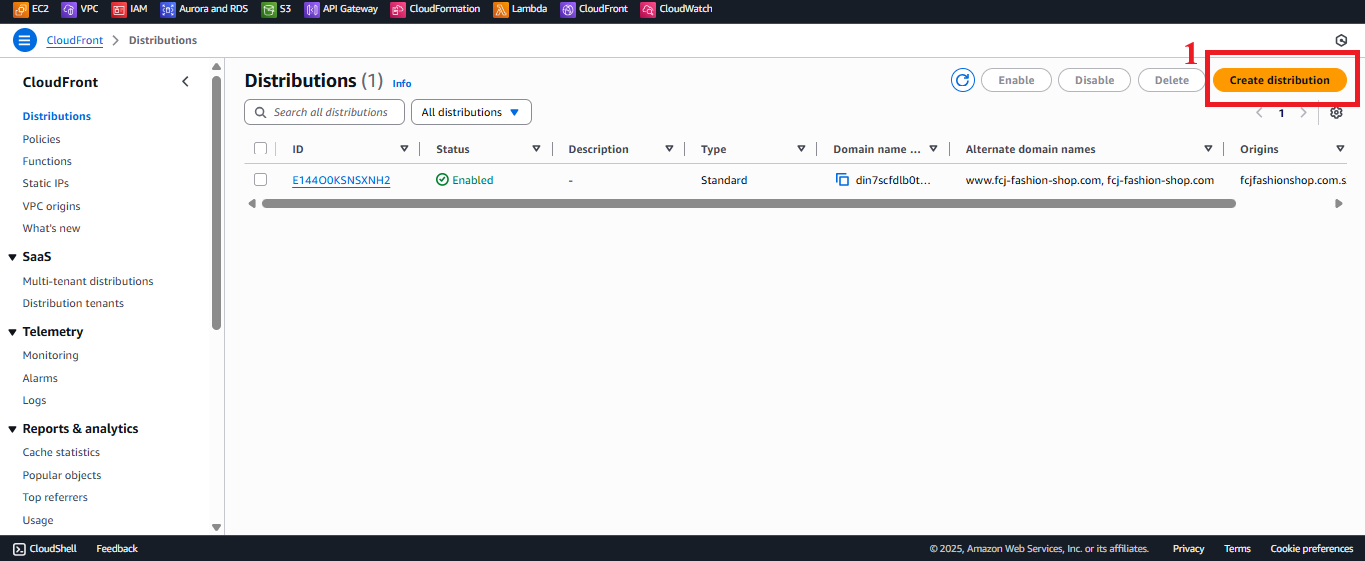
Figure 2: Create Distribution Button in CloudFront.
- In CloudFront > Distributions, click Create distribution.
-
Configure Distribution Name and Origin
- Distribution name: Enter
StudentWebsiteDistribution.- Reason: This name helps identify the distribution in the CloudFront list, and it does not affect the access domain.
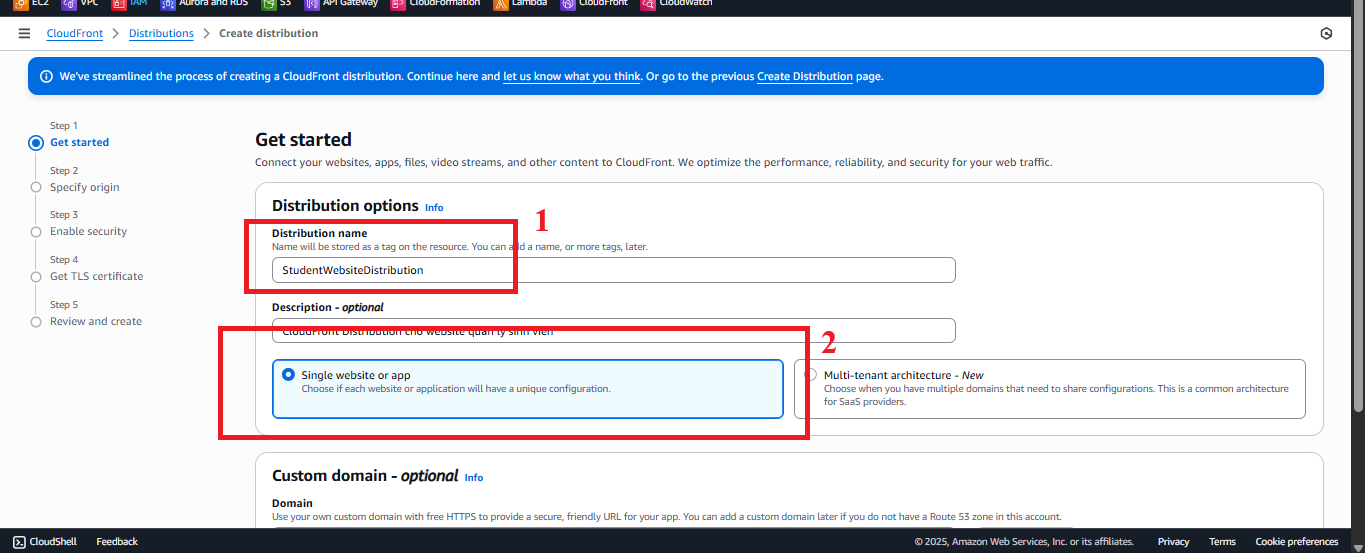
Figure 3: Enter Distribution Name.
- Reason: This name helps identify the distribution in the CloudFront list, and it does not affect the access domain.
- Click Next to proceed.
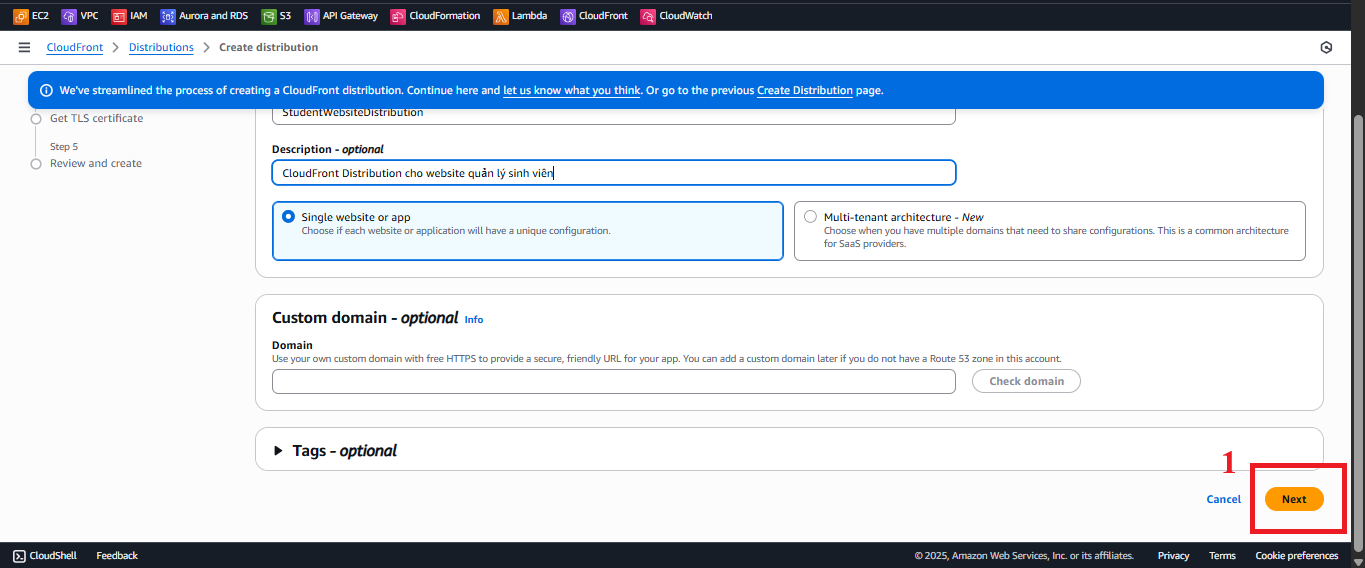
Figure 4: Click Next to Go to the Next Page. - Origin:
- Origin type: Select Amazon S3.
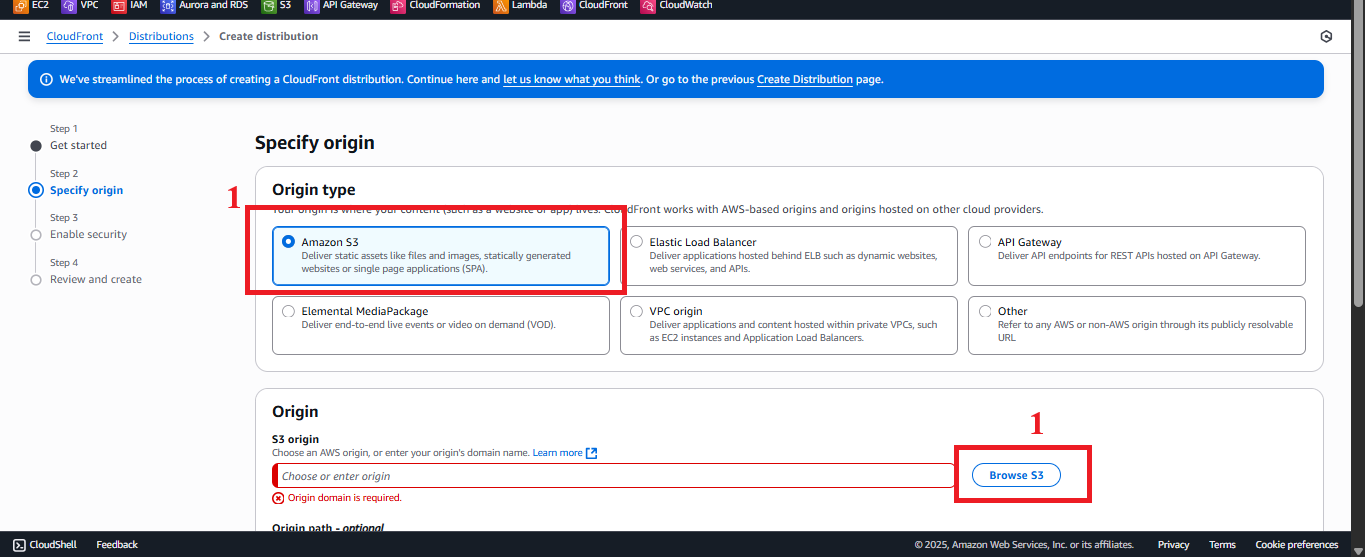
Figure 5: Select Origin Type Amazon S3. - Origin domain: Click Browse S3 and select
student-management-website-2025from the list.- Result: AWS automatically fills in
student-management-website-2025.s3.amazonaws.com(the REST API endpoint for S3). - Note: If the interface displays the Static Website Hosting endpoint (
student-management-website-2025.s3-website-us-east-1.amazonaws.com), choose the REST API endpoint (*.s3.amazonaws.com) to be compatible with OAI.
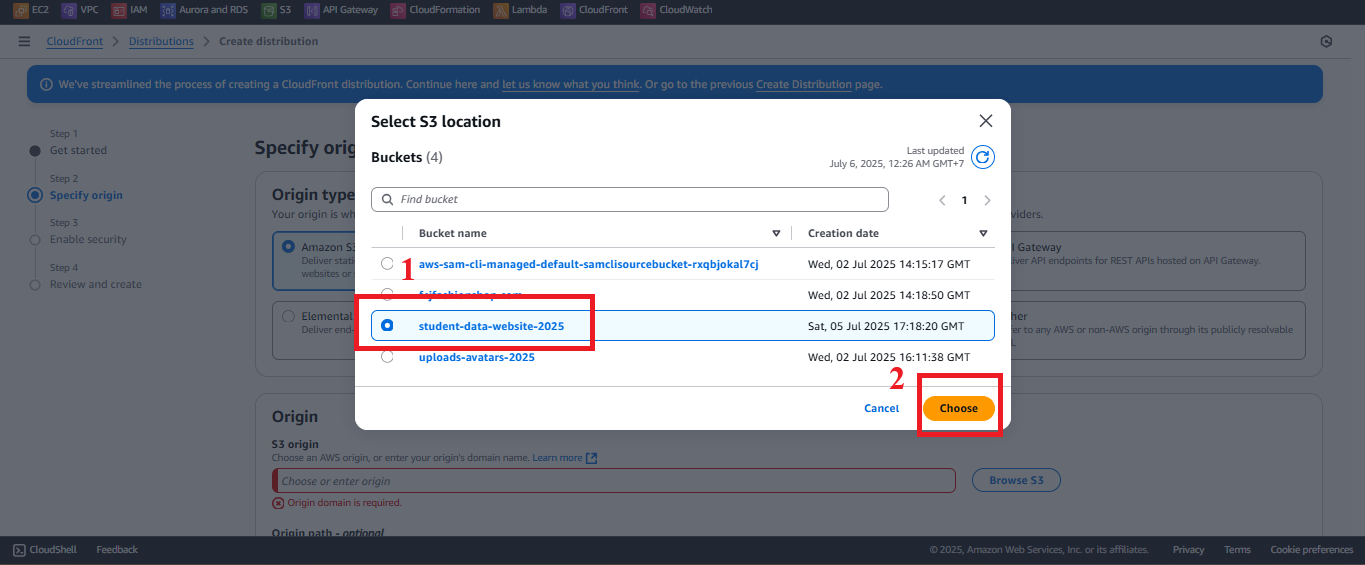
Figure 6: Select Origin Domain.
- Result: AWS automatically fills in
- Origin access:
- Select Allow private S3 bucket access to CloudFront – Recommended.
- Choose Create a new OAI or select an existing OAI.
- OAI Name: Enter
StudentWebsiteOAI(or any preferred name). - Select Use recommended origin settings to automatically update the Bucket Policy for
student-management-website-2025. - Result: AWS creates an OAI and adds the policy to the bucket:
{ "Version": "2012-10-17", "Statement": [ { "Sid": "AllowCloudFrontOAI", "Effect": "Allow", "Principal": { "AWS": "arn:aws:iam::cloudfront:user/CloudFront Origin Access Identity EXXXXXX" }, "Action": "s3:GetObject", "Resource": "arn:aws:s3:::student-management-website-2025/*" } ] } - Note: Remove the old public policy (
Principal: "*", section 6.4) for better security.
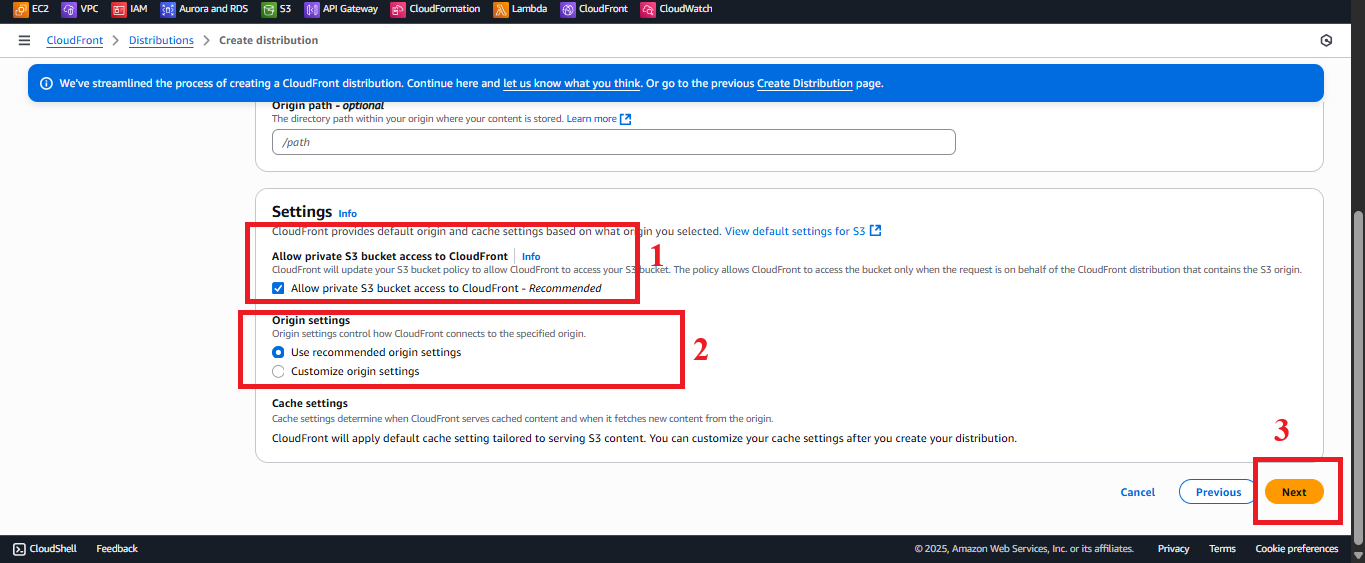
Figure 7: Configure Origin Access Identity.
- Click Choose to confirm the Origin.
- Click Next.
- Origin type: Select Amazon S3.
- Distribution name: Enter
-
Configure Cache Behavior and Security
- Default cache behavior:
- Viewer protocol policy: Select Redirect HTTP to HTTPS to ensure secure access.
- Allowed HTTP methods: Select GET, HEAD (suitable for a static website).
- Cache key and origin requests: Select CachingOptimized to optimize performance.
- Compress objects automatically: Select Yes to compress content (e.g., CSS, JS).
- Web Application Firewall (WAF):
- Select Enable security protections.
- Choose AWS WAF default web ACL or create a new ACL in AWS WAF (e.g., block SQL injection, XSS).
- Reason: WAF protects the web interface from common attacks.
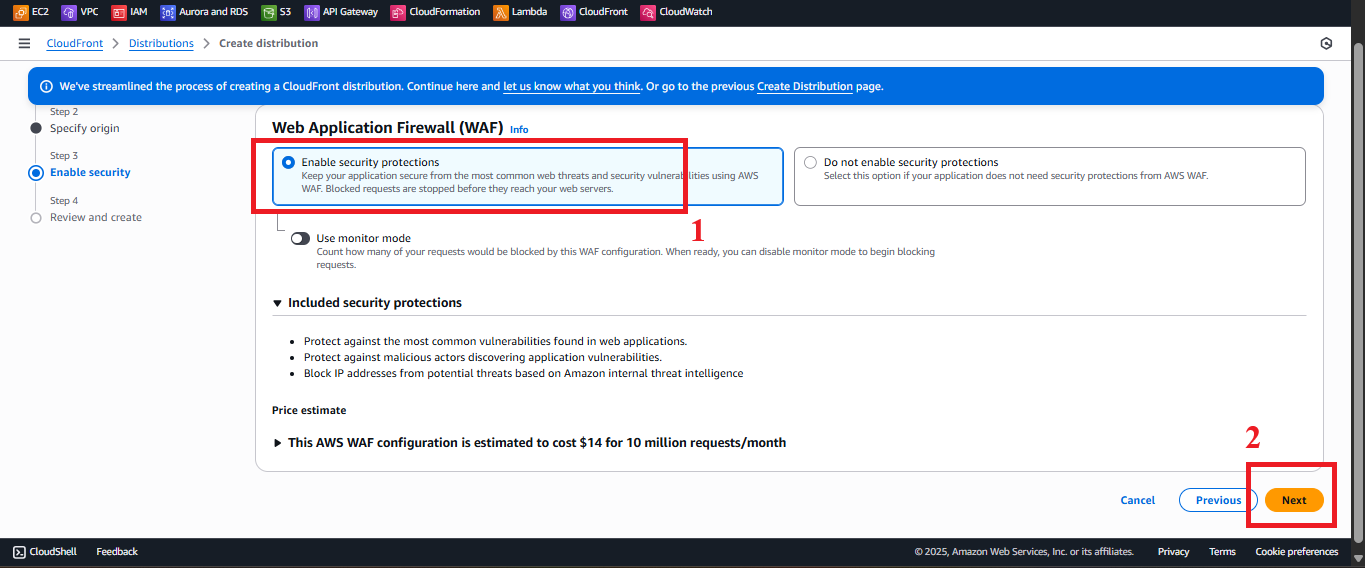
Figure 8: Configure Cache Behavior and WAF.
- Click Next.
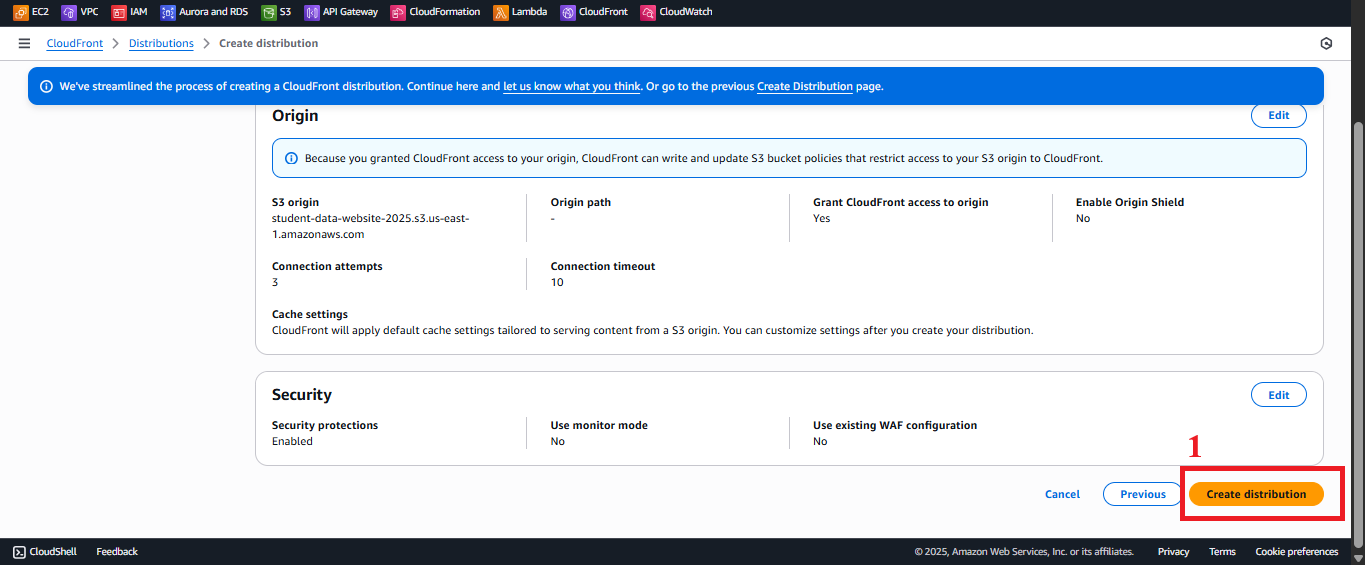
Figure 9: Click Next to Continue.
- Default cache behavior:
-
Configure Settings
- Price class: Select Use all edge locations (optimal for global performance, or choose another to reduce costs).
- Alternate domain name (CNAME) (Optional): Enter a custom domain (e.g.,
www.student-management.com) if available, requires DNS configuration. - Default root object: Enter
index.htmlto serve the main file when accessing the CloudFront domain. - SSL certificate: Select Default CloudFront Certificate (*.cloudfront.net) for HTTPS.
- Tags (Optional): Add tags like
Project=StudentManagement,Environment=Production.
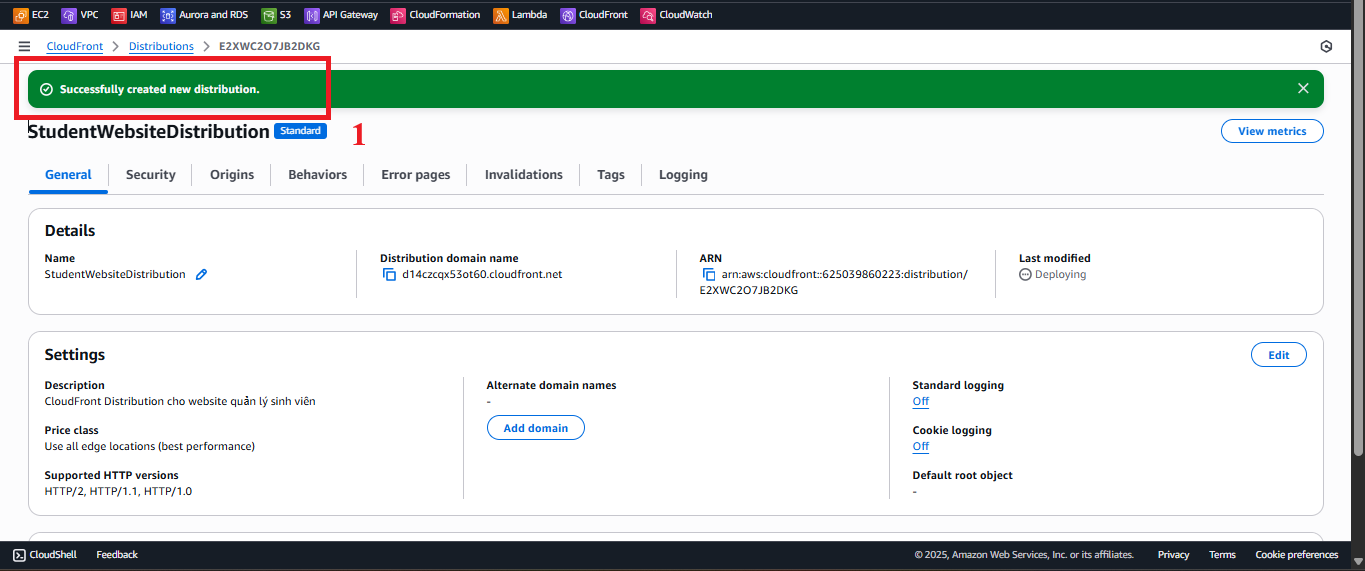
Figure 10: Configure Settings for CloudFront.
-
Create Distribution
- Review the configuration:
- Origin:
student-management-website-2025.s3.amazonaws.com. - Origin access: OAI (
StudentWebsiteOAI). - Viewer protocol policy: Redirect HTTP to HTTPS.
- Default root object:
index.html. - WAF: Enabled.
- Origin:
- Click Create distribution.
- Expected result: CloudFront will show the message “Successfully created new distribution”. The initial status will be In Progress (takes 5–15 minutes). After completion, the status will change to Enabled, and you will receive the Distribution domain name (e.g.,
d12345678.cloudfront.net).

Figure 11: Distribution Creation Status Notification.
- Review the configuration:
-
Test the Distribution
- In CloudFront > Distributions, select the distribution (
StudentWebsiteDistribution). - Check that the Status is Enabled and copy the Distribution domain name (e.g.,
https://d12345678.cloudfront.net). - Open your browser and go to this URL.
- Expected result: The web interface should display with the input form, student table, and functional buttons (Save, View, Backup) using Tailwind CSS and Poppins font.

Figure 12: Web Interface via CloudFront. - Error Handling:
- 403 Forbidden:
- Check the Bucket Policy for the correct OAI ARN (
arn:aws:iam::cloudfront:user/CloudFront Origin Access Identity EXXXXXX). - Verify that
index.html,styles.css,scripts.jsare uploaded to S3 (section 6.2). - Ensure the old public policy (
Principal: "*") has been removed (section 6.4).
- Check the Bucket Policy for the correct OAI ARN (
- 404 Not Found:
- Verify that Default root object is
index.html(section 7.2). - Ensure Static Website Hosting is enabled with
index.htmlas the Index document (section 6.3).
- Verify that Default root object is
- Incorrect Interface:
- Open Developer Tools > Console to check for errors loading
styles.cssorscripts.js. - Check paths in
index.html(e.g.,<link href="styles.css">,<script src="scripts.js">).
- Open Developer Tools > Console to check for errors loading
- CORS: Check the CORS configuration in API Gateway (section 4.7) with
Access-Control-Allow-Origin: https://d12345678.cloudfront.net. - API Errors: Check
StudentApiKey,StudentUsagePlan(section 4.9), and CloudWatch logs for Lambda.
- 403 Forbidden:
- In CloudFront > Distributions, select the distribution (
Important Notes
| Factor | Details |
|---|---|
| Security | OAI ensures only CloudFront accesses S3. Remove the old public policy (Principal: "*", section 6.4) and keep Block public access (section 6.1, except Block public access for bucket policies). Use CloudFront Functions to add the x-api-key header: javascript <br> function handler(event) { <br> var request = event.request; <br> request.headers['x-api-key'] = { value: 'xxxxxxxxxxxxxxxxxxxx' }; <br> return request; <br> } <br> |
| Optimization | Enable CloudFront Standard Logs to track access: In CloudFront > Distribution > General > Logging, select On, specify a log bucket (e.g., student-web-logs-20250706). Use AWS CLI: bash <br> aws cloudfront create-distribution --distribution-config file://distribution-config.json <br> |
| System Integration | Update CORS in API Gateway (section 4.7) with Access-Control-Allow-Origin: https://d12345678.cloudfront.net. Ensure POST /students, GET /students, POST /backup work with Invoke URL and StudentApiKey. |
| Integration Testing | Access the CloudFront URL (https://d12345678.cloudfront.net) and check: - POST /students: Save records, send SES email. - GET /students: Display table. - POST /backup: Create file in student-backup-20250706, send email. Use Developer Tools > Network to check API requests. |
| Error Handling | 403 Forbidden: Check OAI ARN, Bucket Policy, s3:GetObject permission. 404 Not Found: Verify index.html is Default root object, file exists in S3. Incorrect Interface: Check Developer Tools > Console, paths in index.html. CORS: Check Access-Control-Allow-Origin header in Lambda (section 3) and API Gateway (section 4.7). 429: Check rate/burst/quota limits in StudentUsagePlan (section 4.3). |
Best Practice Tip: Test the CloudFront URL immediately after the Enabled status. Create invalidation (section 7.3) if updating files in S3. Use AWS CLI to automate configuration.
Conclusion
The CloudFront Distribution has been created with OAI and WAF, distributing content from student-management-website-2025 over HTTPS. The system is ready to integrate with the student API and test the interface.
Next step: Proceed to Configure Default Root Object to continue configuration!