Update Bucket Policy to Support Data Backup
Objective: Create the S3 Bucket
student-backup-20250706(if not already created in section 2.4) and configure the Bucket Policy to allow the Lambda functionBackupDynamoDBAndSendEmail(with theDynamoDBBackupRolerole, section 3.3) to write backup files (JSON/CSV) to the bucket via the POST /backup endpoint (section 4.6). This bucket stores backup data from the DynamoDB tablestudentDataand integrates with SES to send notification emails. The bucket does not require public access, onlys3:PutObjectpermission for theDynamoDBBackupRolerole, ensuring security and seamless integration with the serverless system.
Overview of the Backup Bucket
- Role of the
student-backup-20250706bucket:- Stores backup files (JSON/CSV) created by the Lambda function
BackupDynamoDBAndSendEmailwhen calling the POST /backup endpoint. - Configured to only allow the
DynamoDBBackupRolerole to write files (s3:PutObject,s3:PutObjectAcl), with no public access. - Integrated with the
studentAPI (stageprod, section 4.8) and SES to send notification emails after backup.
- Stores backup files (JSON/CSV) created by the Lambda function
- System integration:
- Lambda function
BackupDynamoDBAndSendEmail(section 3.3):- Reads data from DynamoDB
studentData(dynamodb:Scan,dynamodb:Query). - Writes backup files to
student-backup-20250706(s3:PutObject). - Sends notification emails via SES (
ses:SendEmail,ses:SendRawEmail).
- Reads data from DynamoDB
- POST /backup endpoint (section 4.6) is called from the web interface (
scripts.js, section 6.2) via the Invoke URL (e.g., https://abc123.execute-api.us-east-1.amazonaws.com/prod/backup) with headerx-api-key: <StudentApiKey>(section 4.2). - CORS is configured (section 4.7) to support requests from the CloudFront domain (e.g., https://d12345678.cloudfront.net).
- Lambda function
- Why public access is not allowed:
- The
student-backup-20250706bucket only needs write access from Lambda, not public access like thestudent-management-website-2025bucket (section 6.4). - Block all public access is enabled for security, only allowing the
DynamoDBBackupRolerole to access.
- The
Prerequisites
You need to complete section 2.4 (create the student-backup-20250706 bucket), section 3.3 (create the Lambda function BackupDynamoDBAndSendEmail with the DynamoDBBackupRole role), section 4.1 (create the student API), section 4.2 (create the StudentApiKey), section 4.3 (create the StudentUsagePlan), section 4.6 (create the /backup resource and POST /backup method), section 4.7 (enable CORS), section 4.8 (deploy the API to the prod stage), section 4.9 (attach StudentApiKey to StudentUsagePlan), section 5 (build the web interface with scripts.js), section 6.1 (create the student-management-website-2025 bucket). Ensure your AWS account has s3:CreateBucket, s3:PutBucketPolicy permissions and the AWS region is us-east-1.
Detailed Steps
-
Access AWS Management Console
- Open your browser and log in to the AWS Management Console with your AWS account.
- In the search bar at the top, type S3 and select the Amazon S3 service to access the bucket management interface.
- Check AWS region: Make sure you are working in us-east-1 (US East (N. Virginia)) to synchronize with the
student-backup-20250706bucket,studentAPI, Lambda functions (getStudentData,insertStudentData,BackupDynamoDBAndSendEmail), DynamoDB tablestudentData, and SES. The region is shown in the top right corner of the AWS Console.
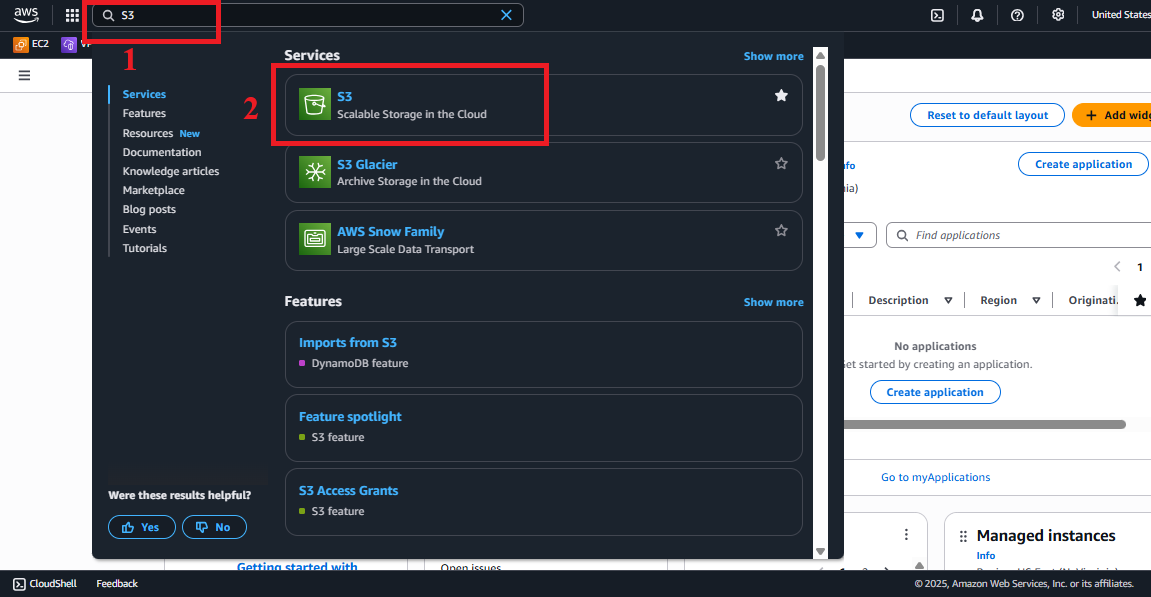
Figure 1: AWS Console interface with S3 search bar.
-
Create the
student-backup-20250706Bucket- Check existing buckets: In S3 > Buckets, look for the
student-backup-20250706bucket (assumed created in section 2.4). If it exists, skip creation and move to Step 3. - In the main Amazon S3 interface, click Create bucket (usually in the top right corner).
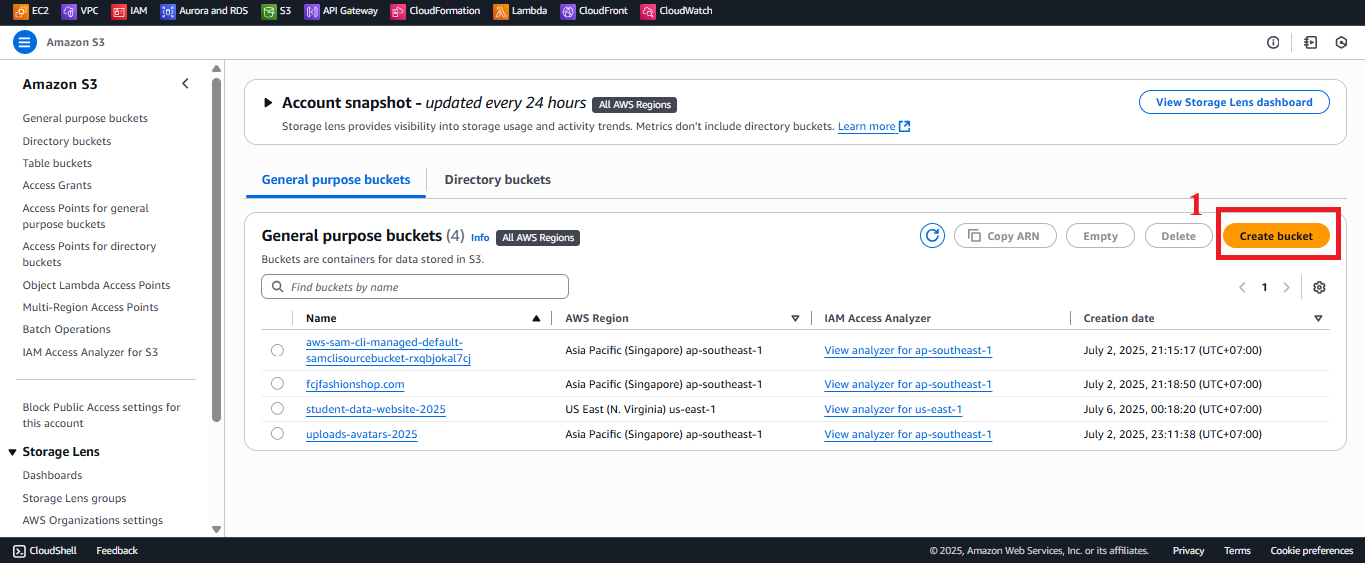
Figure 2: Create bucket button in S3 interface. - In the Create bucket interface, enter the following:
- Bucket name: Enter
student-backup-20250706.- The bucket name must be globally unique. If taken, try adding a random suffix (e.g.,
student-backup-20250706-abc123). - Name must contain only lowercase letters, numbers, hyphens (-), no spaces or special characters.
- The bucket name must be globally unique. If taken, try adding a random suffix (e.g.,
- AWS Region: Select US East (N. Virginia) us-east-1 to match other services.
- Bucket type: Select General purpose (suitable for backup file storage).
- Object Ownership: Select ACLs disabled (recommended for non-public buckets) to manage permissions via Bucket Policy and IAM.
- Block Public Access settings for this bucket: Keep Block all public access selected (default) to ensure the bucket is not publicly accessible.
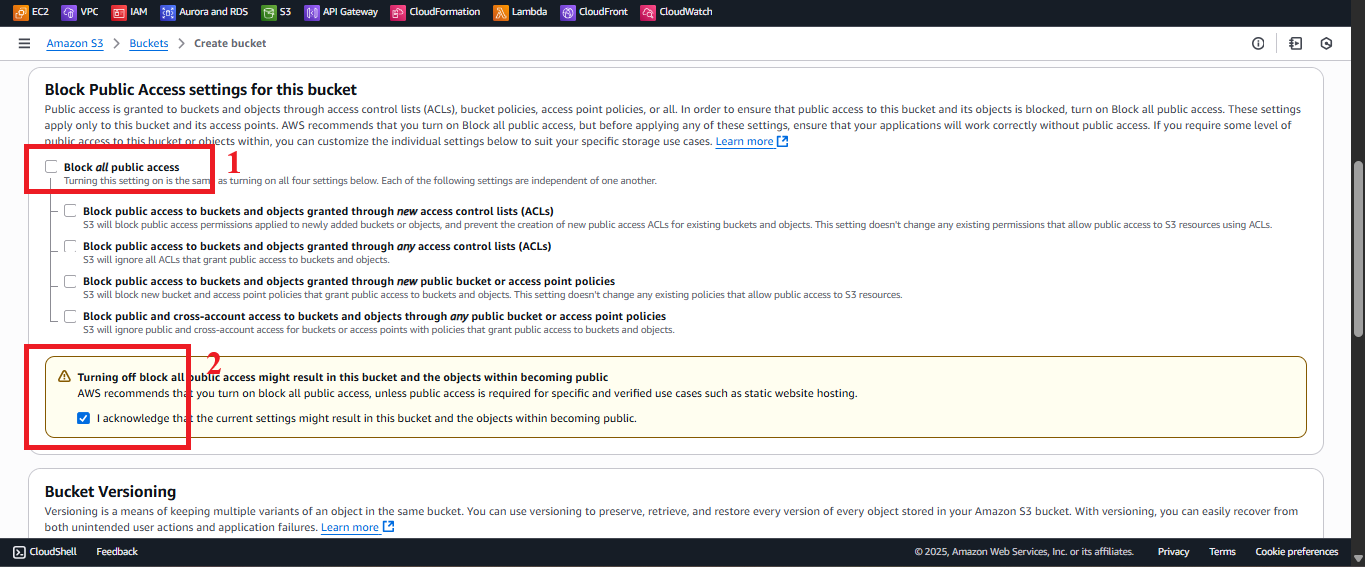
Figure 3: Block Public Access selected. - Bucket Versioning: Select Disable (as required).
- Note: It is recommended to Enable to store versions of backup files, supporting recovery if write errors occur. If enabled, use AWS CLI:
aws s3api put-bucket-versioning --bucket student-backup-20250706 --versioning-configuration Status=Enabled

Figure 4: Enable Bucket Versioning. - Note: It is recommended to Enable to store versions of backup files, supporting recovery if write errors occur. If enabled, use AWS CLI:
- Default encryption: Select Enable > Server-side encryption with Amazon S3-managed keys (SSE-S3) to encrypt data at rest for better security.
- Tags (Optional): Add tags for cost management, e.g.,
Project=StudentManagement,Environment=Production.
- Bucket name: Enter
- Click Create bucket.
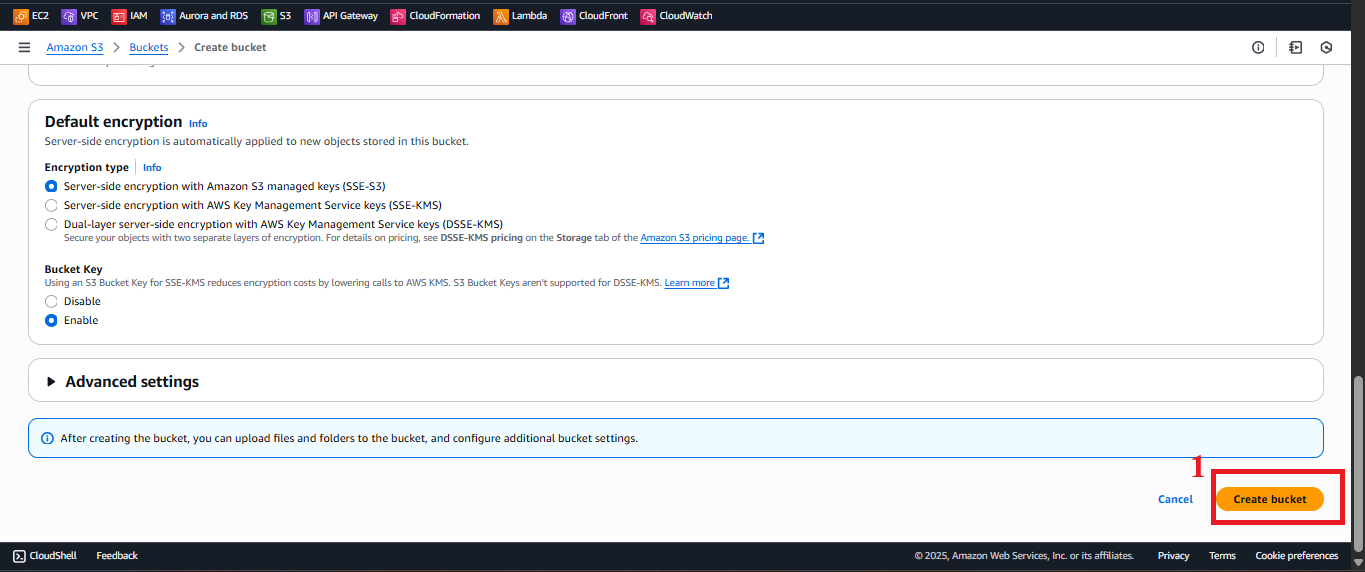
Figure 5: Review and click Create bucket. - Expected result: AWS S3 shows the message “Successfully created bucket ‘student-backup-20250706’”.

Figure 6: Bucket creation status message. - Troubleshooting:
- “Bucket name already exists”: Change the bucket name (e.g.,
student-backup-20250706-<random-string>). Checks3:CreateBucketpermission in your IAM role. - “AccessDenied”: Check your IAM role has
s3:CreateBucketpermission:{ "Version": "2012-10-17", "Statement": [ { "Effect": "Allow", "Action": "s3:CreateBucket", "Resource": "*" } ] }
- “Bucket name already exists”: Change the bucket name (e.g.,
- Check existing buckets: In S3 > Buckets, look for the
-
Access the Bucket’s Permissions Tab
- In S3 > Buckets, select the
student-backup-20250706bucket. - Click the Permissions tab (usually at the top, next to Objects, Properties, etc.).
- Scroll down to the Bucket policy section to view the current status (default is empty if not configured).
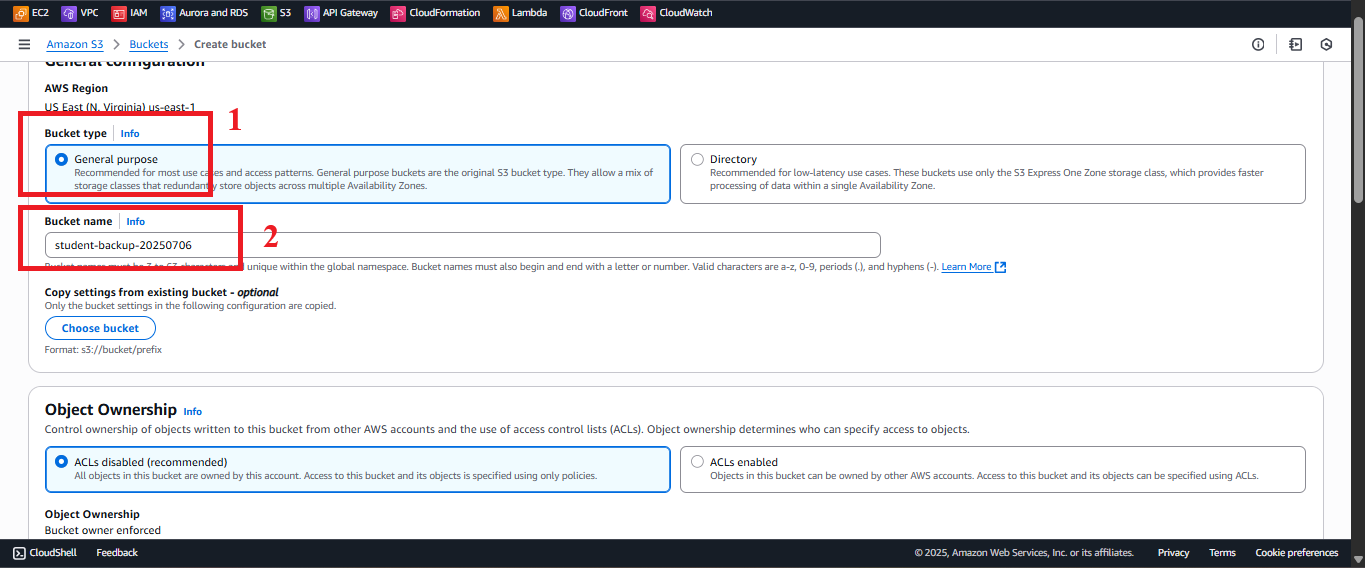
Figure 7: Permissions tab and Bucket policy section.
- In S3 > Buckets, select the
-
Edit the Bucket Policy
- In the Bucket policy section, click Edit to open the editor.
- Paste the following JSON to allow the
DynamoDBBackupRolerole to write files (s3:PutObject,s3:PutObjectAcl):{ "Version": "2012-10-17", "Statement": [ { "Sid": "AllowLambdaPutObject", "Effect": "Allow", "Principal": { "AWS": "arn:aws:iam::<AWS_ACCOUNT_ID>:role/DynamoDBBackupRole" }, "Action": [ "s3:PutObject", "s3:PutObjectAcl" ], "Resource": "arn:aws:s3:::student-backup-20250706/*" } ] } - Explanation of the JSON:
- Version: “2012-10-17” is the latest IAM policy format version.
- Statement: List of permission statements.
- Sid: “AllowLambdaPutObject” is an optional identifier for the policy.
- Effect: “Allow” permits the specified actions.
- Principal: “arn:aws:iam::<AWS_ACCOUNT_ID>:role/DynamoDBBackupRole” specifies the IAM role of the Lambda
BackupDynamoDBAndSendEmail. - Action:
s3:PutObject: Allows writing backup files to the bucket.s3:PutObjectAcl: Allows setting ACL on files (if needed).
- Resource: “arn:aws:s3:::student-backup-20250706/*” specifies all files in the
student-backup-20250706bucket.
- Replace
<AWS_ACCOUNT_ID>:- Find your AWS account ID in IAM > Users or Account (e.g., 123456789012).
- Replace in the ARN:
arn:aws:iam::123456789012:role/DynamoDBBackupRole.
- Check the code: Ensure the ARN in Resource and Principal is correct and matches your actual bucket/role.
Figure 8: Configure Bucket Policy.
- Paste the following JSON to allow the
-
Save Changes
- Click Save changes to apply the Bucket Policy.
- Expected result: AWS S3 shows the message “Successfully edited bucket policy”.
Figure 9: Click Save changes. - Troubleshooting:
- “Policy has invalid resource”: Check the ARN in Resource is correct (
arn:aws:s3:::student-backup-20250706/*). - “Invalid principal in policy”: Verify the ARN of
DynamoDBBackupRoleis correct and the role exists in IAM. - “AccessDenied”: Check your IAM role has
s3:PutBucketPolicypermission:{ "Version": "2012-10-17", "Statement": [ { "Effect": "Allow", "Action": "s3:PutBucketPolicy", "Resource": "arn:aws:s3:::student-backup-20250706" } ] }
- “Policy has invalid resource”: Check the ARN in Resource is correct (
-
Check Lambda Permissions
- Verify the
DynamoDBBackupRolerole:- In IAM > Roles, find
DynamoDBBackupRole(created in section 3.3). - Ensure the role has
s3:PutObjectands3:PutObjectAclpermissions for thestudent-backup-20250706bucket:{ "Version": "2012-10-17", "Statement": [ { "Effect": "Allow", "Action": [ "s3:PutObject", "s3:PutObjectAcl" ], "Resource": "arn:aws:s3:::student-backup-20250706/*" } ] }
- In IAM > Roles, find
- Check the POST /backup endpoint:
- Call the endpoint using curl to verify the Lambda can write backup files:
curl -X POST https://abc123.execute-api.us-east-1.amazonaws.com/prod/backup \ -H "x-api-key: xxxxxxxxxxxxxxxxxxxx" \ -H "Content-Type: application/json" - Expected result:
- Backup file (JSON/CSV) is created in S3 > student-backup-20250706 > Objects (e.g.,
backup-20250706.json). - Notification email is sent via SES (check your inbox, including Spam/Junk).
- Backup file (JSON/CSV) is created in S3 > student-backup-20250706 > Objects (e.g.,
- Troubleshooting:
- 403 Forbidden error:
- Check the ARN in the Bucket Policy (Resource and Principal) matches the bucket and role.
- Verify
DynamoDBBackupRolehass3:PutObjectpermission and is attached to theBackupDynamoDBAndSendEmailLambda.
- Backup file not appearing:
- Check the Lambda CloudWatch log (
/aws/lambda/BackupDynamoDBAndSendEmail) for errors. - Ensure the POST /backup endpoint returns status 200 and no CORS errors.
- Check the Lambda CloudWatch log (
- CORS error:
- Check the
Access-Control-Allow-Originheader in Lambda (section 3.3) and API Gateway (section 4.7). - Ensure CORS supports the CloudFront domain (e.g., https://d12345678.cloudfront.net).
- Check the
- 403 Forbidden error:
- Call the endpoint using curl to verify the Lambda can write backup files:
- Verify the
Important Notes
| Factor | Details |
|---|---|
| Security | Keep Block all public access enabled to ensure the student-backup-20250706 bucket is not publicly accessible. Only the DynamoDBBackupRole role is allowed to write files. Avoid embedding StudentApiKey in scripts.js; use AWS Secrets Manager or CloudFront Functions: function handler(event) { var request = event.request; request.headers[‘x-api-key’] = { value: ‘xxxxxxxxxxxxxxxxxxxx’ }; return request; } |
| Optimization | Enable S3 Access Logs: In S3 > student-backup-20250706 > Properties > Server access logging, select Enable, specify a log bucket (e.g., student-backup-logs-20250706). Use AWS CLI to automate: aws s3api put-bucket-policy –bucket student-backup-20250706 –policy file://policy.json |
| System integration | Ensure the POST /backup endpoint works with the Invoke URL and StudentApiKey. Update CORS in API Gateway (section 4.7) with Access-Control-Allow-Origin: https://d12345678.cloudfront.net. Integrate with CloudFront (section 7) to call the API from the web interface. |
| Integration testing | Call POST /backup from the web interface (https://d12345678.cloudfront.net) or curl. Check: - Backup file appears in student-backup-20250706. - SES email is sent. Use Developer Tools > Network to inspect API requests. |
| Troubleshooting | 403 Forbidden: Check ARN in Bucket Policy, s3:PutObject permission for DynamoDBBackupRole. File not appearing: Check CloudWatch logs, Lambda code. CORS: Check Access-Control-Allow-Origin header in Lambda (section 3.3) and API Gateway (section 4.7). 429: Check Rate/Burst/Quota limits in StudentUsagePlan (section 4.3). |
Practical tip: Check the Bucket Policy and IAM permissions of
DynamoDBBackupRolebefore calling POST /backup. Use AWS CLI to automate if you need to apply the policy to multiple buckets. Prepare for section 7 (CloudFront configuration) to complete the integration.
Conclusion
The student-backup-20250706 bucket has been created and the Bucket Policy configured to allow the BackupDynamoDBAndSendEmail Lambda function to write backup files. The bucket is ready to integrate with the POST /backup endpoint and CloudFront (section 7).
Next step: Go to Configure CloudFront for content distribution to continue setup!