Enable Static Website Hosting
Objective: Enable Static Website Hosting on the S3 Bucket
student-management-website-2025to serve the static files (index.html,styles.css,scripts.jsfrom section 6.2) as a static website. This provides an HTTP endpoint (e.g., http://student-management-website-2025.s3-website-us-east-1.amazonaws.com) to access the interface, preparing it for distribution via CloudFront (section 7) with HTTPS and high performance. The interface calls the GET /students, POST /students, and POST /backup API endpoints (section 4.8) using the Invoke URL (e.g., https://abc123.execute-api.us-east-1.amazonaws.com/prod) andStudentApiKey(section 4.2) with CORS (section 4.7).
Overview of Static Website Hosting
- Role of Static Website Hosting:
- Turns the
student-management-website-2025bucket into a static web server, providing an HTTP endpoint (e.g., http://student-management-website-2025.s3-website-us-east-1.amazonaws.com). - Handles HTTP GET requests for static files (
index.html,styles.css,scripts.js). - Sets
index.htmlas the Index document to display the main page when accessing the root endpoint.
- Turns the
- Integration with the system:
- The web interface calls the
studentAPI (stageprod, section 4.8) to:- POST /students: Save records to DynamoDB
studentDataand send a confirmation email via SES. - GET /students: Display data in the table.
- POST /backup: Create a backup file in the S3 Bucket
student-backup-20250706(section 2.4, 6.5) and send notification emails via SES.
- POST /students: Save records to DynamoDB
- Bucket Policy (section 6.4) allows public access (
s3:GetObject) for CloudFront to retrieve the content. - CloudFront (section 7) uses the S3 endpoint as the Origin to provide HTTPS and improve load times.
- CORS is configured (section 4.7) to support requests from the CloudFront domain (e.g., https://d12345678.cloudfront.net).
- The web interface calls the
- Reason for choosing
index.htmlas the Index document:index.htmlis the main file containing the interface (form, table, functional buttons) uploaded in section 6.2.- When accessing the root endpoint, S3 automatically serves
index.htmlas the default page.
Initial Requirements
You need to complete section 6.1 (create the student-management-website-2025 bucket), section 6.2 (upload index.html, styles.css, scripts.js), section 5 (build the web interface), section 4.1 (create the student API), section 4.2 (create the StudentApiKey), section 4.3 (create the StudentUsagePlan), section 4.4 (create the GET /students method), section 4.5 (create the POST /students method), section 4.6 (create the /backup resource and POST /backup method), section 4.7 (enable CORS), section 4.8 (deploy the API to the prod stage), section 4.9 (link the StudentApiKey to StudentUsagePlan), section 3 (create Lambda functions getStudentData, insertStudentData, BackupDynamoDBAndSendEmail, DynamoDB table studentData, student-backup-20250706 bucket, SES email verification). Ensure your AWS account has s3:PutBucketWebsite permissions and the AWS region is us-east-1.
Detailed Actions
-
Access the AWS Management Console
- Open your browser and log into the AWS Management Console using your AWS account.
- In the search bar at the top of the page, type S3 and select the Amazon S3 service to enter the bucket management interface.
- Check the AWS region: Ensure you are working in the us-east-1 (US East (N. Virginia)) region to sync with the
student-management-website-2025bucket,studentAPI, Lambda functions (getStudentData,insertStudentData,BackupDynamoDBAndSendEmail), DynamoDBstudentData,student-backup-20250706bucket, and SES. The region is displayed in the top right corner of the AWS Console.
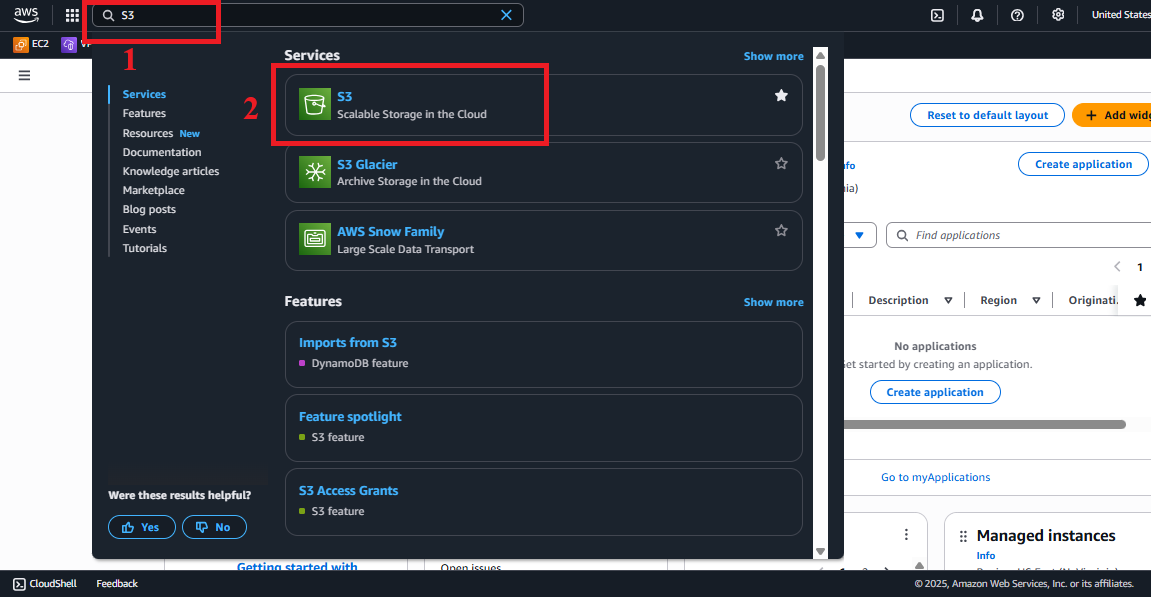 Figure 1: AWS Console Interface with the S3 search bar.
-
Select the
student-management-website-2025Bucket- In the main Amazon S3 > Buckets interface, find and select the
student-management-website-2025bucket (created in section 6.1). - If you cannot find the bucket:
- Check the AWS region (
us-east-1) and refresh the page. - Verify that the bucket has been created with the correct name (the bucket name is globally unique, so you may have used a different name such as
student-management-website-20250706-abc123).
- Check the AWS region (
- Click on the bucket name to enter the Bucket Management interface.
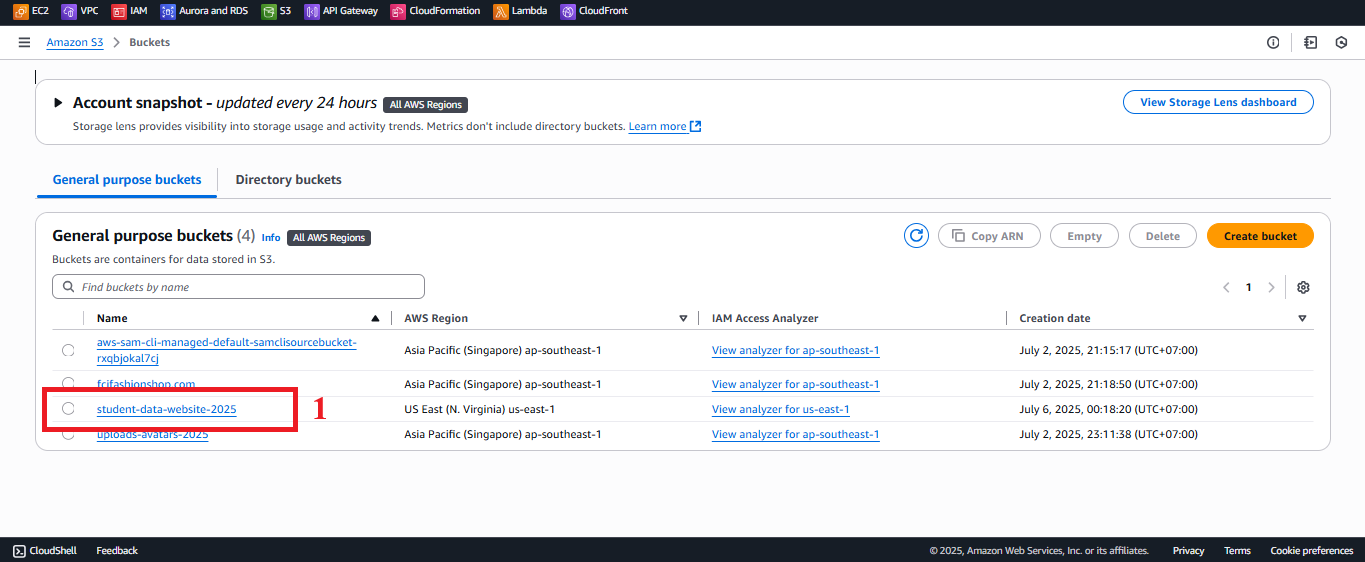 Figure 2: Select the
 student-management-website-2025bucket.
- In the main Amazon S3 > Buckets interface, find and select the
-
Access the Properties Tab
- In the student-management-website-2025 bucket interface, select the Properties tab (usually located at the top of the page, next to Objects, Permissions, etc.).
- Scroll down to the Static website hosting section to see the current status (default is Disabled).
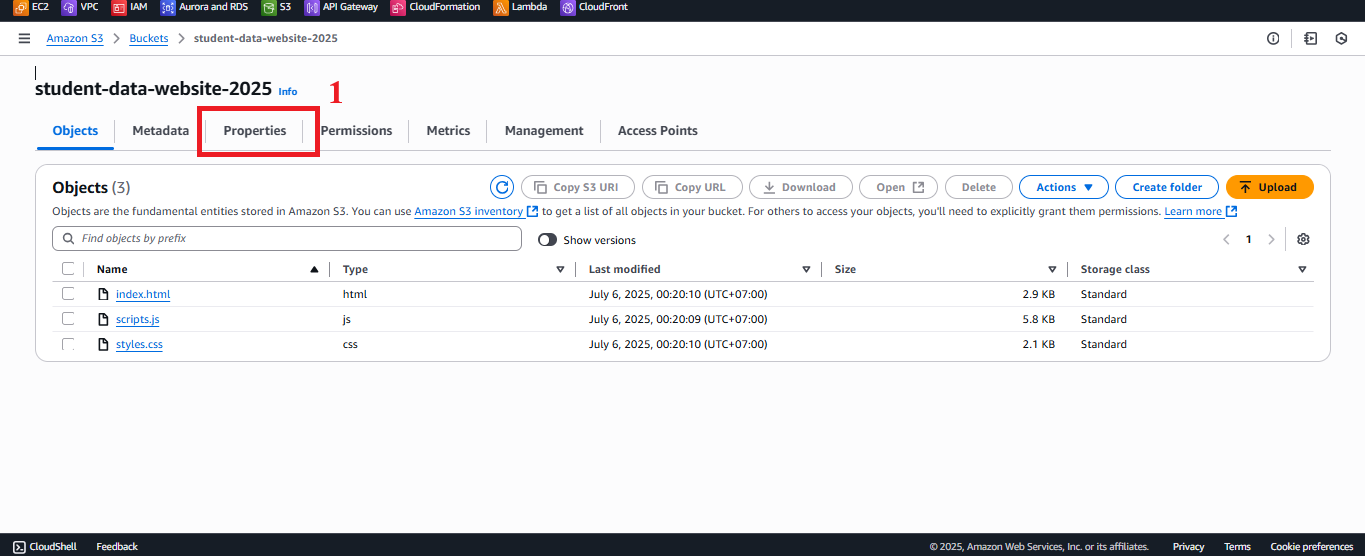 Figure 3: Properties Tab and Static Website Hosting Section.
-
Edit Static Website Hosting
- In the Static website hosting section, click the Edit button to open the configuration interface.
- Before editing, verify that the files
index.html,styles.css,scripts.jshave been uploaded to the bucket (section 6.2), as Static Website Hosting requires theindex.htmlfile to function correctly.
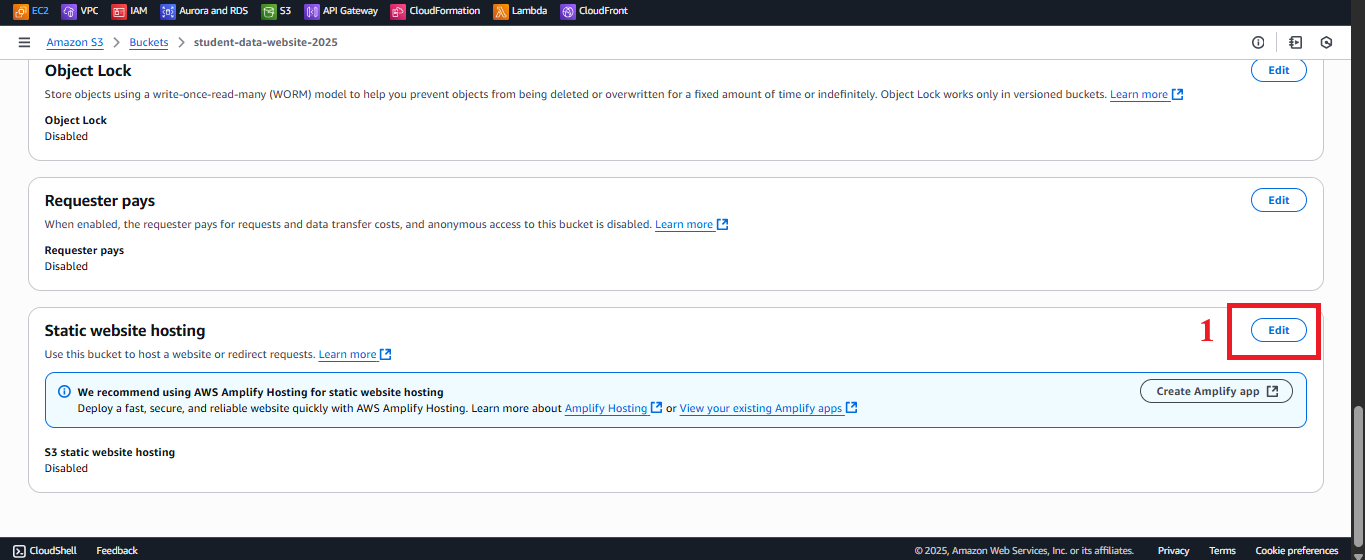 Figure 4: Click Edit in Static Website Hosting.
-
Configure Static Website Hosting
- In the Edit static website hosting interface, enter the following information:
- Static website hosting: Select Enable to enable the feature.
- Hosting type: Select Host a static website (suitable for the static interface of the application).
- Note: Do not select Redirect requests for an object (used for redirects, not applicable here).
- Index document: Enter
index.html(the main file of the web interface, containing the form and student table).- Reason: When accessing the root endpoint of the bucket, S3 will serve
index.htmlas the default page.
- Reason: When accessing the root endpoint of the bucket, S3 will serve
- Error document (Optional):
- Enter
index.htmlto redirect any errors (e.g., 404 Not Found) back to the main page. - Reason: Ensures the user always sees the main interface, even when accessing non-existent paths.
- If you want a custom error page, upload the
error.htmlfile (section 6.2) and enter the file name here.
- Enter
- Review the configuration: Ensure Enable is selected, Hosting type is Host a static website, and Index document is
index.html.
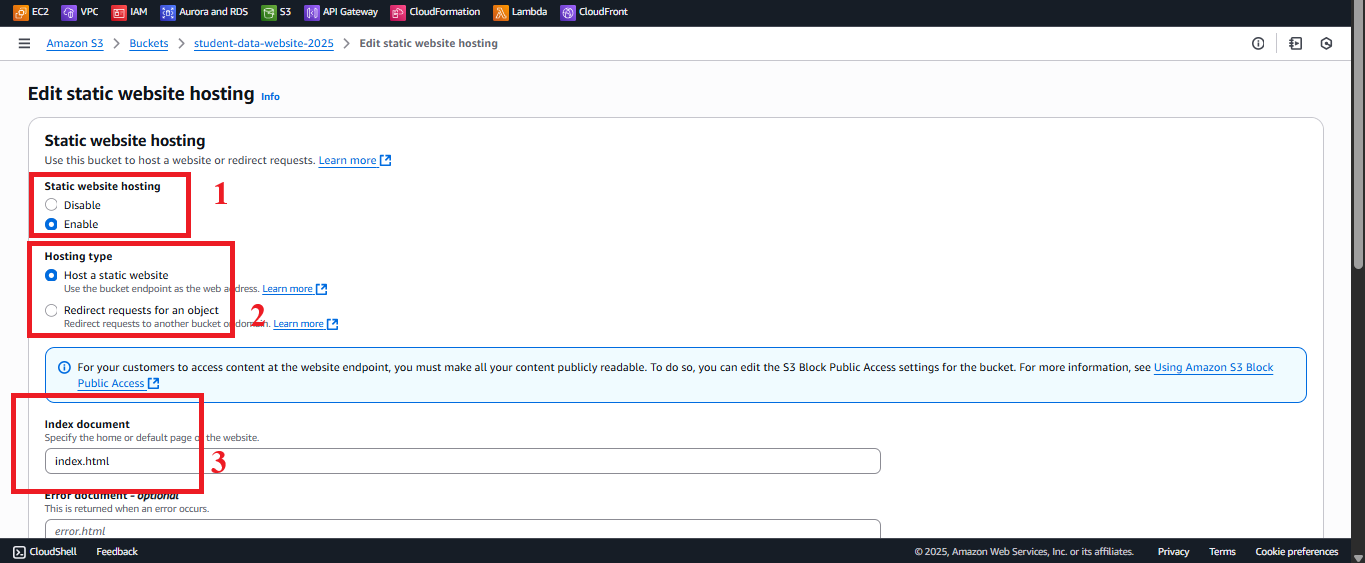 Figure 5: Configure Static Website Hosting.
- In the Edit static website hosting interface, enter the following information:
-
Save Changes
- Click Save changes to apply the configuration.
- Expected result: AWS S3 will display the message “Successfully edited static website hosting”.
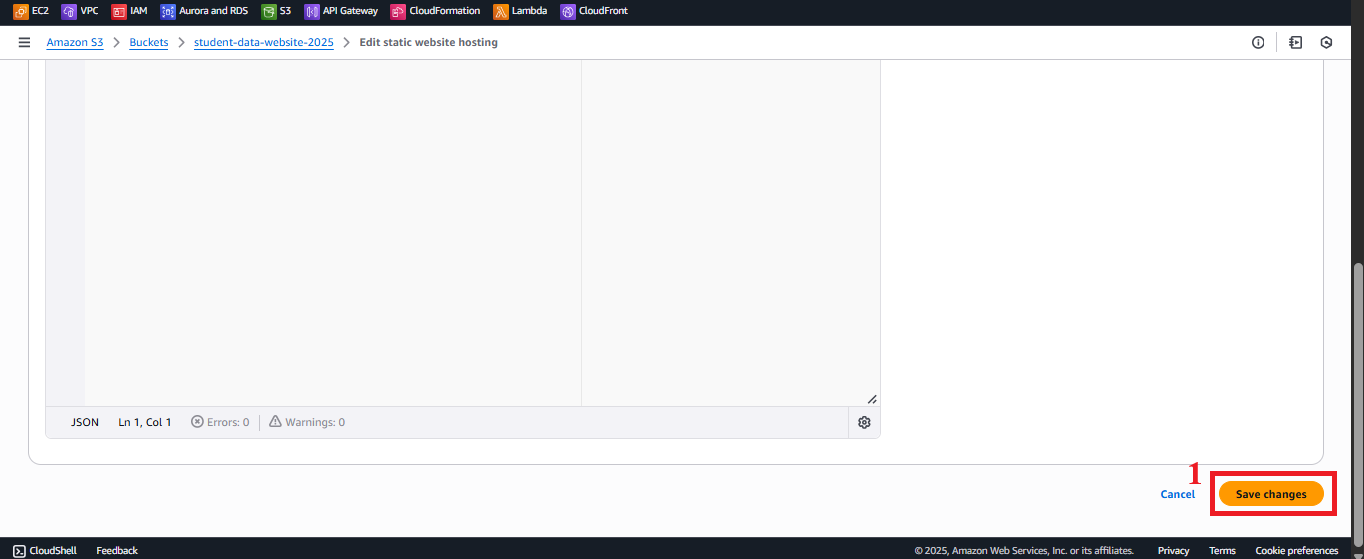 Figure 6: Click Save Changes.
 - In the Properties > Static website hosting tab, you will see:
- Status: Enabled.
- Bucket website endpoint: A URL like
http://student-management-website-2025.s3-website-us-east-1.amazonaws.com.
- Copy the Bucket website endpoint to test.
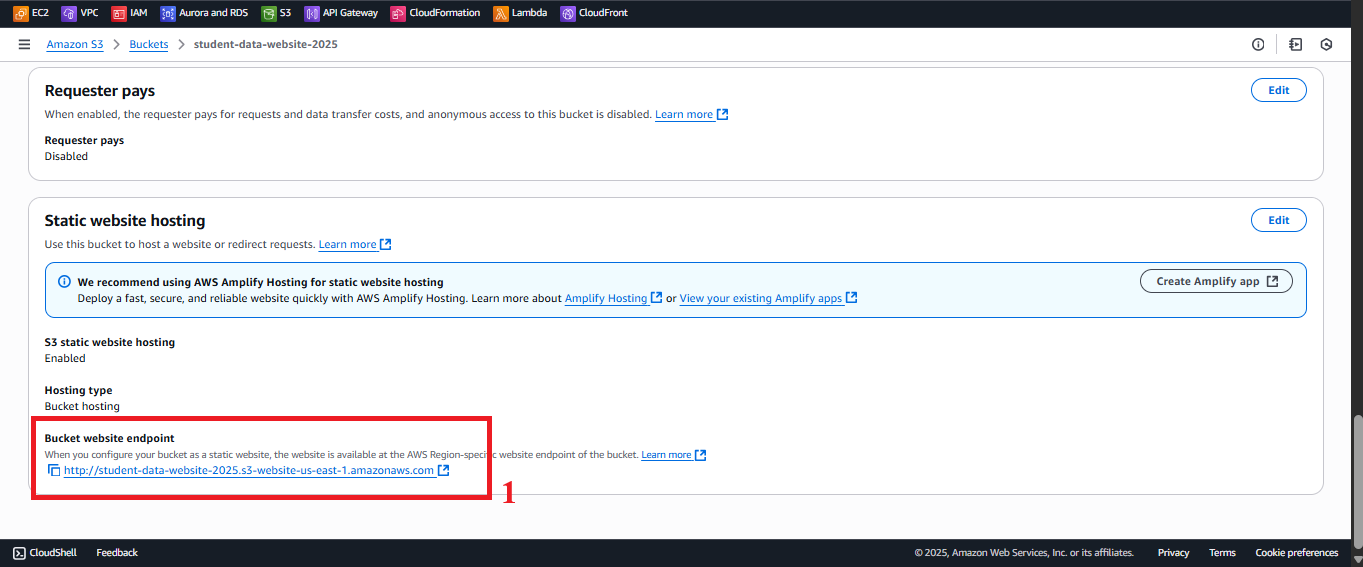 Figure 7: Status Message and Bucket Website Endpoint.
-
Test Static Website Hosting
-
Open your browser and go to the Bucket website endpoint (e.g., http://student-management-website-2025.s3-website-us-east-1.amazonaws.com).
-
Expected result:
- The web interface should display with the input form, student table, and functional buttons (Save, View, Backup).
- The
styles.cssandscripts.jsfiles should load correctly, and the interface should use Tailwind CSS and Poppins font as expected.
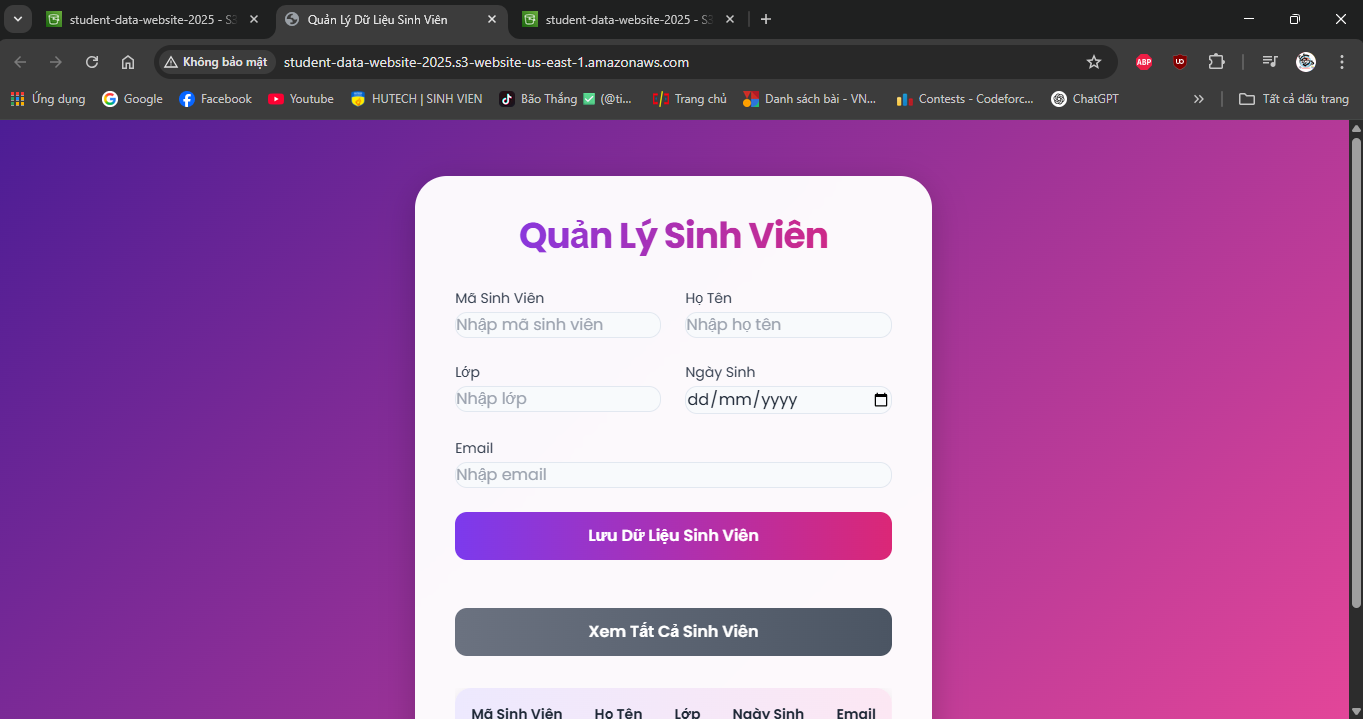 Figure 8: Web Interface Displayed via S3 Endpoint.
-
Note:
- API requests (GET /students, POST /students, POST /backup) may encounter CORS errors because the S3 endpoint uses HTTP and has not yet integrated with CloudFront. This will be addressed when configuring CloudFront (section 7) and CORS in API Gateway (section 4.7).
- The S3 endpoint only supports HTTP, not HTTPS. CloudFront will provide HTTPS and improve loading times.
-
Error Handling:
- 403 Forbidden:
- Check the Bucket Policy (section 6.4) to ensure
s3:GetObjectis allowed publicly. - Ensure Block all public access is unchecked (section 6.1).
- Check the Bucket Policy (section 6.4) to ensure
- 404 Not Found:
- Verify that
index.htmlis uploaded to the bucket (section 6.2) and is located in the root directory. - Check the paths in
index.htmlforstyles.cssandscripts.js(e.g., , ).
- Verify that
- Incorrect Interface Display:
- Open Developer Tools > Console in the browser to check for errors (e.g., CSS/JS files not loading).
- Verify that the files were uploaded correctly (section 6.2) and are not corrupted.
- “AccessDenied” error:
- Check if the IAM role of your account has
s3:PutBucketWebsitepermissions.
- Check if the IAM role of your account has
- 403 Forbidden:
-
Important Notes
| Factor | Details |
|---|---|
| Security | Currently, the bucket uses public access (s3:GetObject). Use CloudFront Origin Access Identity (OAI) (section 6.4) to restrict direct access to S3. Avoid embedding StudentApiKey in scripts.js; use AWS Secrets Manager or CloudFront Functions: function handler(event) { var request = event.request; request.headers[‘x-api-key’] = { value: ‘xxxxxxxxxxxxxxxxxxxx’ }; return request; } |
| Optimization | Ensure styles.css, scripts.js are compressed (section 6.2). Enable S3 Access Logs: In S3 > student-management-website-2025 > Properties > Server access logging, select Enable, and specify a log bucket (e.g., student-web-logs-20250706). Use AWS CLI: aws s3api put-bucket-website –bucket student-management-website-2025 –website-configuration ‘{“IndexDocument”:{“Suffix”:“index.html”},“ErrorDocument”:{“Key”:“index.html”}}’ |
| System Integration | Configure Bucket Policy (section 6.4) to allow CloudFront to retrieve the content. Create a CloudFront distribution (section 7) with the Origin as the Bucket website endpoint, Default root object: index.html, Viewer protocol policy: Redirect HTTP to HTTPS. Update CORS in API Gateway (section 4.7) with Access-Control-Allow-Origin: https://d12345678.cloudfront.net. |
| Integration Testing | Access the Bucket website endpoint to test the interface. After configuring CloudFront, access the CloudFront URL (https://d12345678.cloudfront.net) and check: POST /students (save records, send SES email), GET /students (display table), POST /backup (create file in student-backup-20250706, send email). Use Developer Tools > Network to test API requests. |
| Error Handling | 403 Forbidden: Check the Bucket Policy (section 6.4) and Block all public access (section 6.1). 404 Not Found: Verify index.html is in the root folder, paths in index.html are correct (, ). Incorrect Interface: Check Developer Tools > Console. AccessDenied: Check IAM role (s3:PutBucketWebsite). |
Best Practice Tip: Test the S3 endpoint before integrating CloudFront. If you encounter CORS errors, verify the CORS configuration in API Gateway (section 4.7). Use AWS CLI to automate configuration.
Conclusion
The Static Website Hosting feature has been enabled on the student-management-website-2025 bucket, providing an endpoint to serve the web interface. The bucket is ready to integrate with CloudFront (section 7) to support HTTPS.
Next step: Proceed to Configure Bucket Policy for Public Access to continue configuring!