Upload the Web Interface Resources to S3 (HTML/CSS/JS)
Objective: Upload the static web interface files (
index.html,styles.css,scripts.jsfrom section 5) to the S3 Bucketstudent-management-website-2025(created in section 6.1) in preparation for enabling Static Website Hosting (section 6.3) and serving the content via CloudFront (section 7). These files form the interface of the Student Data Management application, allowing users to input, view, and back up student data via the GET /students, POST /students, and POST /backup API endpoints (section 4.8) with API Key security (StudentApiKey, section 4.2) and CORS (section 4.7).
Overview of the Web Interface Resources
- Files to upload:
index.html: The structure of the interface with an input form, student display table, and functional buttons (Save, View, Backup).styles.css: Customizes the interface with Tailwind CSS, Poppins font, color gradients, and animations.scripts.js: The logic for calling the API using jQuery, making requests to the Invoke URL (e.g.,https://abc123.execute-api.us-east-1.amazonaws.com/prod) with thex-api-key: <StudentApiKey>header.
- Role of the
student-management-website-2025bucket:- Store the static files to serve the web interface through Static Website Hosting.
- Configure public access (
s3:GetObject) in the Bucket Policy (section 6.4) to allow CloudFront to retrieve the content. - Integrate with CloudFront to provide HTTPS, improve loading speeds, and enhance security.
- Integration with the system:
- The web interface calls the
studentAPI (stageprod, section 4.8) to perform the following functions:- POST /students: Save records to DynamoDB
studentDataand send a confirmation email via SES. - GET /students: Display data in the table.
- POST /backup: Create backup files in the S3 bucket
student-backup-20250706(section 2.4, 6.5) and send notification emails via SES.
- POST /students: Save records to DynamoDB
- CORS is configured (section 4.7) to support requests from the CloudFront domain (e.g.,
https://d12345678.cloudfront.net).
- The web interface calls the
Initial Requirements
You need to complete section 6.1 (create the student-management-website-2025 bucket), section 5 (build the web interface with index.html, styles.css, scripts.js), section 4.1 (create the student API), section 4.2 (create the StudentApiKey), section 4.3 (create the StudentUsagePlan), section 4.4 (create the GET /students method), section 4.5 (create the POST /students method), section 4.6 (create the /backup resource and POST /backup method), section 4.7 (enable CORS), section 4.8 (deploy the API to the prod stage), section 4.9 (link the StudentApiKey to StudentUsagePlan and associate with the student API in the prod stage), section 3 (create Lambda functions getStudentData, insertStudentData, BackupDynamoDBAndSendEmail, DynamoDB table studentData, student-backup-20250706 bucket, SES email verification). Ensure your AWS account has permissions to access S3 (s3:PutObject) and the AWS region is us-east-1.
Detailed Actions
-
Access the AWS Management Console
- Open your browser and log into the AWS Management Console using your AWS account.
- In the search bar at the top of the page, type S3 and select the Amazon S3 service to enter the bucket management interface.
- Check the AWS region: Ensure you are working in the us-east-1 (US East (N. Virginia)) region to sync with the
student-management-website-2025bucket,studentAPI, Lambda functions (getStudentData,insertStudentData,BackupDynamoDBAndSendEmail), DynamoDBstudentData,student-backup-20250706bucket, and SES. The region is displayed in the top right corner of the AWS Console.
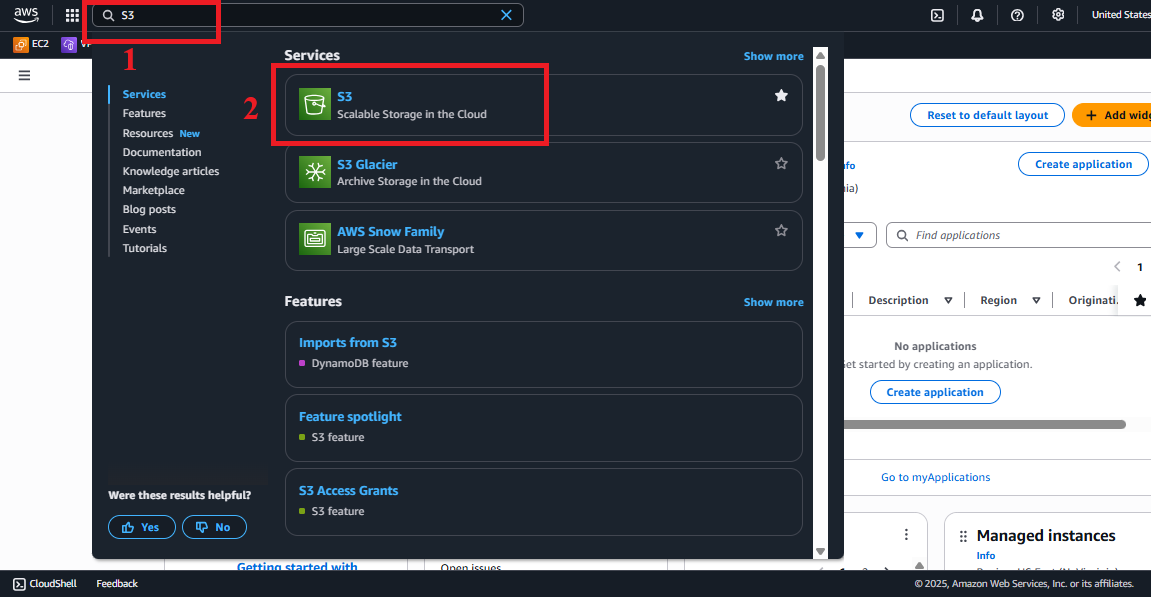 Figure 1: AWS Console Interface with the S3 search bar.
-
Select the
student-management-website-2025Bucket- In the main Amazon S3 > Buckets interface, find and select the
student-management-website-2025bucket (created in section 6.1). - If you cannot find the bucket:
- Check the AWS region (
us-east-1) and refresh the page. - Verify that the bucket has been created with the correct name (the bucket name is globally unique, so you may have used a different name such as
student-management-website-20250706-abc123).
- Check the AWS region (
- Click on the bucket name to enter the Objects management interface for
student-management-website-2025.
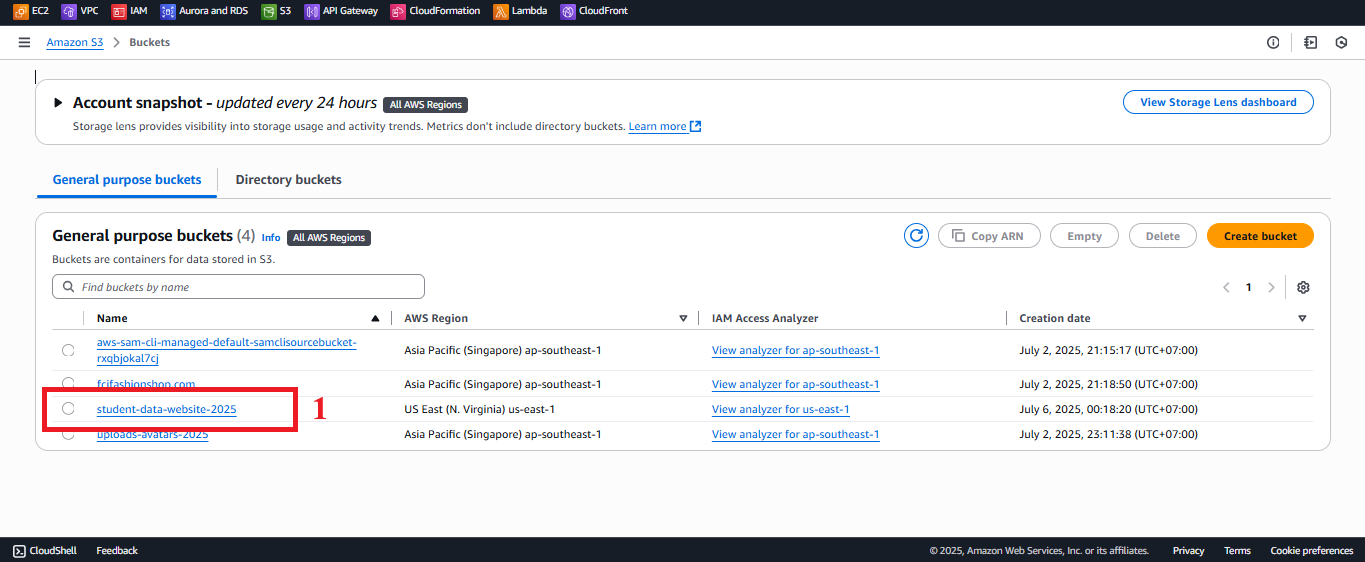 Figure 2: Select the
 student-management-website-2025bucket.
- In the main Amazon S3 > Buckets interface, find and select the
-
Open the Upload Interface
- In the Objects interface for the
student-management-website-2025bucket, click the Upload button (usually located at the top right). - The Upload interface will open, allowing you to select or drag and drop files to upload.
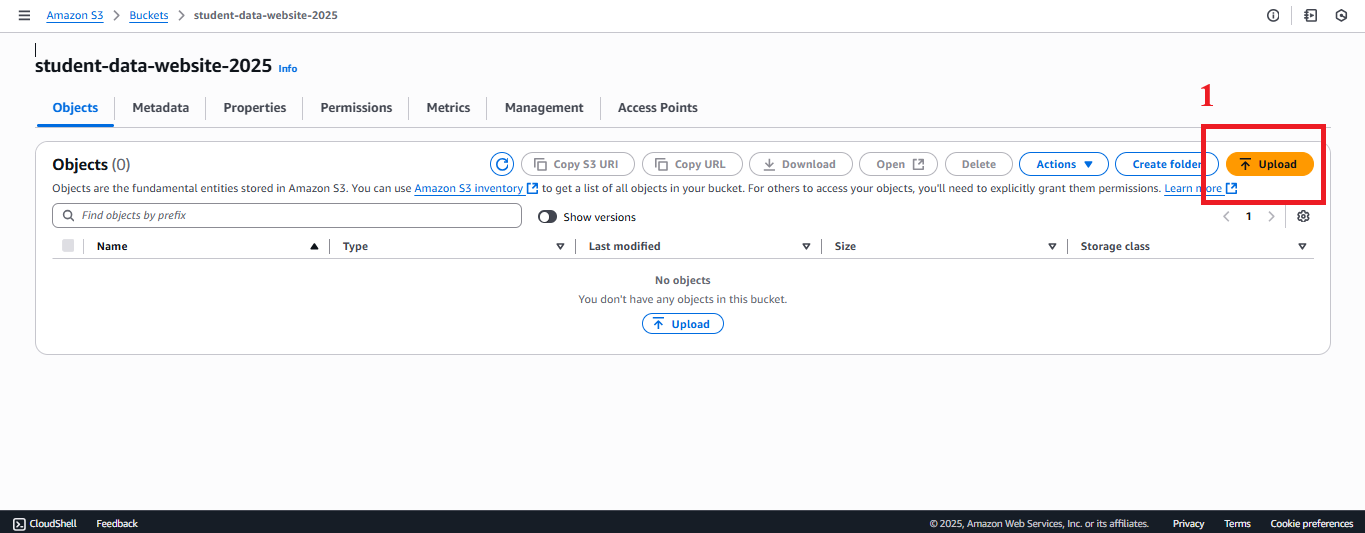 Figure 3: Upload Button in the Bucket Interface.
- In the Objects interface for the
-
Prepare and Drag and Drop Files to Upload
- Prepare the files:
- Ensure you have the following files from section 5:
index.html: The interface with forms, tables, and functional buttons, using Tailwind CSS and jQuery.styles.css: Custom styles with Poppins font, gradients, and responsive effects.scripts.js: The logic for calling the API with the Invoke URL (e.g.,https://abc123.execute-api.us-east-1.amazonaws.com/prod) andStudentApiKey(e.g.,xxxxxxxxxxxxxxxxxxxx).
- Store the files in a local directory (e.g.,
student-web-files/) for easier management. - Check the content:
- Open
scripts.jsand verify thatAPI_ENDPOINTandAPI_KEYhave been replaced with the Invoke URL (section 4.8) andStudentApiKey(section 4.2). - If not replaced, update it as follows:
const API_ENDPOINT = 'https://abc123.execute-api.us-east-1.amazonaws.com/prod'; const API_KEY = 'xxxxxxxxxxxxxxxxxxxx'; - Security note: Do not embed
API_KEYdirectly; see the Note for using AWS Secrets Manager or CloudFront Functions.
- Open
- Open
index.htmllocally in your browser to ensure the interface displays correctly before uploading.
- Ensure you have the following files from section 5:
- Drag and drop the files:
- In the Upload interface, drag and drop the
index.html,styles.css,scripts.jsfiles from your local folder to the upload area. - Or click Add files and select each file from your computer.
- File structure:
- Upload the files directly to the root folder of the bucket (do not create subfolders like
css/,js/) to ensure a simple path (e.g.,https://student-management-website-2025.s3-website-us-east-1.amazonaws.com/index.html). - If you need subfolders, create them first in the bucket (e.g., Create folder >
css,js) and upload the respective files, but update the paths inindex.html:<link rel="stylesheet" href="/css/styles.css"> <script src="/js/scripts.js"></script>
- Upload the files directly to the root folder of the bucket (do not create subfolders like
- In the Upload interface, drag and drop the
- Prepare the files:
-
Upload the Files to the Bucket
- After selecting the files, verify that the Upload interface shows
index.html,styles.css,scripts.jsin the file list.
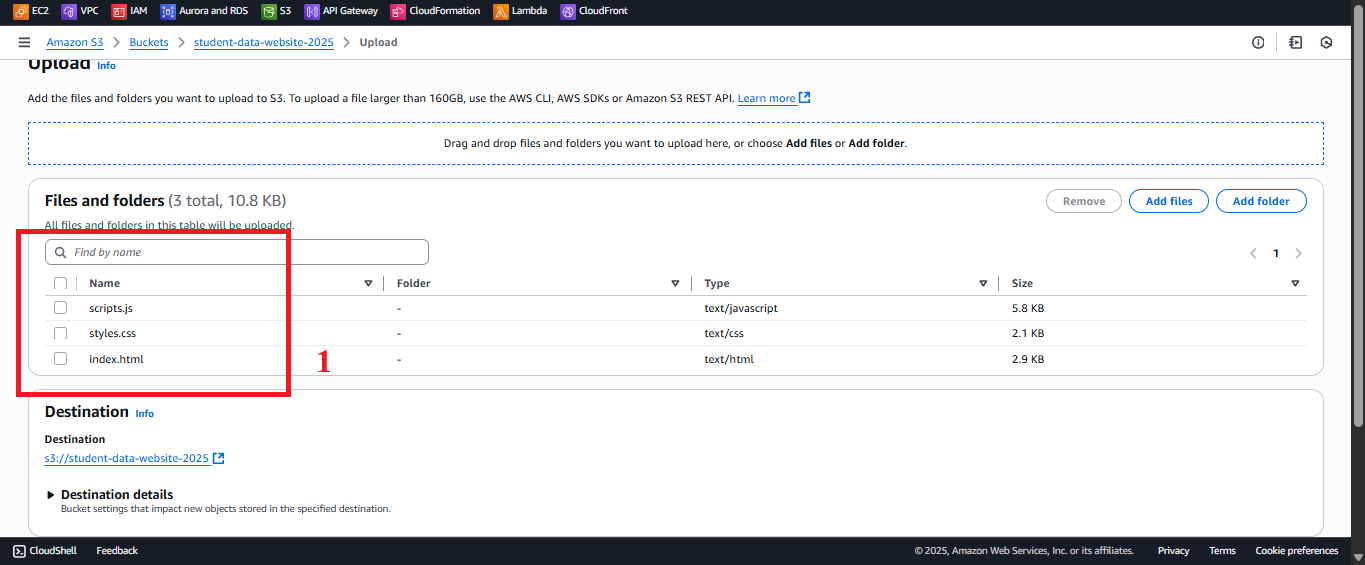 Figure 4: File List in the Upload Interface.
 - In the Permissions section (in the Upload interface):
- Predefined ACLs: Select Grant public-read access to ensure CloudFront can retrieve the files.
- Note: This permission will be replaced by the Bucket Policy (section 6.4) for centralized management, but select it here for initial testing.
- In the Properties section (optional):
- Storage class: Choose Standard (default) for optimal performance for the web interface.
- Server-side encryption: Ensure Enable with SSE-S3 (configured in section 6.1).
- Click Upload to start uploading the files.
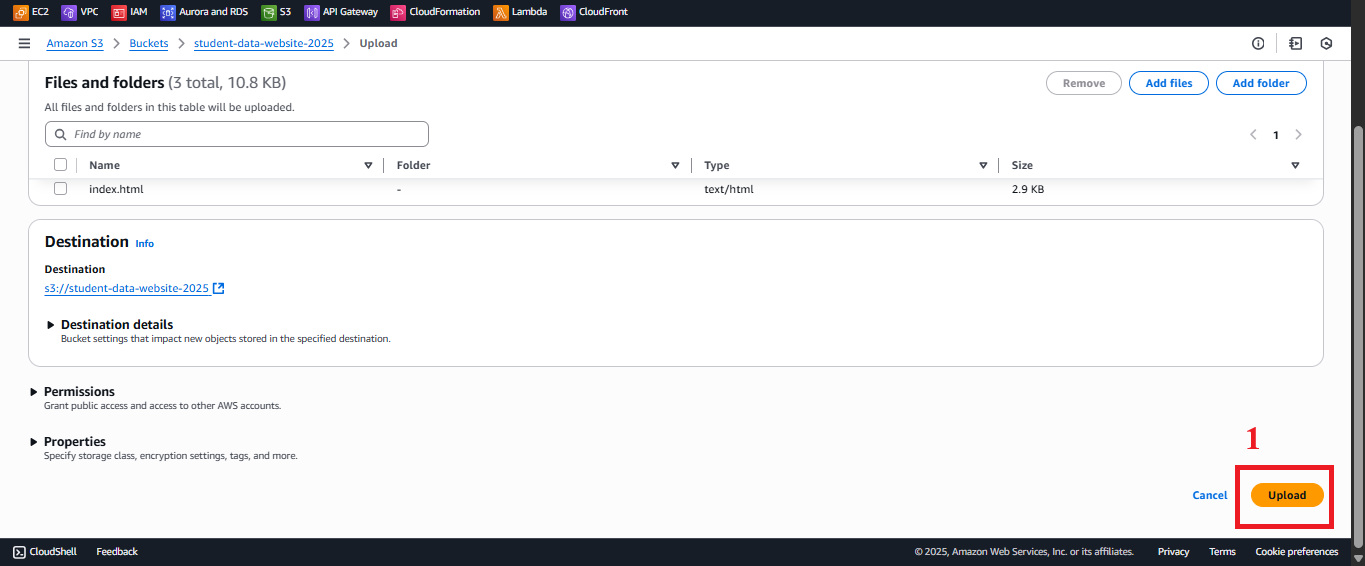 Figure 5: Click Upload to Upload Files.
- After selecting the files, verify that the Upload interface shows
-
Check the Upload Status
- After clicking Upload, AWS S3 will process the files and display the message: “Upload succeeded” when all files are uploaded successfully.
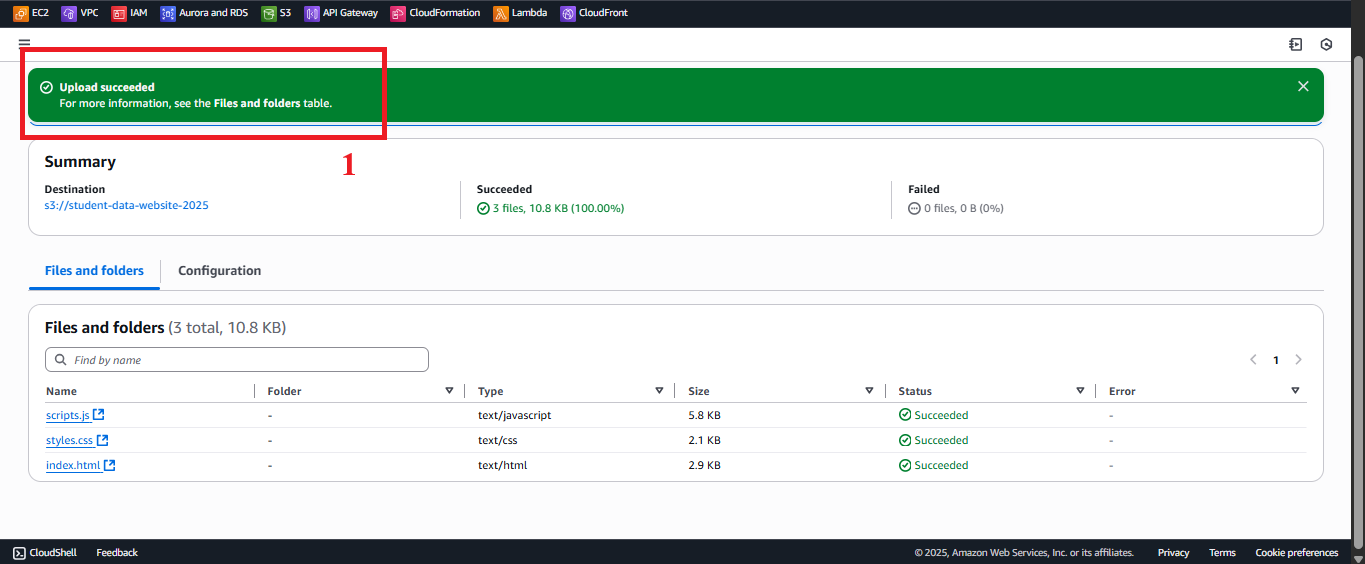 Figure 6: Upload Succeeded Message.
 - To verify:
- In S3 > Buckets > student-management-website-2025 > Objects, check the list displaying
index.html,styles.css,scripts.js. - Click each file to view details (e.g., URL, size, upload date).
- In S3 > Buckets > student-management-website-2025 > Objects, check the list displaying
- Error Handling:
- If you encounter an “AccessDenied” error:
- Ensure Block all public access is unchecked in section 6.1.
- Check if your AWS account has
s3:PutObjectpermissions.
- If files are not showing:
- Refresh the page or check the AWS region (
us-east-1). - Verify that you selected the correct
student-management-website-2025bucket.
- Refresh the page or check the AWS region (
- If you see “Upload failed”:
- Check the network connection or file size (S3 supports up to 5TB per file).
- Try uploading each file individually to identify the problematic file.
- If you encounter an “AccessDenied” error:
- After clicking Upload, AWS S3 will process the files and display the message: “Upload succeeded” when all files are uploaded successfully.
Important Notes
| Factor | Details |
|---|---|
| File Structure | - Upload the files directly to the root folder for a simple path (e.g., /index.html, /styles.css, /scripts.js). - If using subfolders (css/, js/), update the paths in index.html and verify when enabling Static Website Hosting (section 6.3). |
| Security | - Avoid embedding StudentApiKey directly in scripts.js. Use AWS Secrets Manager or CloudFront Functions to add the x-api-key header: ```javascript // Example with CloudFront Functions function handler(event) { var request = event.request; request.headers[‘x-api-key’] = { value: ‘xxxxxxxxxxxxxxxxxxxx’ }; return request; } - After uploading, configure the Bucket Policy (section 6.4) to manage the s3:GetObject permission instead of relying on public-read ACL. - Use CloudFront Origin Access Identity (OAI) (section 7) for better security, restricting direct access to S3. |
| Optimization | - File Compression: Minimize styles.css and scripts.js (use UglifyJS or CSSNano) to reduce loading time. - Content Check: Open index.html locally in the browser to ensure the interface displays correctly before uploading. - Use AWS CLI: Upload files faster with the command: bash <br> aws s3 cp student-web-files/ s3://student-management-website-2025/ --recursive <br> - S3 Versioning: Enabled in section 6.1, ensuring you can recover from errors when uploading the wrong file. |
| System Integration | - After uploading the files, enable Static Website Hosting (section 6.3) to get the endpoint (e.g., http://student-management-website-2025.s3-website-us-east-1.amazonaws.com). - Configure Bucket Policy (section 6.4) to allow CloudFront to retrieve the content. - Integrate with CloudFront (section 7) to serve the interface via HTTPS and improve loading speeds. - Ensure CORS in API Gateway (section 4.7) supports requests from the CloudFront domain (e.g., https://d12345678.cloudfront.net). |
| Integration Testing | - Verify the files in S3 > Buckets > student-management-website-2025 > Objects. - After enabling Static Website Hosting (section 6.3), access the S3 endpoint (e.g., http://student-management-website-2025.s3-website-us-east-1.amazonaws.com) to test the interface. - Expected result: The interface should display with forms, tables, and functional buttons. - Note: API requests may encounter CORS errors if CloudFront has not been configured yet; this will be fixed in section 7. - After integrating with CloudFront, test the following functions: - POST /students: Save records to DynamoDB studentData and send an email via SES. - GET /students: Display data in the table. - POST /backup: Create files in student-backup-20250706 and send notification emails. |
| Error Handling | - 403 Forbidden: Check the s3:PutObject permission and Bucket Policy (section 6.4). - Files not displaying: Verify the files were uploaded to the correct bucket and root folder. - Interface errors: Check paths in index.html (e.g., <link href="styles.css">, <script src="scripts.js">) and the browser’s log (Developer Tools > Console). |
Best Practice Tip: Before uploading, test the interface locally with
npx serveor a static server to ensure the files work correctly. Use AWS CLI to upload faster if you have multiple files. After uploading, verify the file list in the bucket and proceed with section 6.3 (enable Static Website Hosting).
Conclusion
The index.html, styles.css, and scripts.js files have been uploaded to the student-management-website-2025 bucket, ready for enabling Static Website Hosting (section 6.3) and integrating with CloudFront (section 7) to serve the web interface.
Next step: Proceed to Enable Static Website Hosting to continue configuring!