Create a New S3 Bucket
Objective: Create a new Amazon S3 Bucket named
student-management-website-2025to store static files (index.html,styles.css,scripts.jsfrom section 5) for the Student Data Management application’s web interface. This bucket will be configured to support Static Website Hosting (section 6.3) and serve content via CloudFront (section 7), integrated with thestudentAPI (stageprod, section 4.8) to call the GET /students, POST /students, and POST /backup endpoints with API Key security (StudentApiKey, section 4.2) and CORS (section 4.7).
Overview of the S3 Bucket in the Application
- Role of the
student-management-website-2025bucket:- Store static files (
index.html,styles.css,scripts.js) for the web interface using Tailwind CSS. - Enable Static Website Hosting to provide an endpoint to access the interface (to be distributed via CloudFront to support HTTPS and high performance).
- Uncheck Block all public access to allow the configuration of public access permissions (
s3:GetObject) in the Bucket Policy (section 6.4), which is required for CloudFront to access the content. - Enable Bucket Versioning to store versions of the files, supporting recovery in case of errors when updating the interface.
- Store static files (
- Integration with the system:
- The web interface calls the
studentAPI (section 4.8) using the Invoke URL (e.g.,https://abc123.execute-api.us-east-1.amazonaws.com/prod) andStudentApiKeyin thex-api-keyheader. - CORS is configured (section 4.7) to support requests from the CloudFront domain (e.g.,
https://d12345678.cloudfront.net). - This bucket differs from the
student-backup-20250706bucket (section 2.4, 6.5), which is used to store backup files from the POST /backup endpoint.
- The web interface calls the
Initial Requirements
You need to complete section 2.4 (create the student-backup-20250706 bucket), section 3 (create the Lambda functions getStudentData, insertStudentData, BackupDynamoDBAndSendEmail, DynamoDB table studentData, SES email verification), section 4.1 (create the student API), section 4.2 (create the StudentApiKey), section 4.3 (create StudentUsagePlan), section 4.4 (create the GET /students method), section 4.5 (create the POST /students method), section 4.6 (create the /backup resource and POST /backup method), section 4.7 (enable CORS), section 4.8 (deploy the API to the prod stage), section 4.9 (link the StudentApiKey to StudentUsagePlan and associate with the student API in the prod stage), and section 5 (build the web interface with index.html, styles.css, scripts.js). Ensure your AWS account has permissions to access S3 (s3:CreateBucket, s3:PutBucketPolicy) and the AWS region is us-east-1.
Detailed Actions
-
Access the AWS Management Console
- Open your browser and log into the AWS Management Console using your AWS account.
- In the search bar at the top of the page, type S3 and select the Amazon S3 service to enter the bucket management interface.
- Check the AWS region: Ensure you are working in the us-east-1 (US East (N. Virginia)) region to sync with the
studentAPI, Lambda functions (getStudentData,insertStudentData,BackupDynamoDBAndSendEmail), DynamoDB tablestudentData,student-backup-20250706bucket, and SES. The region is displayed in the top right corner of the AWS Console.
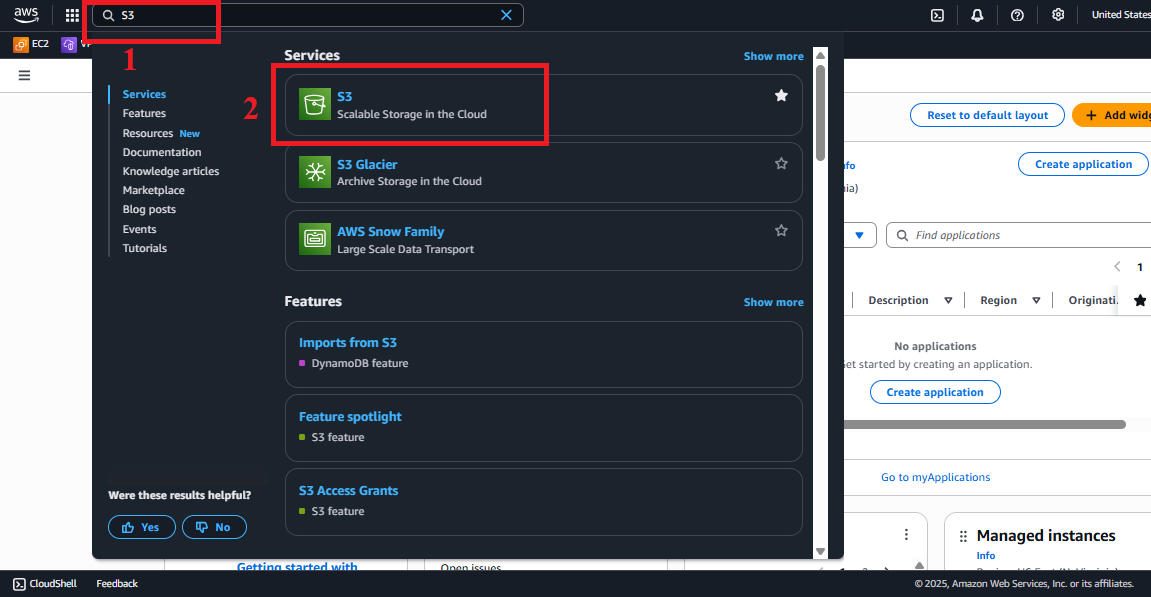 Figure 1: AWS Console Interface with the S3 search bar.
-
Open the Create Bucket Interface
- In the main Amazon S3 interface, look at the left navigation menu or the main section.
- Click the Create bucket button (usually located at the top right) to open the create bucket configuration interface.
- Note: If the interface shows a list of existing buckets, check if the
student-management-website-2025bucket already exists to avoid duplication.
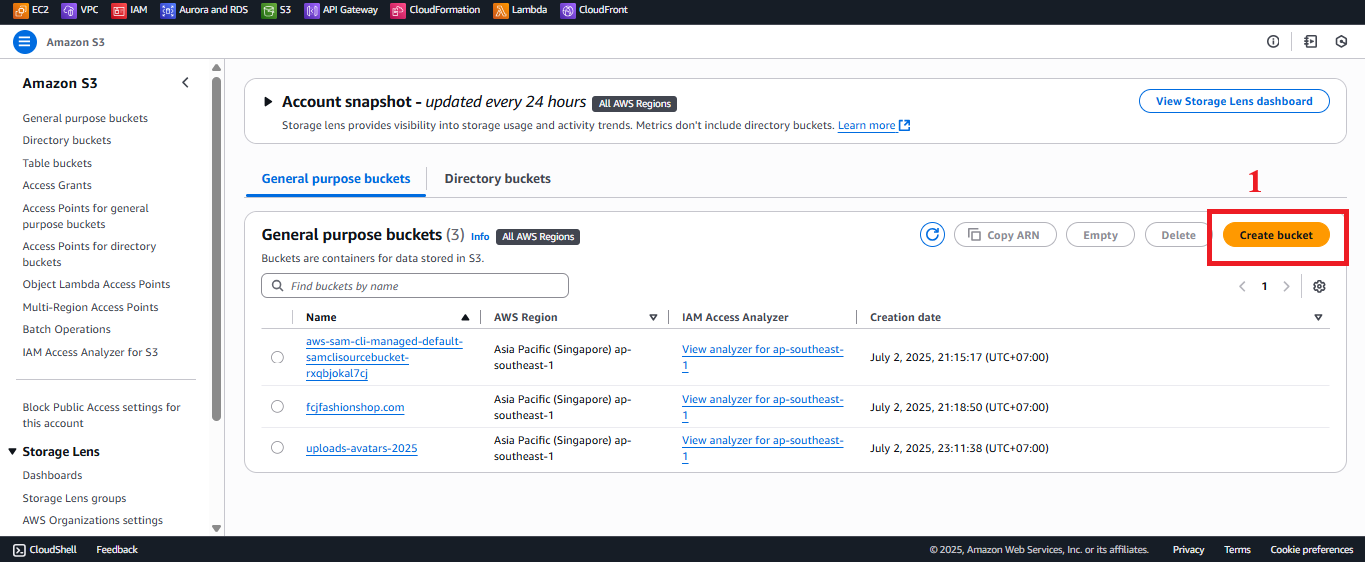 Figure 2: Create Bucket Button in the S3 Interface.
-
Configure the
student-management-website-2025Bucket- In the Create bucket interface, enter the following information:
- Bucket name: Enter
student-management-website-2025.- The bucket name must be globally unique (it cannot be the same as any existing bucket in AWS).
- If the name is already taken, try adding a random suffix (e.g.,
student-management-website-20250706-abc123). - The name must follow the rules: only lowercase letters, numbers, hyphens (-), and no spaces or other special characters.
- AWS Region: Select US East (N. Virginia) us-east-1 to sync with other services in the system.
- Bucket type: Choose General purpose (suitable for storing static content).
- Object Ownership:
- Choose ACLs enabled > Bucket owner preferred to support public access permissions via Bucket Policy (section 6.4).
- This allows managing permissions using Access Control Lists (ACLs) and Bucket Policy, which is necessary for CloudFront to access the files.
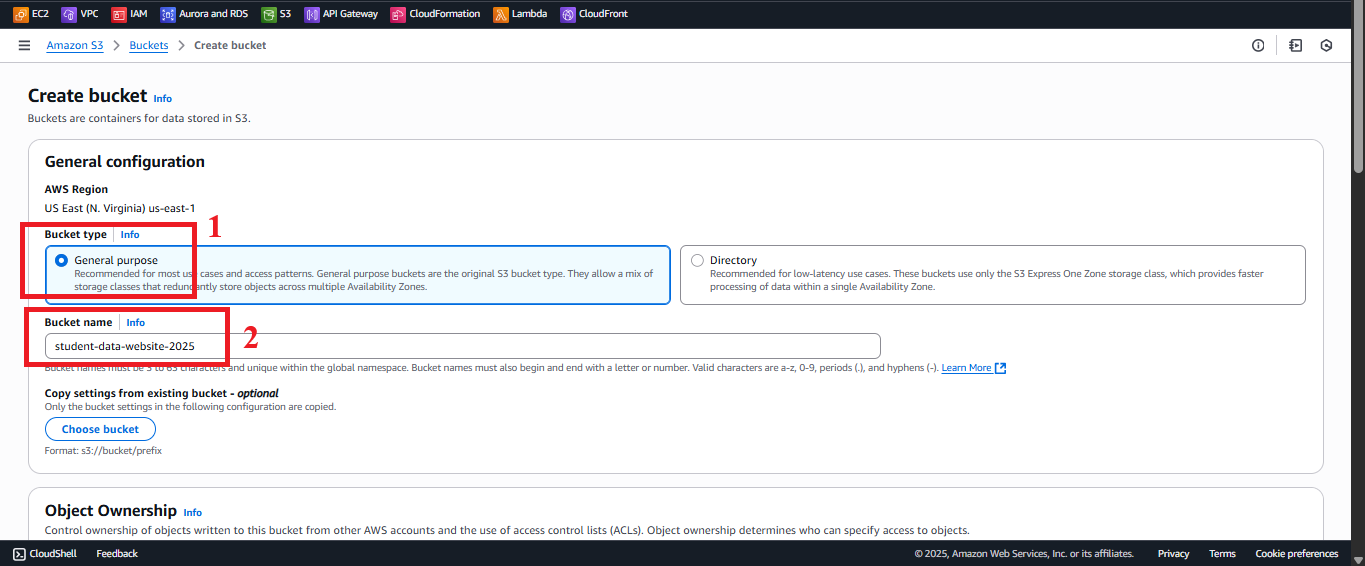 Figure 3: Configure Bucket Name and AWS Region.
- Block Public Access settings for this bucket:
- Uncheck Block all public access and all related sub-options:
- Block public access to buckets and objects granted through new access control lists
- Block public access to buckets and objects granted through new public bucket or access point policies
- Block public access from access points
- Reason: Public access (
s3:GetObject) needs to be allowed for CloudFront to serve the web interface. After configuring the Bucket Policy (section 6.4), unrelated options can be enabled again for added security.
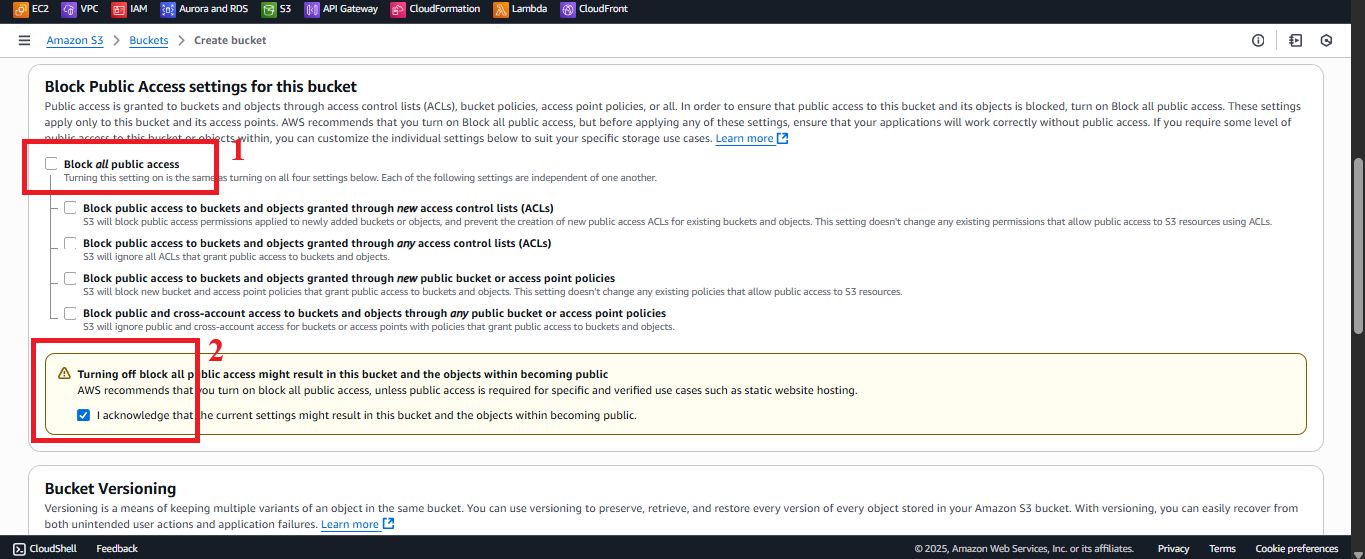 Figure 4: Uncheck Block Public Access.
- Uncheck Block all public access and all related sub-options:
- Bucket Versioning:
- Select Enable to enable Bucket Versioning.
- Reason: Store versions of the files (
index.html,styles.css,scripts.js) to recover them if errors occur while updating the interface (e.g., mistakenly uploading the wrong file).
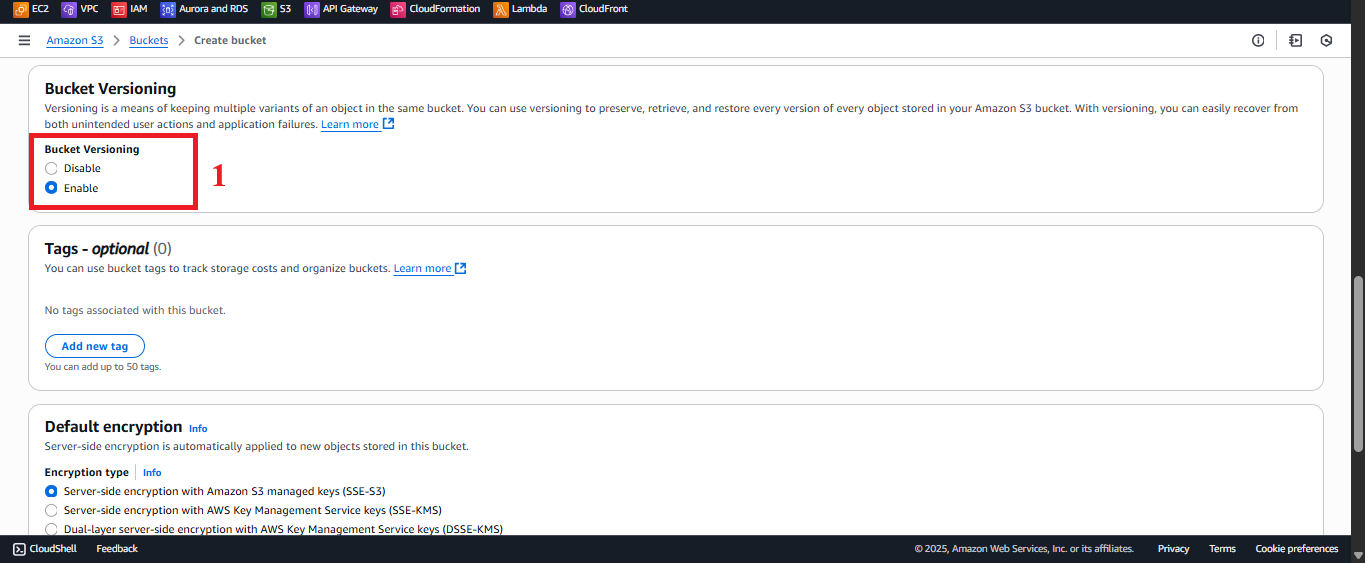 Figure 5: Enable Bucket Versioning.
- Tags (Optional):
- Add tags to manage costs, e.g.,
Project=StudentManagement,Environment=Production.
- Add tags to manage costs, e.g.,
- Default encryption:
- Select Enable > Server-side encryption with Amazon S3-managed keys (SSE-S3) to encrypt data at rest, enhancing security for the interface files.
- Advanced settings: Leave the defaults (no need to configure Object Lock or Multi-Region Access Points for static content).
- Bucket name: Enter
- Review configuration: Check the information, especially the bucket name, region, and Block Public Access settings.
- Click Create bucket to finish.
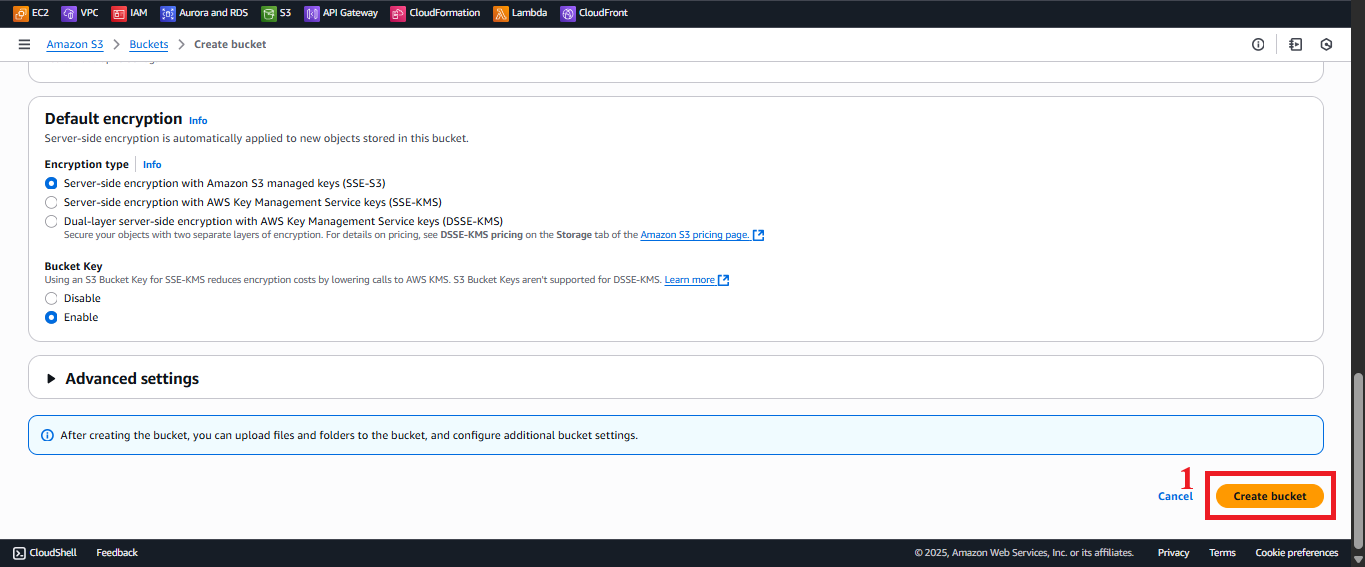 Figure 6: Review and Click Create Bucket.
- In the Create bucket interface, enter the following information:
-
Create the Bucket
- After clicking Create bucket, you should see the message: “Successfully created bucket ‘student-management-website-2025’.”
- Expected result: In the Buckets list, the
student-management-website-2025bucket should appear with a newly created status. - Error handling:
- If you encounter the “Bucket name already exists”:
- Change the bucket name (e.g.,
student-management-website-20250706-<random-string>). - Check if you have permissions to create a bucket (
s3:CreateBucket) in the IAM role.
- Change the bucket name (e.g.,
- If you encounter the “AccessDenied”:
- Check if the IAM role for your AWS account has
s3:CreateBucketands3:PutBucketPolicypermissions.
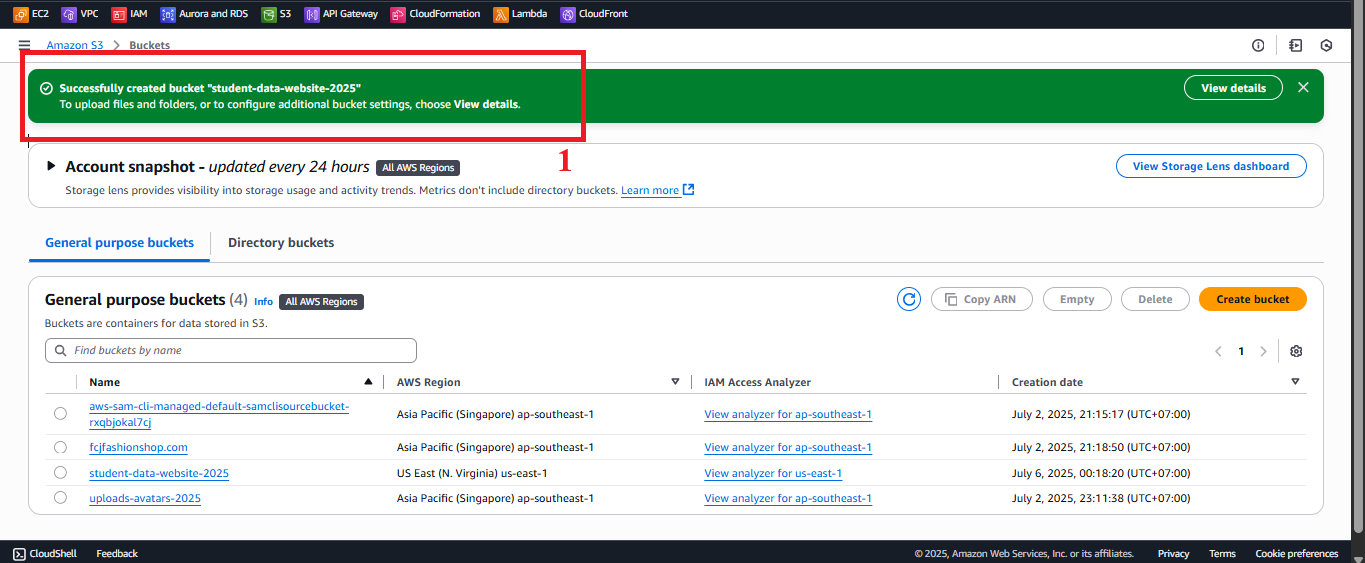
Figure 7: Bucket Creation Status Notification.
- Check if the IAM role for your AWS account has
- If you encounter the “Bucket name already exists”:
-
Check the Bucket
- In S3 > Buckets, select
student-management-website-2025to verify:- Properties: Check the region (
us-east-1), Bucket Versioning (Enabled), Default encryption (SSE-S3). - Permissions: Verify that Block all public access is unchecked to support the Bucket Policy (section 6.4).
- Properties: Check the region (
- Note: This bucket will be used to upload interface files (section 6.2), enable Static Website Hosting (section 6.3), and configure public access permissions (section 6.4) before integrating with CloudFront.
- In S3 > Buckets, select
Important Notes
| Factor | Details |
|---|---|
| Bucket Name | - The name student-management-website-2025 is recommended for easy identification, but it must be globally unique. If it’s already taken, add a random suffix (e.g., student-management-website-20250706-abc123). - Ensure it does not conflict with the backup bucket (student-backup-20250706, section 2.4). |
| Security | - Unchecking Block all public access is temporary to configure Bucket Policy (section 6.4). After configuring, unrelated options can be re-enabled for better security. - For better security, use CloudFront Origin Access Identity (OAI) instead of full public access (section 6.4). - Do not store API_KEY in static files. Use AWS Secrets Manager or CloudFront Functions to add the x-api-key header (section 5). |
| AWS Region | - Ensure the region us-east-1 matches with the student-management-website-2025 bucket, student-backup-20250706, student API, prod stage, Lambda functions (getStudentData, insertStudentData, BackupDynamoDBAndSendEmail), DynamoDB studentData, SES, and CloudFront. |
| Error Handling | - If the bucket does not appear: Refresh the page or check the AWS region. - If unable to create the bucket: Check the bucket limit in the account (default 100 buckets per region, may require AWS to increase the quota). - If encountering AccessDenied: Verify IAM role permissions for s3:CreateBucket and s3:PutBucketPolicy. |
| Optimization | - Add S3 Access Logs to track access: In S3 > student-management-website-2025 > Properties > Server access logging, select Enable and specify a log bucket (e.g., student-web-logs-20250706). - Use AWS CLI or SDK to automate bucket creation: |
| Integration Testing | - Verify that the student-management-website-2025 bucket exists in S3 > Buckets with the correct region (us-east-1) and Bucket Versioning (Enabled). - Prepare the index.html, styles.css, scripts.js files (section 5) to upload (section 6.2). - After completing section 6, access the interface via the CloudFront URL (e.g., https://d12345678.cloudfront.net) and check the following functionalities: - POST /students: Save records to DynamoDB studentData and send email via SES. - GET /students: Display the student table. - POST /backup: Create backup files in student-backup-20250706 and send notification emails. |
Best Practice Tip: After creating the bucket, immediately check it in S3 > Buckets to verify the information. Use AWS CLI or SDK to automate if you need to create multiple buckets. Prepare the interface files from section 5 and verify IAM permissions before proceeding with section 6.2 (uploading files to S3).
Conclusion
The student-management-website-2025 bucket has been successfully created in the us-east-1 region, with Bucket Versioning and Default encryption enabled, ready for uploading interface files (section 6.2), enabling Static Website Hosting (section 6.3), and integrating with CloudFront.
Next step: Proceed to Upload the interface assets to S3 to continue configuring!