Link API Key to Usage Plan & Associate with REST API and Stage
Objective: Link the
StudentApiKey(created in section 4.2) to theStudentUsagePlan(created in section 4.3) and associate it with thestudentAPI (created in section 4.1) on theprodstage (created in section 4.8). This ensures that requests to the endpoints (GET /students, POST /students, POST /backup) must include theStudentApiKeyin thex-api-keyheader and adhere to the limits of theStudentUsagePlan(Rate: 5 requests/second, Burst: 10 requests, Quota: 1000 requests/day). This configuration allows the web interface (running on CloudFront, using Tailwind CSS) to access the API securely and with control.
Overview of API Key and Usage Plan in API Gateway
- API Key (
StudentApiKey) is an authentication string used to control access to the API methods (GET /students, POST /students, POST /backup), requiring thex-api-keyheader in each request. - Usage Plan (
StudentUsagePlan) manages access limits (Rate, Burst, Quota) and links the API Key with a specific API/stage. - Linking
StudentApiKeytoStudentUsagePlanand thestudentAPI on theprodstage ensures:- Only requests with a valid
StudentApiKeyare processed. - Requests adhere to the limits: 5 requests/second (Rate), 10 concurrent requests (Burst), and 1000 requests/day (Quota).
- The web interface can safely call the endpoints with CORS support (section 4.7) and Invoke URL (section 4.8).
- Only requests with a valid
- After completing the steps, the endpoints will be ready for use in the web interface with API Key security.
Prerequisites
You need to complete the steps in section 4.1 (create the student API), section 4.2 (create the StudentApiKey API Key), section 4.3 (create the StudentUsagePlan Usage Plan), section 4.4 (create the GET /students method), section 4.5 (create the POST /students method), section 4.6 (create the /backup resource and POST /backup method), section 4.7 (enable CORS), section 4.8 (deploy the API to the prod stage), and section 3 (create the Lambda functions getStudentData, insertStudentData, BackupDynamoDBAndSendEmail, studentData DynamoDB table, student-backup-20250706 S3 bucket, SES email verification). Ensure your AWS account is ready and the AWS region is us-east-1.
Detailed Actions
-
Access AWS Management Console
-
Open your browser and log in to AWS Management Console with your AWS account.
-
In the search bar at the top of the page, type API Gateway and select Amazon API Gateway to access the management interface.
-
Check the AWS region: Make sure you’re working in the correct AWS region (assumed
us-east-1to match previous steps), and verify the region in the top-right corner of the AWS Console. This region must match with thestudentAPI, Lambda functions (getStudentData,insertStudentData,BackupDynamoDBAndSendEmail),studentDataDynamoDB table,student-backup-20250706S3 bucket, and SES.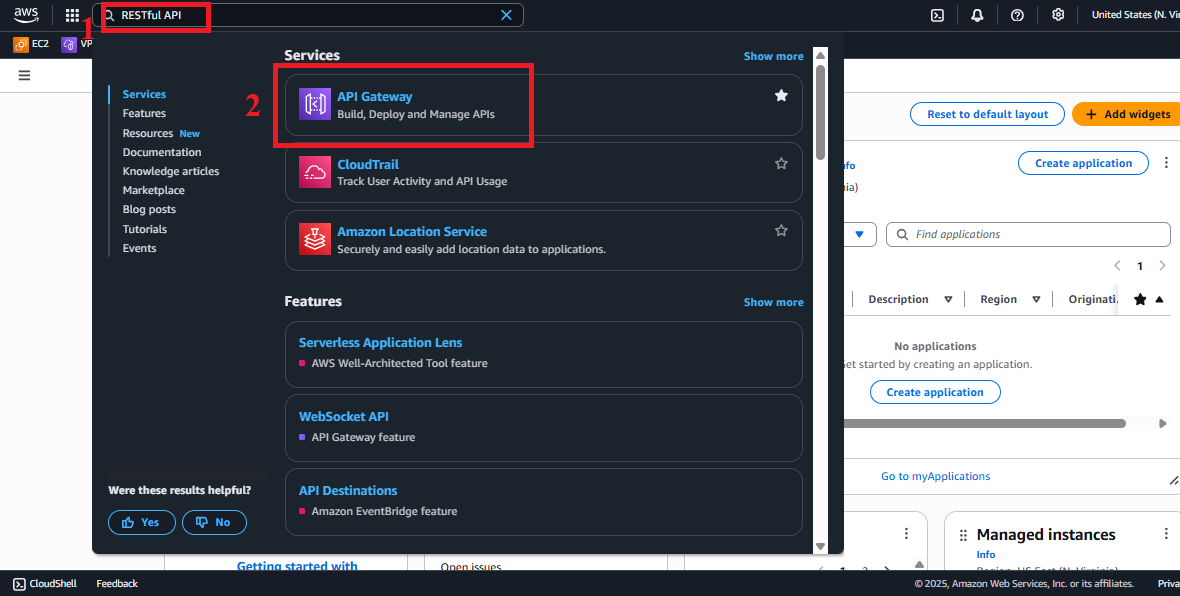
Figure 1: AWS Console interface with the API Gateway search bar.
-
-
Navigate to the API Keys Section
-
In the main interface of Amazon API Gateway, look at the left navigation menu.
-
Select API Keys to view the list of existing API Keys.
-
The list should display
StudentApiKey(created in section 4.2). If it’s not visible, check your AWS region or refresh the page.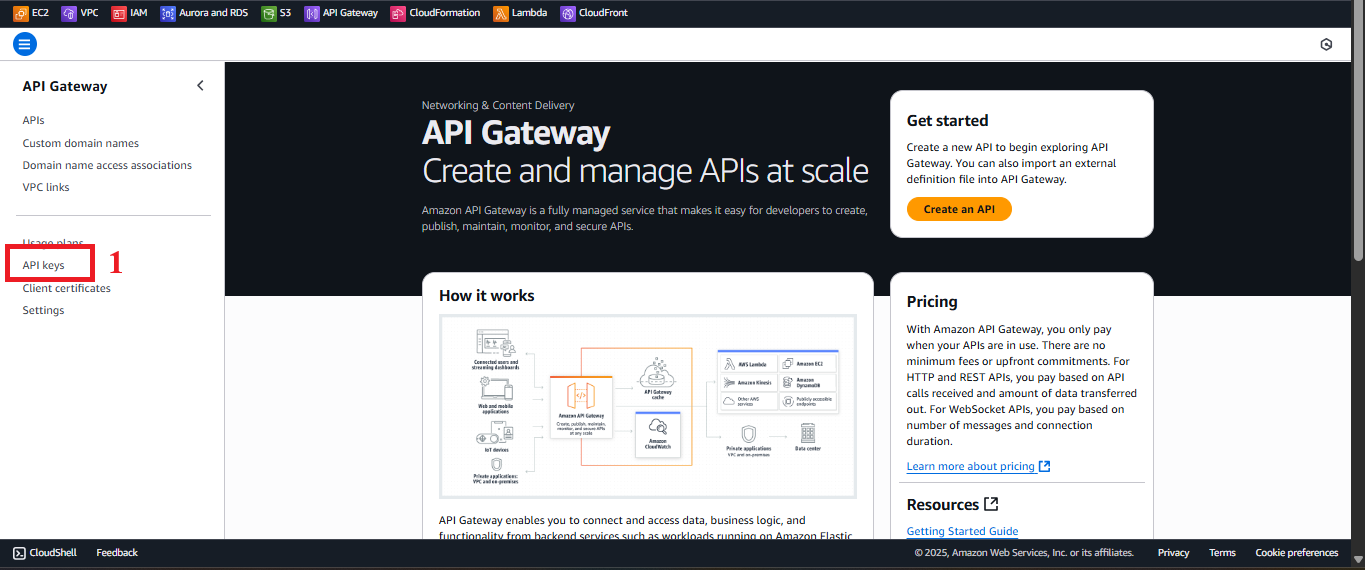
Figure 2: Navigation menu with the API Keys option.
-
-
Select the
StudentApiKey-
In the API Keys list, find and select
StudentApiKey. -
You will be taken to the detail page of
StudentApiKey, where you can see information like Value (the API key value, which may be hidden), Usage Plans, and configuration options.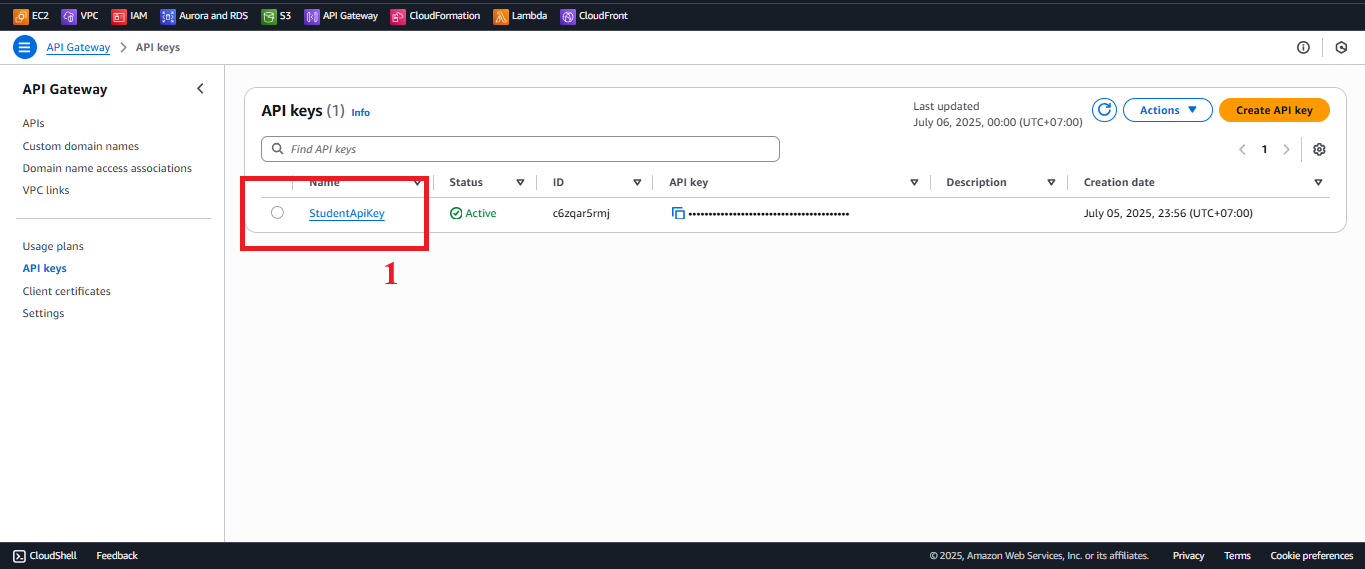
Figure 3: Detail page ofStudentApiKey.
-
-
Link
StudentApiKeyto the Usage Plan-
On the detail page of
StudentApiKey, click Add to Usage Plan (or Actions > Add to Usage Plan, depending on your Console version). -
In the Add key to usage plan section:
- Usage Plan: Select
StudentUsagePlanfrom the dropdown (created in section 4.3). - Note: If
StudentUsagePlandoes not appear, check if the Usage Plan has been created in the same AWS region (us-east-1).
- Usage Plan: Select
-
Click Save to link
StudentApiKeytoStudentUsagePlan. -
Check: After saving, in the detail page of
StudentApiKey, the Usage Plans section will showStudentUsagePlan.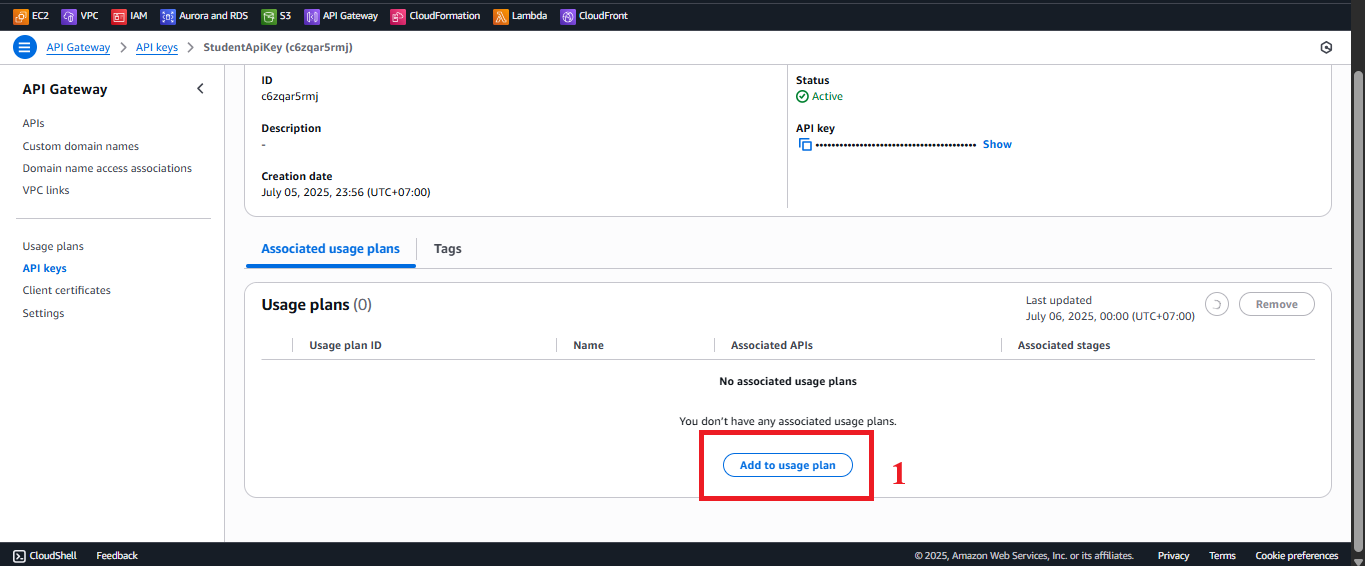
Figure 4: LinkingStudentApiKeytoStudentUsagePlan.
-
-
Check the Status of the API Key Link
-
After clicking Save, you should see the message: “Successfully added ‘StudentApiKey’ to ‘StudentUsagePlan’.”
-
If you don’t see the message or encounter an error:
- “Usage Plan not found”: Check if
StudentUsagePlanexists in Usage Plans (section 4.3). - “AccessDenied”: Check the IAM role of your AWS account for
apigateway:PUTpermission to link the API Key. - “API Key already added”: If
StudentApiKeywas already linked, this message may appear; skip and continue to the next step.
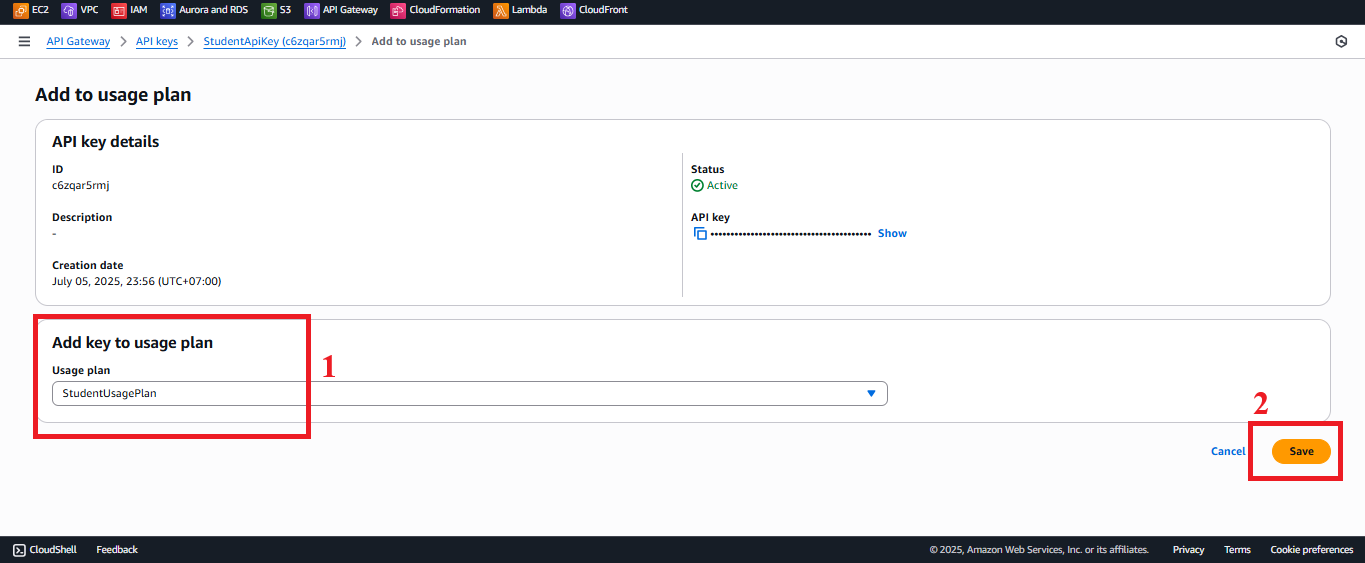
Figure 5: Status message of linking the API Key. - “Usage Plan not found”: Check if
-
-
Navigate to the Usage Plans Section
-
In the left menu of Amazon API Gateway, select Usage Plans to see the list of Usage Plans.
-
The list should display
StudentUsagePlan(created in section 4.3). If it’s not visible, check your AWS region or refresh the page.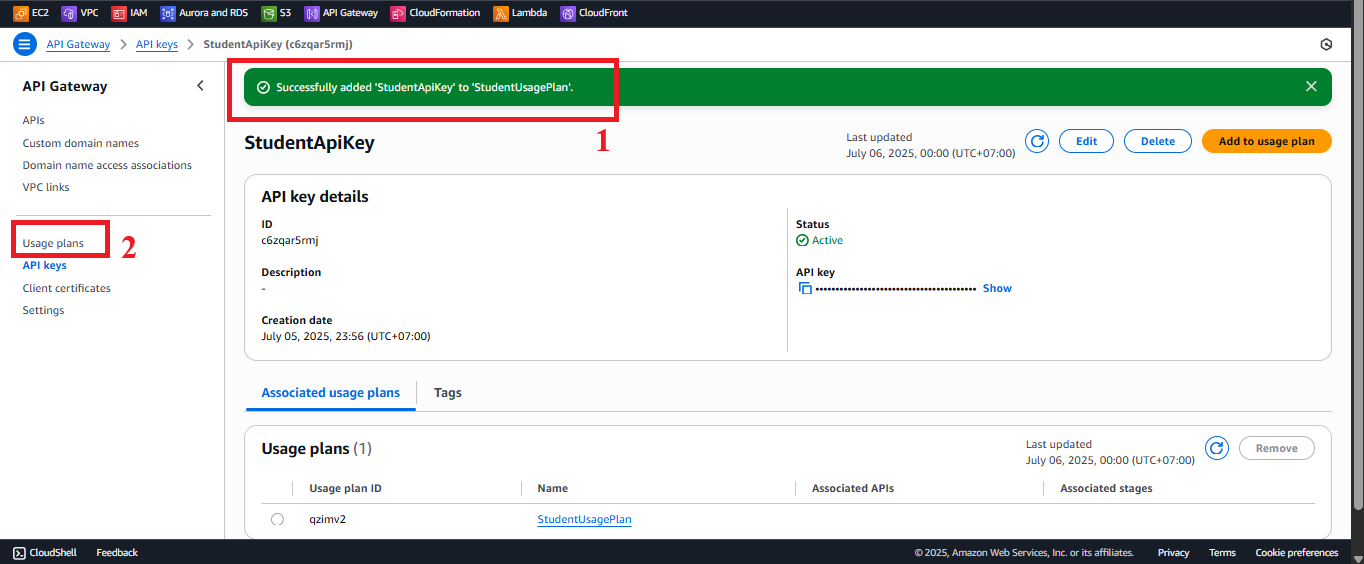
Figure 6: Navigation menu with the Usage Plans option.
-
-
Select
StudentUsagePlan-
In the Usage Plans list, find and select
StudentUsagePlan. -
You will be taken to the detail page of
StudentUsagePlan, where you can see information such as Throttling (Rate: 5, Burst: 10), Quota (1000 requests/day), API Keys, and Associated APIs and Stages.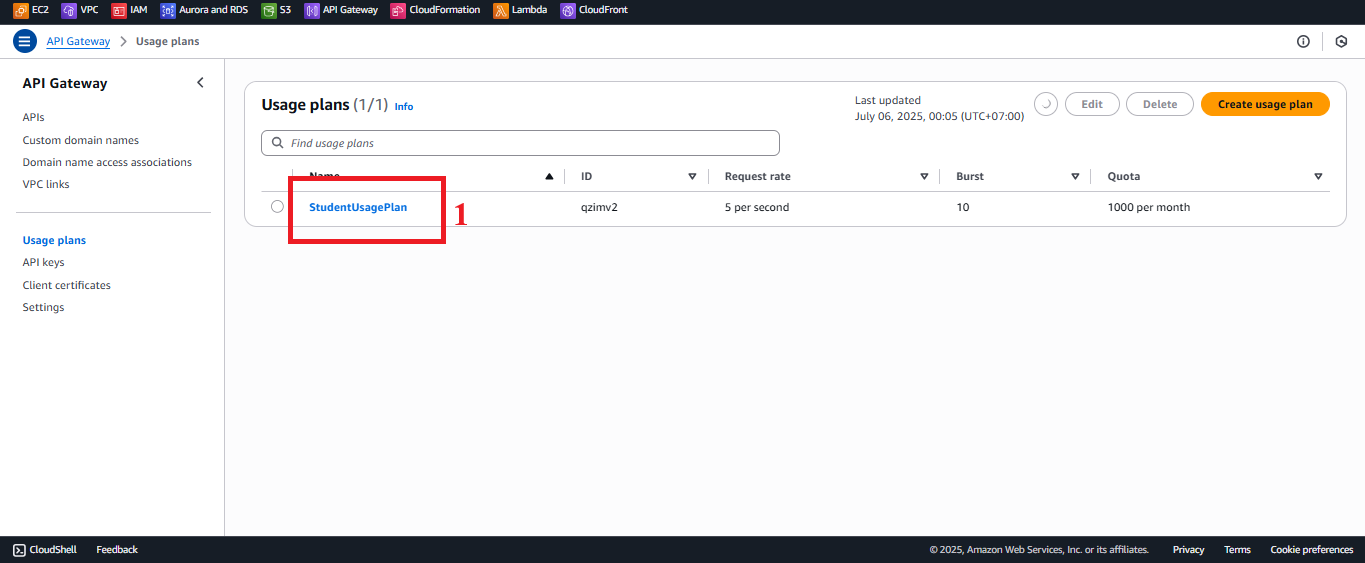
Figure 7: Detail page ofStudentUsagePlan.
-
-
Link API and Stage
- In the detail page of
StudentUsagePlan, click Add API Stage (or Actions > Add API Stage, depending on your Console version).
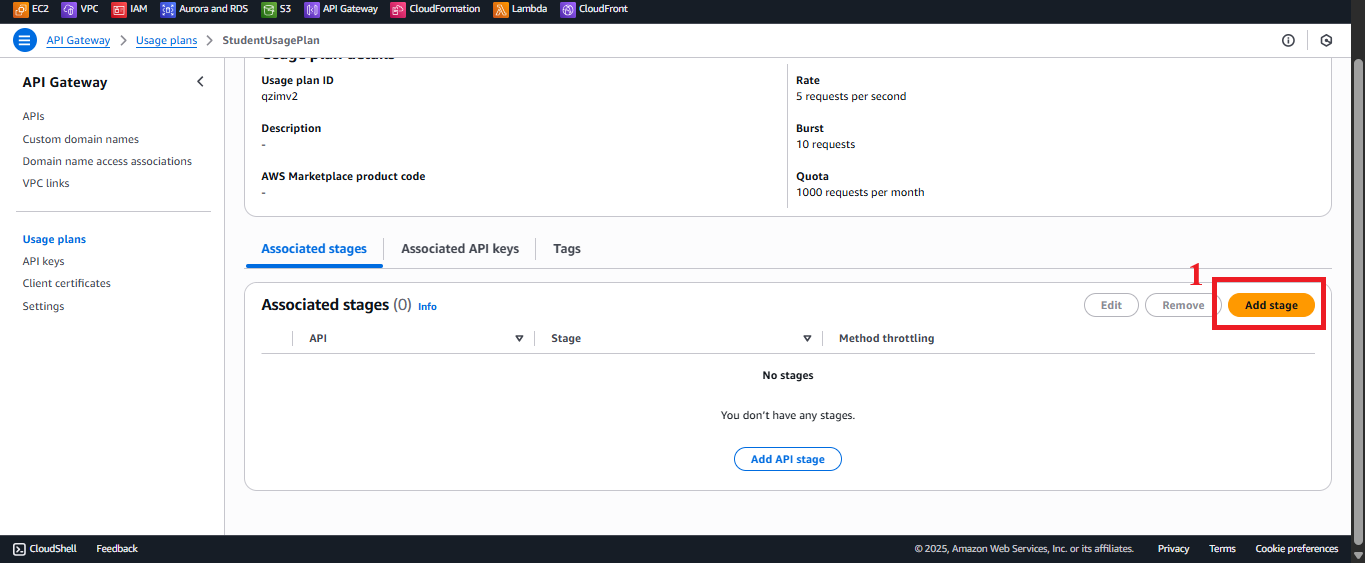
Figure 8: Clicking the Add API Stage button.-
In the Add API Stage interface:
- API: Select
studentfrom the dropdown (created in section 4.1). - Stage: Select
prodfrom the dropdown (created in section 4.8). - Note: If
studentorproddoes not appear, check that thestudentAPI andprodstage have been created in the same AWS region (us-east-1).
- API: Select
-
Click Add to Usage Plan to link.
-
Check: In the detail page of
StudentUsagePlan, the Associated APIs and Stages section will showstudent:prod.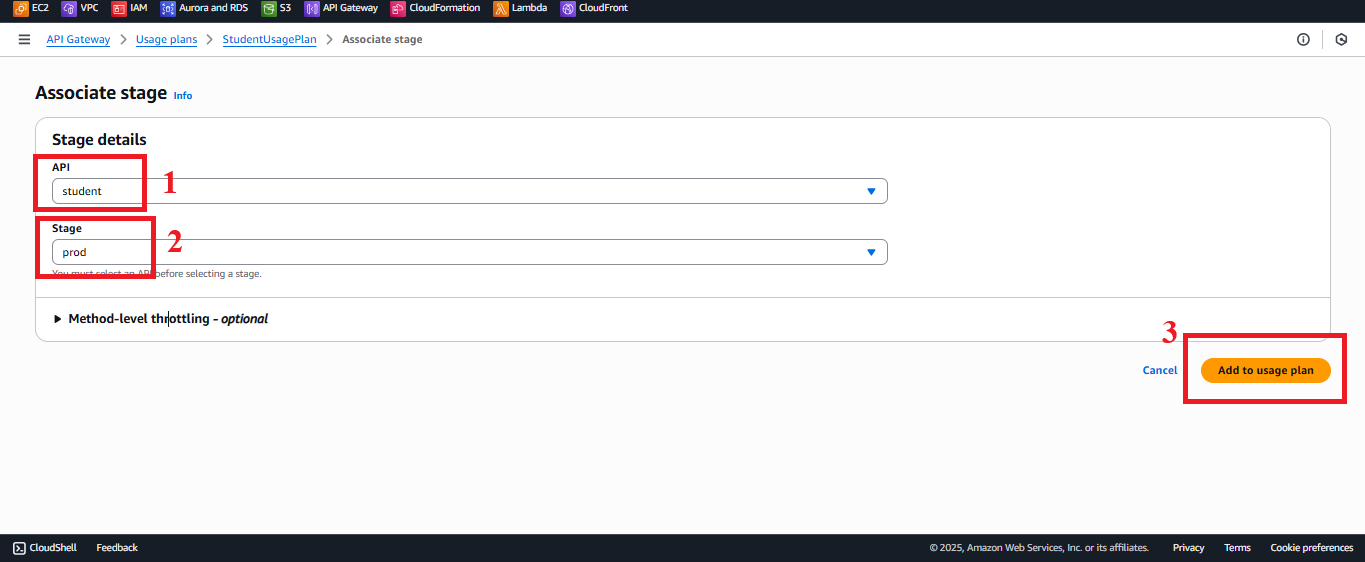
Figure 9: Linking API and Stage interface.
- In the detail page of
-
Check the Status of API and Stage Link
-
After clicking Add to Usage Plan, you should see the message: “Successfully added stage ‘prod’ to usage plan.”
-
To verify:
- In Usage Plans >
StudentUsagePlan:- Check that API Keys displays
StudentApiKey. - Check that Associated APIs and Stages displays
student:prod.
- Check that API Keys displays
- If you don’t see the message or encounter an error:
- “API or Stage not found”: Check if the
studentAPI andprodstage exist (sections 4.1, 4.8). - “AccessDenied”: Check if your IAM role has the
apigateway:PUTpermission to link API/stage. - “Stage already associated”: If
student:prodwas already linked, this message may appear; skip.
- “API or Stage not found”: Check if the
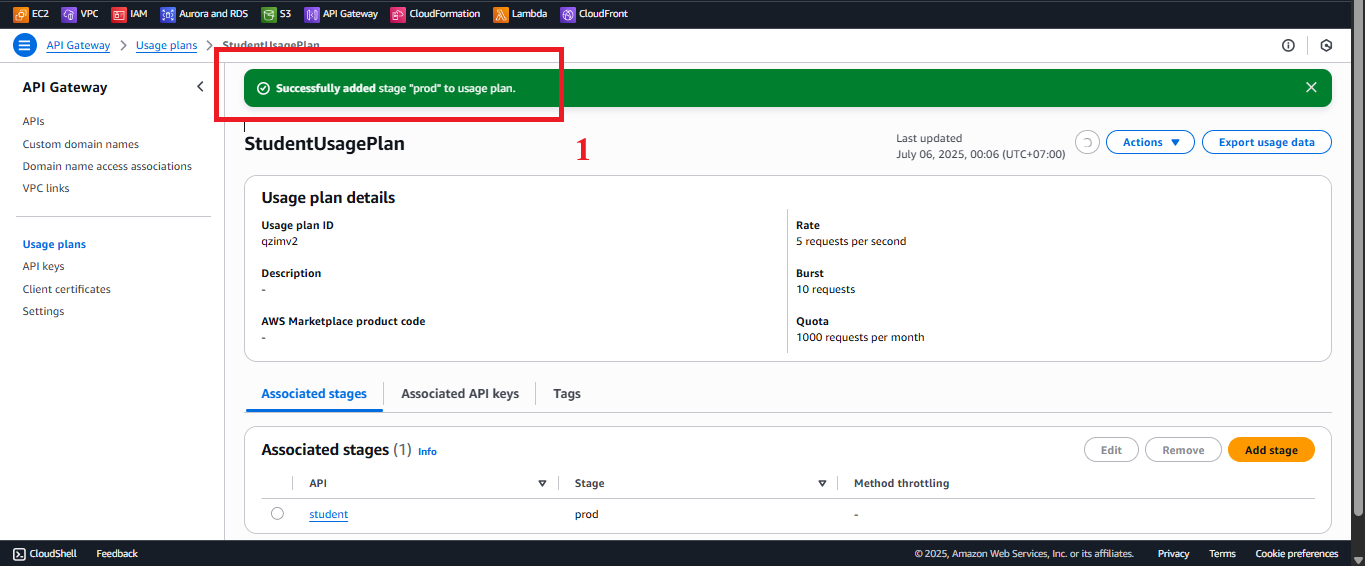
Figure 10: Status message of linking API and Stage. - In Usage Plans >
-
Key Considerations
| Factor | Details |
|---|---|
| Check Full Configuration | - API Key: StudentApiKey is linked to StudentUsagePlan. - Usage Plan: StudentUsagePlan applies Rate limits (5 requests/second), Burst (10 requests), and Quota (1000 requests/day). - API/Stage: student:prod is linked and applies the limits of StudentUsagePlan to the endpoints (GET /students, POST /students, POST /backup). - API Key Required: The methods have API Key Required: true (sections 4.4, 4.5, 4.6). |
| API Key Security | Requests to the endpoints must include the x-api-key: <StudentApiKey> header. Store the API Key in AWS Secrets Manager for increased security. |
| CORS | Ensure CORS is enabled (section 4.7) with the OPTIONS method and Access-Control-Allow-Origin: '*' header (or specific CloudFront domain). Lambda functions (getStudentData, insertStudentData, BackupDynamoDBAndSendEmail) must return the Access-Control-Allow-Origin: '*' header (configured in sections 3.1, 3.2, 3.3). |
| AWS Region | Ensure the us-east-1 region matches with the student API, prod stage, StudentApiKey, StudentUsagePlan, Lambda functions, studentData DynamoDB table, student-backup-20250706 S3 bucket, and SES. |
| Error Handling | - If a 403 "Forbidden" error occurs when calling the endpoint: - Check if the StudentApiKey is valid and linked to StudentUsagePlan. - Ensure student:prod is linked to StudentUsagePlan. - Verify API Key Required: true in Method Request (sections 4.4, 4.5, 4.6). - If a 429 "Too Many Requests" error occurs: - Check Rate (5 requests/second), Burst (10 requests), or Quota (1000 requests/day) limits in StudentUsagePlan. - Check usage statistics in Usage Plans > StudentUsagePlan > Usage. - If a 500 error occurs from Lambda, check the logs in CloudWatch (/aws/lambda/getStudentData, /aws/lambda/insertStudentData, /aws/lambda/BackupDynamoDBAndSendEmail). - If no success message appears, check your AWS region or refresh the Console page. |
| Optimization | - Enable CloudWatch Metrics for StudentUsagePlan to track the number of requests: - In Usage Plans > StudentUsagePlan, select Enable usage plan metrics. - Check in CloudWatch > Metrics > API Gateway > UsagePlanId. - Consider using AWS WAF with API Gateway to protect against DDoS attacks or API Key abuse. - If more API Keys are needed (e.g., for multiple web applications), create additional API Keys and link them to StudentUsagePlan. |
| Early Verification | - After linking StudentApiKey and associating student:prod, check the configuration in Usage Plans > StudentUsagePlan. - Test the endpoints using Postman or curl with the StudentApiKey. - Expected results: - GET /students: Returns student data from DynamoDB studentData. - POST /students: Stores new records in DynamoDB and sends a confirmation email via SES. - POST /backup: Creates a backup file in S3 student-backup-20250706 and sends a notification email. - Check from the web interface (open Developer Tools > Network in your browser) to verify there are no CORS, 403, or 429 errors. |
| Web Interface Integration Check | Use the Invoke URL and StudentApiKey in the web interface (using Tailwind CSS, running on CloudFront) to call the endpoints (GET /students, POST /students, POST /backup). |
Best Practice Tip: After linking
StudentApiKeyand associatingstudent:prod, test the endpoints using Postman with thex-api-keyheader before integrating with the web interface. Verify the data in DynamoDBstudentData, the S3 bucketstudent-backup-20250706, and the SES email to ensure the endpoints are working correctly.
Conclusion
StudentApiKey has been successfully linked to StudentUsagePlan and associated with the student API on the prod stage, ensuring that the endpoints (GET /students, POST /students, POST /backup) are secured and access-controlled, ready for use in the web interface.
Next Step: Proceed to Continue configuring or integrating the web interface to complete the system!