Deploy the API to a Specific Stage
Objective: Deploy the
studentAPI (created in section 4.1) to theprodstage in AWS API Gateway to activate the GET /students (section 4.4), POST /students (section 4.5), and POST /backup (section 4.6) methods, along with CORS configuration (section 4.7). After deployment, copy the Invoke URL (e.g.,https://abc123.execute-api.us-east-1.amazonaws.com/prod) to be used in the web interface (running on CloudFront, using Tailwind CSS) to call the endpoints with the API KeyStudentApiKey(section 4.2).
Overview of API Deployment in API Gateway
- A stage is a deployment environment (e.g.,
prod,dev,test) in API Gateway, representing an active version of the API at a given time. - Deploying the API to the
prodstage will:- Activate the GET /students, POST /students, and POST /backup methods, integrated with Lambda functions (
getStudentData,insertStudentData,BackupDynamoDBAndSendEmail). - Apply the CORS configuration (section 4.7) so the web interface can send cross-origin requests.
- Require the API Key
StudentApiKeyin thex-api-keyheader for the methods (due to API Key Required being enabled in sections 4.4, 4.5, and 4.6).
- Activate the GET /students, POST /students, and POST /backup methods, integrated with Lambda functions (
- The Invoke URL is the root URL of the stage (e.g.,
https://abc123.execute-api.us-east-1.amazonaws.com/prod), combined with the resource paths (/students,/backup) to create the full endpoints:- GET
https://abc123.execute-api.us-east-1.amazonaws.com/prod/students - POST
https://abc123.execute-api.us-east-1.amazonaws.com/prod/students - POST
https://abc123.execute-api.us-east-1.amazonaws.com/prod/backup
- GET
- After deployment, the Invoke URL will be used in the web interface to call the API with the API Key.
Prerequisites
You need to complete section 4.1 (create student API), section 4.2 (create StudentApiKey), section 4.3 (create StudentUsagePlan), section 4.4 (create GET /students method), section 4.5 (create POST /students method), section 4.6 (create /backup resource and POST /backup method), section 4.7 (enable CORS), and section 3 (create Lambda functions getStudentData, insertStudentData, BackupDynamoDBAndSendEmail, DynamoDB studentData table, S3 bucket student-backup-20250706, SES email verification). Ensure your AWS account is ready and the AWS region is us-east-1.
Detailed Actions
-
Access AWS Management Console
-
Open your browser and log into the AWS Management Console with your AWS account.
-
In the search bar at the top, type API Gateway and select the Amazon API Gateway service to access the management interface.
-
Check the AWS region: Ensure you are working in the primary AWS region (assumed
us-east-1to synchronize with previous sections), check the region in the top-right corner of the AWS Console. This region must match thestudentAPI, the Lambda functions (getStudentData,insertStudentData,BackupDynamoDBAndSendEmail),studentDataDynamoDB table,student-backup-20250706S3 bucket, and SES.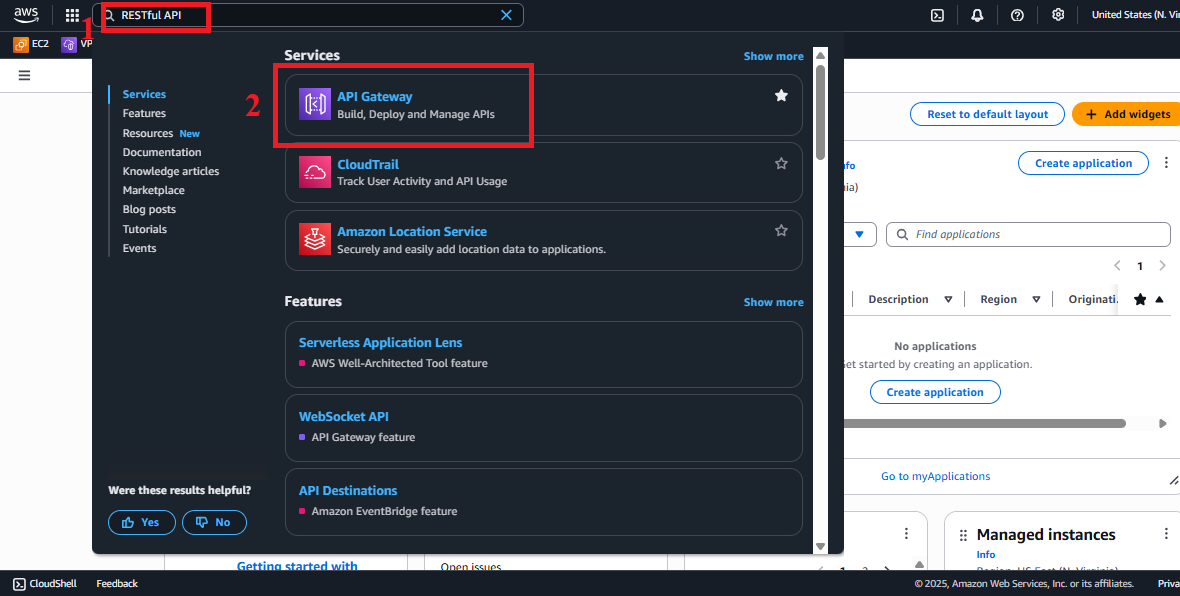
Figure 1: AWS Console interface with the API Gateway search bar.
-
-
Navigate to APIs
-
In the main interface of Amazon API Gateway, look at the left navigation menu.
-
Select APIs to view the list of existing APIs.
-
The list should display the
studentAPI (created in section 4.1). If not, check the AWS region again or refresh the page.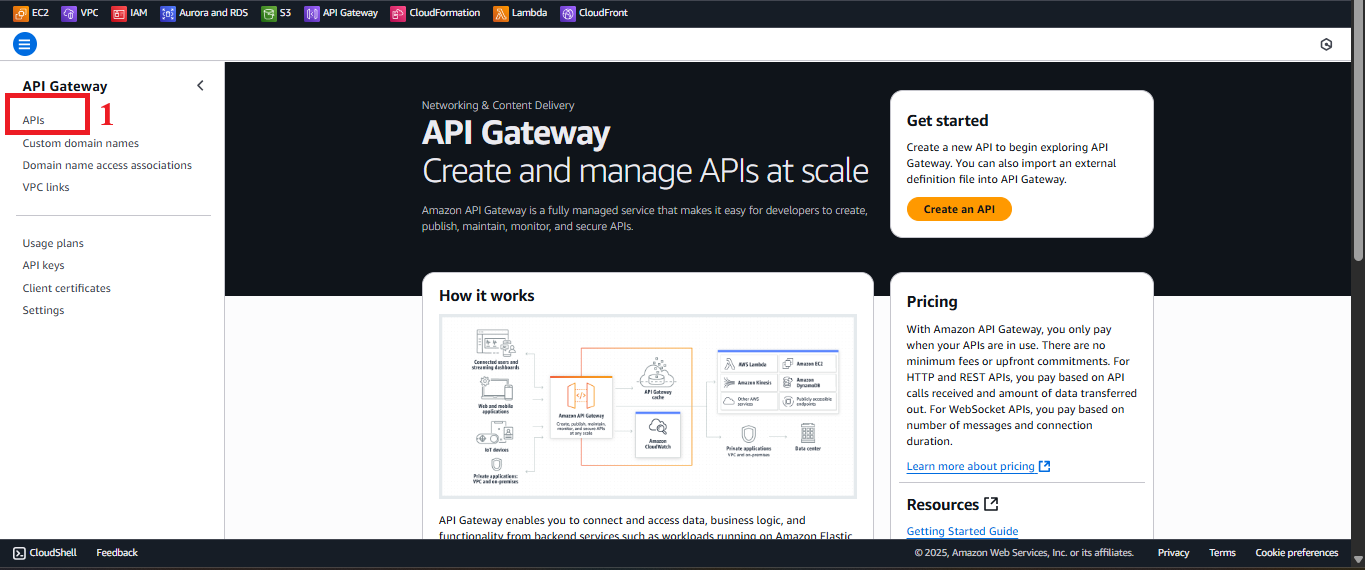
Figure 2: Navigation menu with the APIs option.
-
-
Select the student API
-
In the APIs list, find and select the
studentAPI. -
You will be redirected to the API management page for
student, showing options like Resources, Stages, API Keys, etc.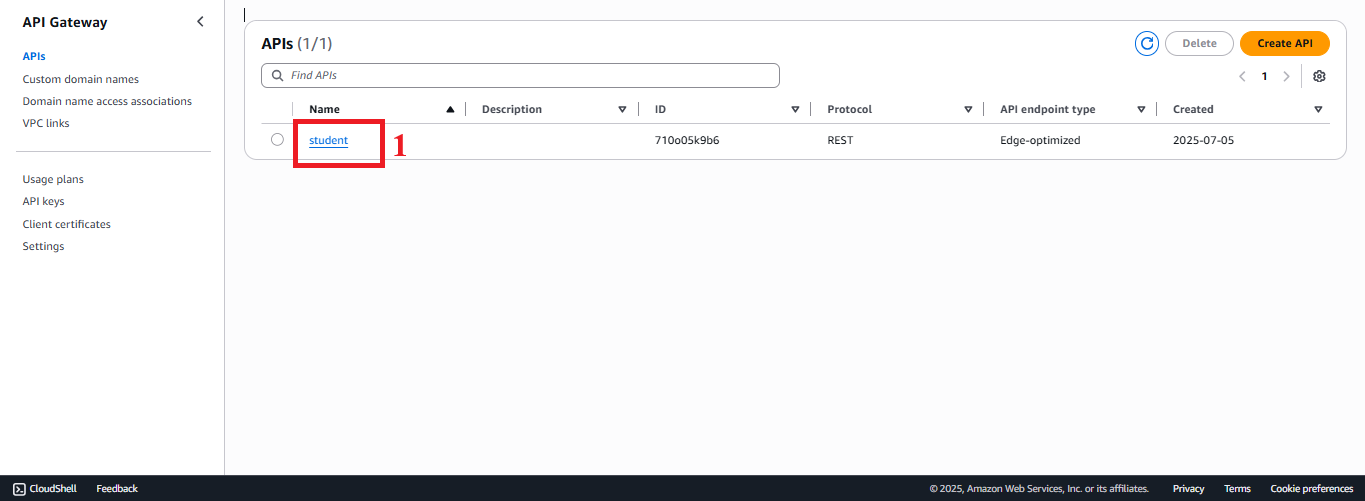
Figure 3: Student API management page.
-
-
Deploy the API
- In the API management page for
student, select Resources from the left menu. - Click Actions > Deploy API to open the deployment interface.
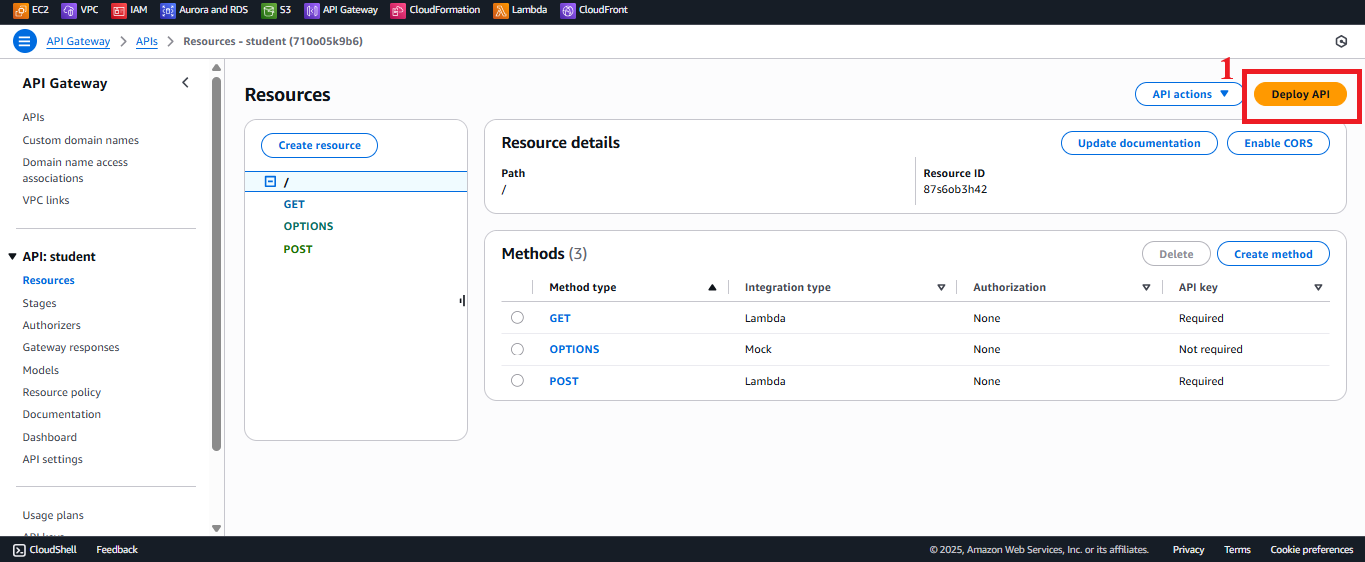
Figure 4: Click the Deploy API button.-
In the Deploy API interface:
- Deployment stage: Select New Stage.
- Stage name: Enter
prod(in lowercase, no special characters). - Stage description: (Optional) Enter
Production stage for StudentManagementAPIfor a clear description. - Deployment description: (Optional) Enter
Initial deployment for prod stageto note the deployment version.
-
Click Deploy to deploy the API to the
prodstage. -
Note:
- If the
prodstage already exists (from a previous deployment), selectprodin the Deployment stage dropdown instead of creating a new one, then click Deploy to update it. - Every time you change the API configuration (method, CORS, etc.), you need to redeploy to apply the changes.
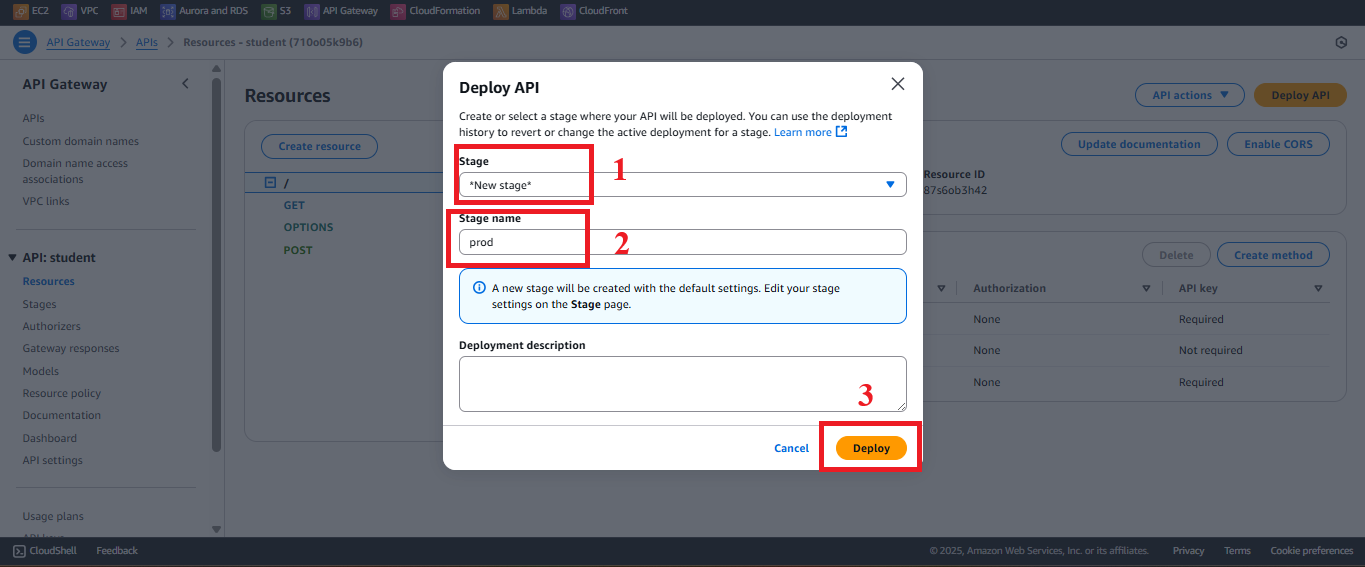
Figure 5: Deploy API to the prod stage interface. - If the
- In the API management page for
-
Check the Deployment Status
-
After clicking Deploy, you will see the message: “Successfully created deployment for student. This deployment is active for prod.”
-
In the left menu, select Stages to view the list of stages.
-
Select the
prodstage to check the details:- Verify that the Invoke URL appears at the top of the page (e.g.,
https://abc123.execute-api.us-east-1.amazonaws.com/prod). - Check the resources (
/students,/backup) and methods (GET, POST, OPTIONS) that have been deployed.
- Verify that the Invoke URL appears at the top of the page (e.g.,
-
If you do not see the message or encounter an error:
- “AccessDenied”: Check that the AWS account’s IAM role has the
apigateway:POSTpermission to deploy the API. - “Stage already exists”: If the
prodstage already exists, select the existing stage and redeploy. - “No methods deployed”: Ensure that the GET /students, POST /students, POST /backup, and OPTIONS methods have been created (sections 4.4, 4.5, 4.6, 4.7).
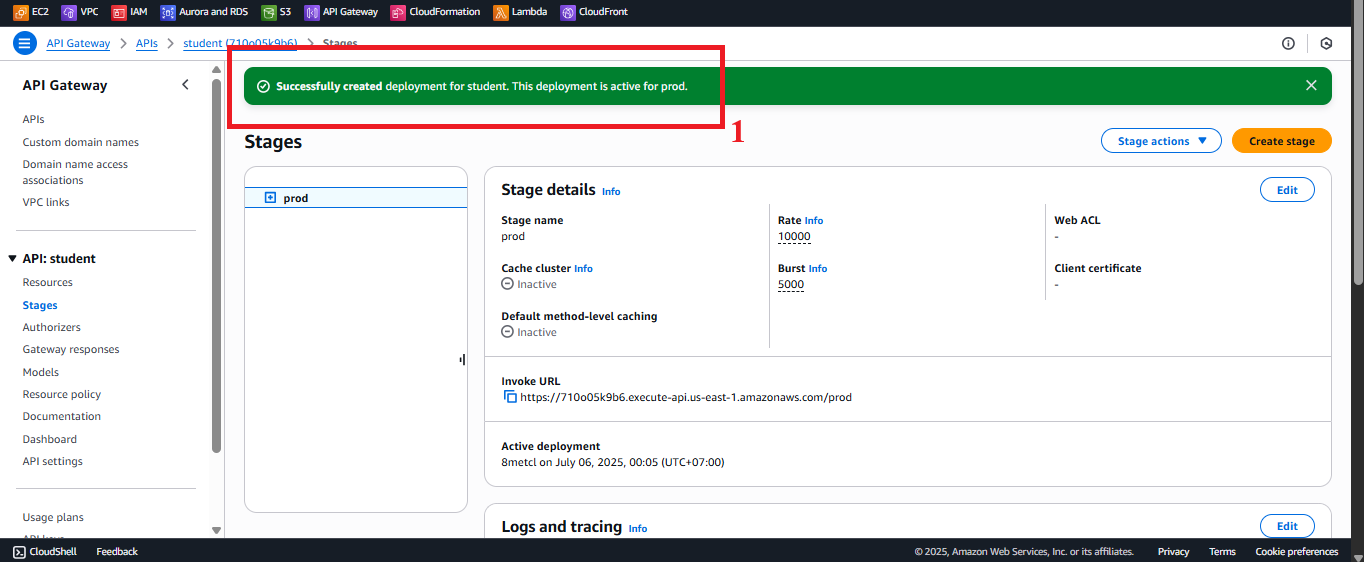
Figure 6: Deployment status message and prod stage details. - “AccessDenied”: Check that the AWS account’s IAM role has the
-
-
Copy the Invoke URL
- In Stages >
prod, copy the Invoke URL (e.g.,https://abc123.execute-api.us-east-1.amazonaws.com/prod). - Store the Invoke URL in a safe place (e.g., configuration file, environment variable, or AWS Secrets Manager) to use in the web interface.
- Use the Invoke URL:
- Combine the Invoke URL with the resource path to create the full endpoint:
- GET
https://abc123.execute-api.us-east-1.amazonaws.com/prod/students - POST
https://abc123.execute-api.us-east-1.amazonaws.com/prod/students - POST
https://abc123.execute-api.us-east-1.amazonaws.com/prod/backup
- GET
- These endpoints will be called from the web interface with the header
x-api-key: <StudentApiKey>.
- Combine the Invoke URL with the resource path to create the full endpoint:
- In Stages >
Important Notes
| Factor | Details |
|---|---|
| API Key Security | Each request to the endpoints must include the x-api-key header with the value StudentApiKey (created in section 4.2). Store the API Key in AWS Secrets Manager for enhanced security, avoiding direct embedding in JavaScript code. |
| CORS | Ensure CORS has been properly enabled (section 4.7) with the OPTIONS method and the Access-Control-Allow-Origin: '*' header (or specific CloudFront domain). The Lambda functions (getStudentData, insertStudentData, BackupDynamoDBAndSendEmail) must return the Access-Control-Allow-Origin: '*' header in the response (configured in sections 3.1, 3.2, 3.3). |
| AWS Region | Ensure the us-east-1 region matches the student API, Lambda functions, studentData DynamoDB table, student-backup-20250706 S3 bucket, and SES. |
| Error Handling | - If you encounter a 403 "Forbidden" error when calling the endpoint: - Check that the StudentApiKey is valid and linked to the Usage Plan (sections 4.3, 4.9). - Ensure API Key Required: true is set in Method Request (sections 4.4, 4.5, 4.6). - If you encounter a 404 "Not Found" error: - Check that the Invoke URL is correct and the resource paths (/students, /backup) are configured. - Ensure the API has been deployed to the prod stage. - If you encounter a CORS error: - Check the CORS configuration (section 4.7) and the Access-Control-Allow-Origin header in Method Response and Lambda. - If you encounter a 500 error from Lambda, check the logs in CloudWatch (log groups /aws/lambda/getStudentData, /aws/lambda/insertStudentData, /aws/lambda/BackupDynamoDBAndSendEmail). |
| Optimization | - Enable CloudWatch Logs for the prod stage to monitor API requests: - In Stages > prod > Logs/Tracing, select Enable CloudWatch Logs and set the log level (e.g., INFO). - Check the logs in CloudWatch > Log groups > /aws/apigateway/student-prod. - Consider using AWS WAF with API Gateway to protect against DDoS attacks or API Key abuse. - If additional stages are needed (e.g., dev, test), create more stages in Stages and deploy separately for testing. |
| Early Testing | - After deployment, verify the prod stage appears in Stages with the correct Invoke URL. - Test the endpoints using Postman or curl. - Expected results: - GET /students: Returns the student list from the DynamoDB studentData table. - POST /students: Saves a new record to DynamoDB and sends a confirmation email via SES. - POST /backup: Creates a backup file in S3 student-backup-20250706 and sends a notification email. - Check from the web interface (open Developer Tools > Network in the browser) to verify that there are no CORS or 403 errors. - If you encounter errors, check the API Key, CORS configuration, or CloudWatch logs. |
| Web Interface Integration Testing | Use the Invoke URL in the web interface to call the endpoints, ensuring the x-api-key header is sent correctly (using Tailwind CSS, running on CloudFront). |
Practical Tip: After deployment, check the Invoke URL using Postman before integrating with the web interface. Verify the data in DynamoDB
studentData, S3 bucketstudent-backup-20250706, and SES email to ensure the endpoints are working correctly.
Conclusion
The student API has been successfully deployed to the prod stage with the Invoke URL ready for use in the web interface, supporting the GET /students, POST /students, and POST /backup methods.
Next step: Move to Linking API Key to Usage Plan to continue!