Set Up Usage Plan
Objective: Create a Usage Plan named
StudentUsagePlanin AWS API Gateway to control and limit access to thestudentAPI (created in section 4.1) via theStudentApiKey(created in section 4.2). The Usage Plan will apply rate limits (Rate: 5 requests/second, Burst: 10 requests) and a quota (1000 requests/day), ensuring cost control, preventing abuse, and securing the endpoints (GET /students,POST /students,POST /backup) when accessed from the web interface (running on CloudFront).
Overview of Usage Plan in API Gateway
- A Usage Plan is a mechanism in API Gateway for managing how clients use the API via API Key, including:
- Rate Limiting: Limits the number of requests per second (Rate) and the maximum number of simultaneous requests (Burst).
- Quota: Limits the total number of requests in a given time period (e.g., day, week, month).
- In this system,
StudentUsagePlanwill:- Link with the
StudentApiKeyto authenticate requests. - Apply to the
studentAPI and stage (e.g.,prod, to be created in section 4.8). - Ensure the web interface only sends valid requests with the API Key within the predefined limits.
- Link with the
- Usage Plan helps protect the API from abuse attacks (like DDoS) and controls the cost of using API Gateway.
Prerequisites
You need to complete section 4.1 (create the student API), section 4.2 (create the StudentApiKey API Key), and section 3 (create the Lambda functions getStudentData, insertStudentData, BackupDynamoDBAndSendEmail, the DynamoDB table studentData, the S3 bucket student-backup-20250706, and SES email verification). Ensure your AWS account is set up, and the AWS region is us-east-1.
Detailed Steps
-
Access AWS Management Console
-
Open your browser and log in to AWS Management Console with your AWS account.
-
In the search bar at the top, type API Gateway and select the Amazon API Gateway service to access the management interface.
-
Check the AWS region: Make sure you are working in the primary AWS region (e.g.,
us-east-1), and check the region at the top right corner of the AWS Console. This region must match thestudentAPI (created in section 4.1) and the Lambda functions (getStudentData,insertStudentData,BackupDynamoDBAndSendEmail).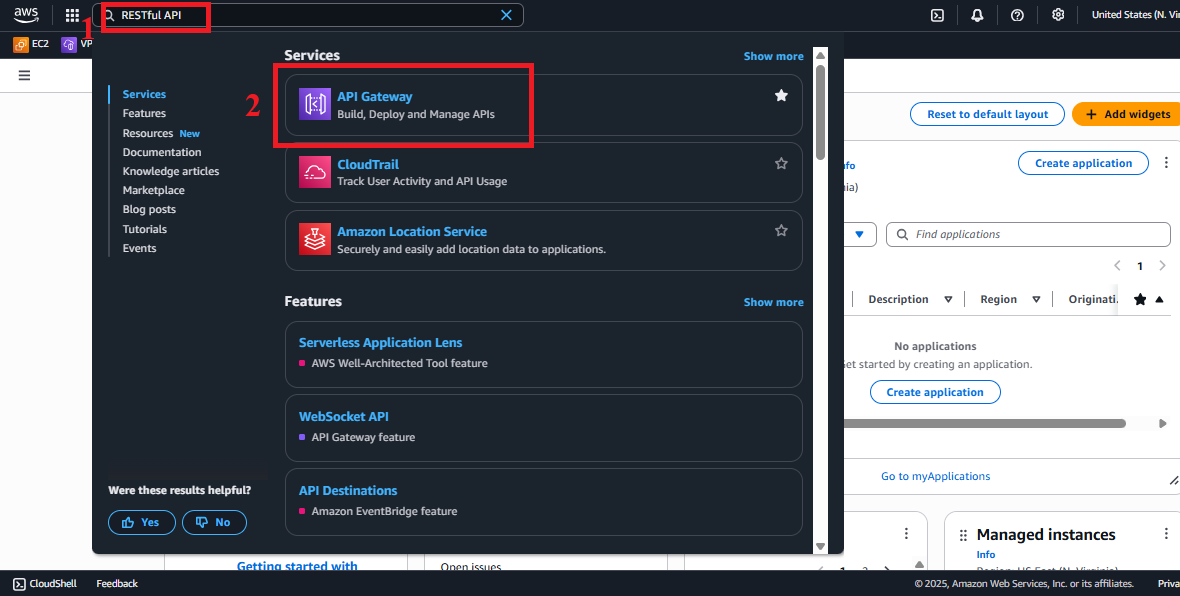 Figure 1: AWS Console Interface with API Gateway Search Bar.
-
-
Navigate to the Usage Plans Section
-
In the main Amazon API Gateway interface, look at the left navigation menu.
-
Select Usage Plans to view the list of existing Usage Plans. If you haven’t created any plans, the list will be empty.
-
The interface will show options to create or manage Usage Plans.
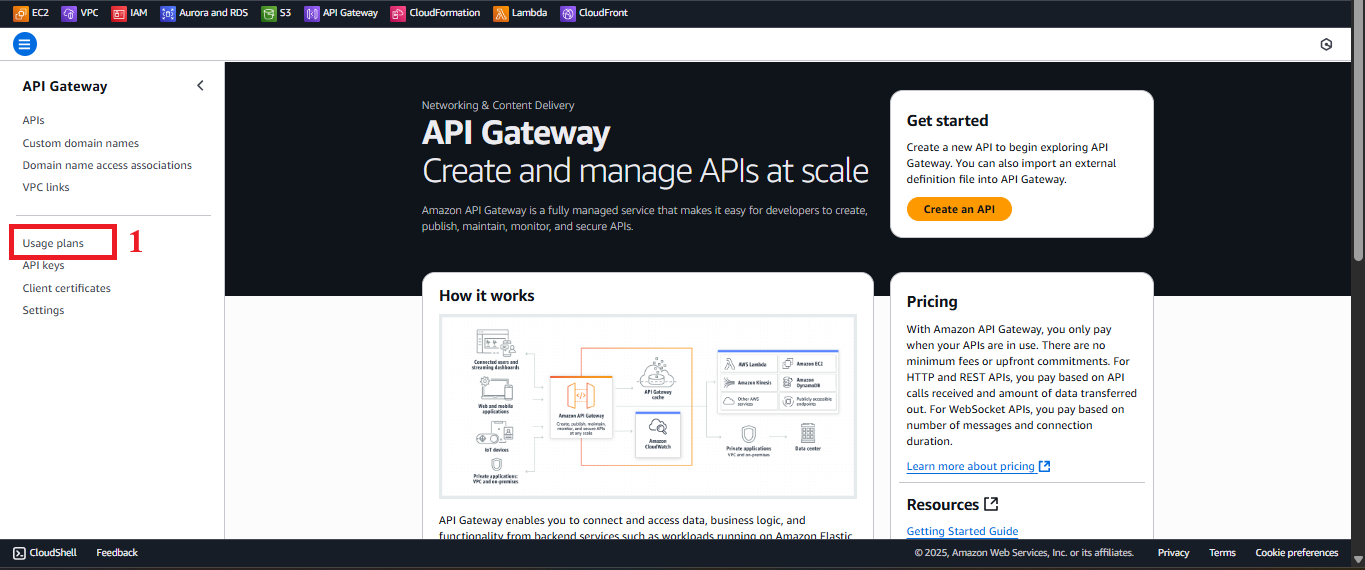 Figure 2: Navigation Menu with Usage Plans Option.
-
-
Start the Usage Plan Creation Process
-
In the Usage Plans interface, click the Create (or Create usage plans depending on the Console version) button at the top right to begin creating a new Usage Plan.
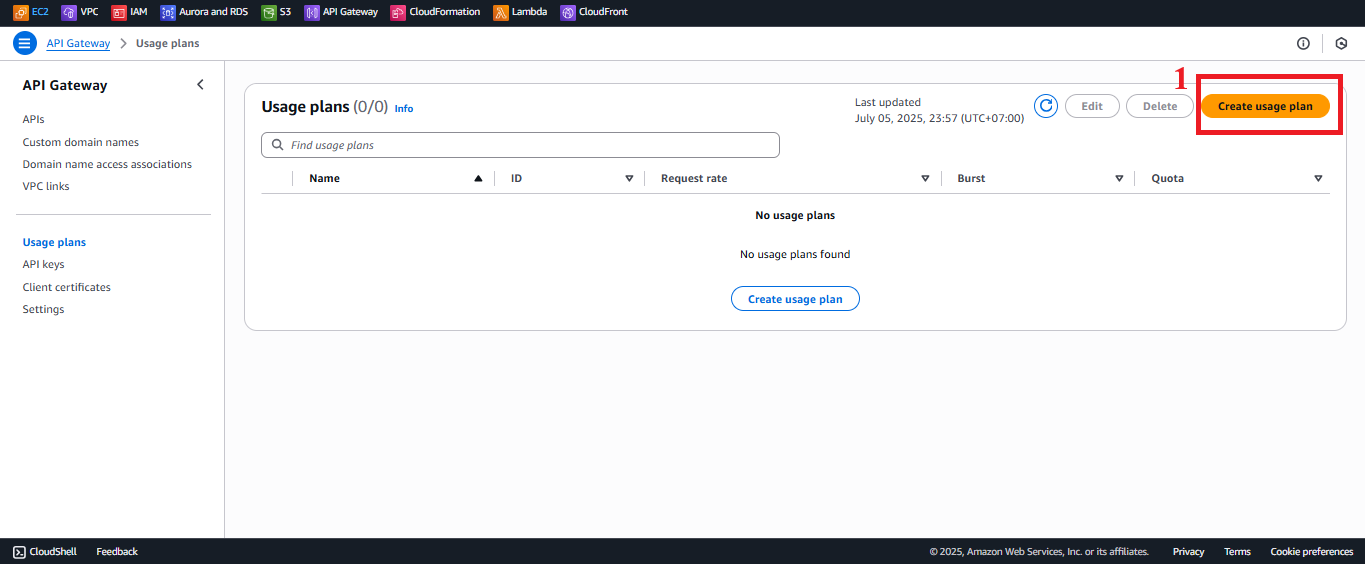 Figure 3: Create Button in the Usage Plans Interface.
-
-
Configure the Usage Plan
-
In the Create Usage Plan section:
- Name: Enter
StudentUsagePlanexactly. This name helps you easily identify the plan when linking it with the API Key and stage. - Description: Enter Usage Plan to control access to StudentManagementAPI (or a similar description for clarity).
- Enable throttling: Select to enable rate limiting.
- Rate: Enter 5 (5 requests/second).
- Burst: Enter 10 (10 simultaneous requests maximum).
- Explanation:
- Rate limits the number of requests per second that the client (with the API Key) can send.
- Burst limits the maximum number of requests that can be processed simultaneously, allowing for a burst of requests.
- These values are suitable for a small-scale application like a student management system.
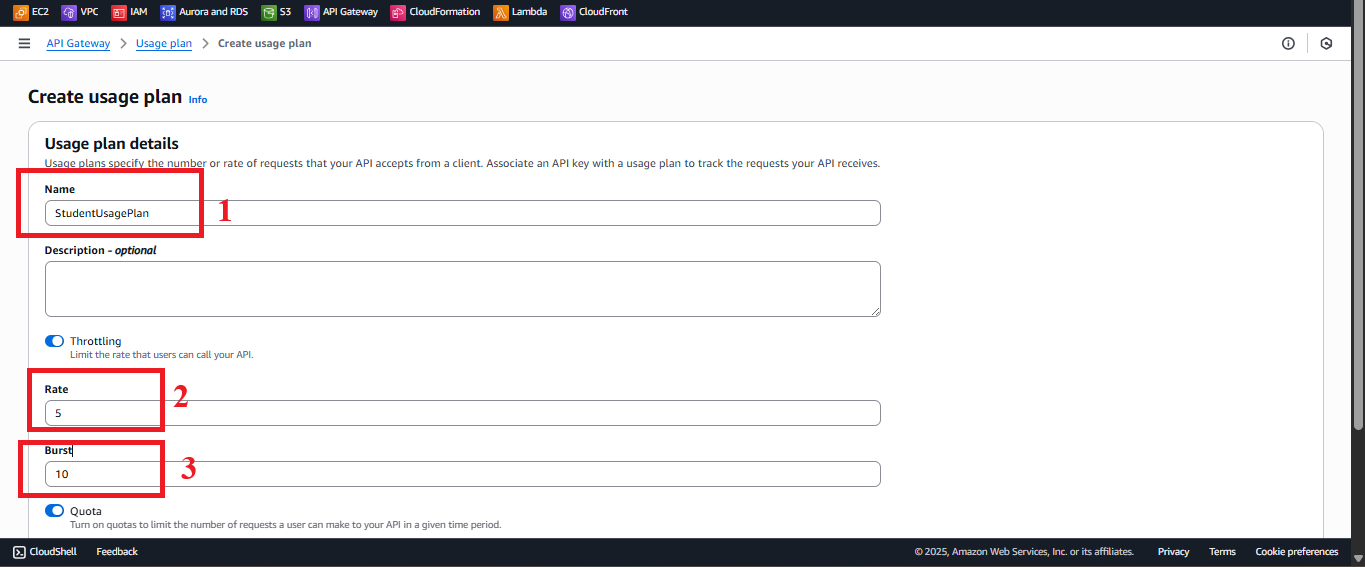 Figure 4: Usage Plan Configuration Interface.
- Enable quota: Select to enable quota limits.
- Quota: Enter 1000 and choose requests per Day (1000 requests/day).
- Explanation: Quota limits the total number of requests per day, helping control costs and prevent abuse.
- Keep the other settings at their default values (e.g., don’t enable Enable usage plan metrics unless you need detailed monitoring).
- Name: Enter
-
Click Next to continue.
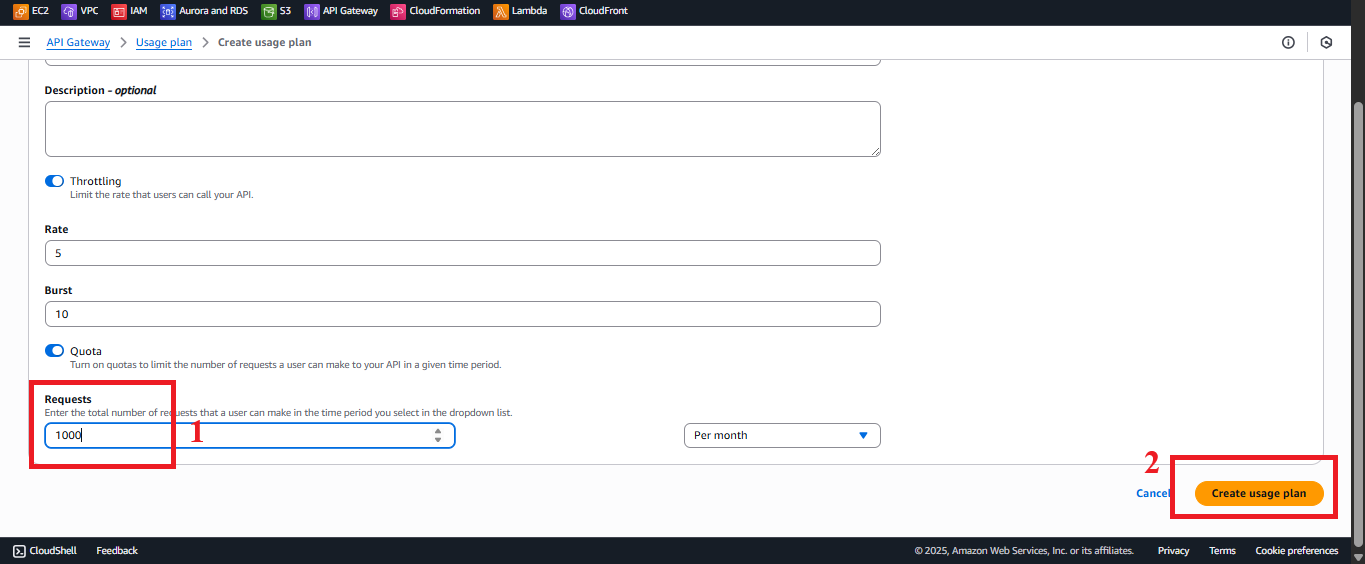 Figure 5: Click Create Button.
-
-
Check the Status of the Usage Plan Creation
-
After clicking Create, you will see the message: “Successfully created usage plan ‘StudentUsagePlan’.”
-
In the Usage Plans list, select
StudentUsagePlanto view the details. -
Verify:
- Throttling: Rate = 5 requests/second, Burst = 10 requests.
- Quota: 1000 requests/day.
- API Keys:
StudentApiKeyis linked.
-
If you don’t see the message or encounter an error:
- Check the IAM permissions for your AWS account to include
apigateway:POSTto create Usage Plans. - Make sure you are in the correct AWS region (
us-east-1). - Refresh the page or check the Usage Plans list again.
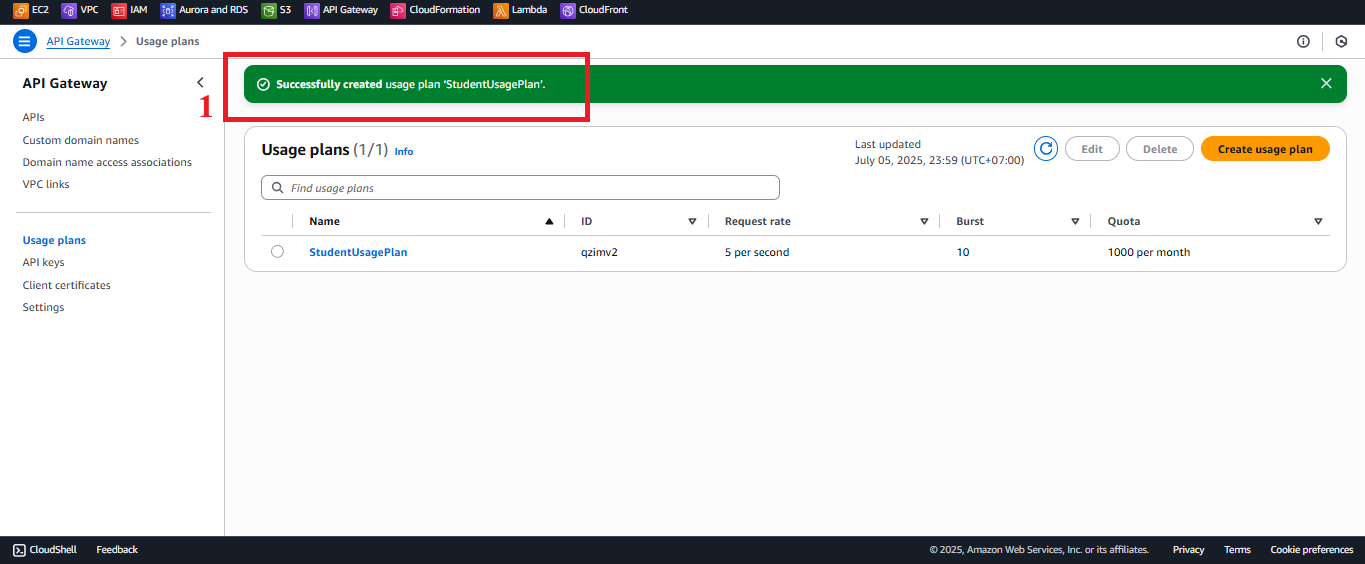 Figure 6: Usage Plan Details Page After Creation.
 - Check the IAM permissions for your AWS account to include
-
Important Notes
| Element | Details |
|---|---|
| Linking with Stage | The Usage Plan will be linked with the prod stage of the student API in section 4.9. After deploying the API (section 4.8), you need to go back to StudentUsagePlan to add the student API and the prod stage. - In Associated APIs and Stages, select Add API Stage, and choose the student API and prod stage. |
| API Key Security | Make sure the StudentApiKey is copied and stored safely (section 4.2). Do not embed the API Key directly in the JavaScript code of the web interface. Use environment variables or AWS Secrets Manager: - Go to AWS Secrets Manager > Store a new secret > Choose Other type of secret > Enter the API Key. - Name the secret (e.g., student-api-key) and retrieve it in the web interface through the AWS SDK. |
| Rate and Quota Limits | Rate: 5 requests/second and Burst: 10 requests are suitable for a small-scale application. If more users are required, increase the values (e.g., Rate = 100, Burst = 200). Quota: 1000 requests/day is sufficient for testing. If needed, increase the quota (e.g., 10,000 requests/day) in production. |
| Error Handling | If you encounter an error “AccessDenied”: - Check if your AWS account IAM permissions include apigateway:POST, apigateway:PUT to create and link Usage Plans. - Make sure the StudentApiKey exists (section 4.2). If the client receives a 429 "Too Many Requests" error when calling the API, check: - Requests exceed Rate or Burst. - Quota of 1000 requests/day has been exceeded (check in Usage Plans > Usage). If the Usage Plan does not appear, refresh the page or check the AWS region again. |
| Optimization | - Enable CloudWatch Metrics for the Usage Plan to track the number of requests: - In StudentUsagePlan, select Enable usage plan metrics. - Check in CloudWatch > Metrics > API Gateway > UsagePlanId. - Consider using AWS WAF with API Gateway to protect against DDoS attacks or API Key abuse. - If you need many clients (e.g., multiple web applications), create additional API Keys and link them with the same StudentUsagePlan. |
| Early Testing | - After creating StudentUsagePlan, verify the plan appears in the Usage Plans list, and StudentApiKey is linked. - After deploying the API (section 4.8), test the Usage Plan by calling the endpoint with the API Key using Postman or curl. - If you receive a 403 "Forbidden" error, check if the API Key is linked with the Usage Plan and if the method requires API Key Required: true (section 4.4, 4.5, 4.6). |
| Web Interface Integration Testing | After linking the Usage Plan to the prod stage (section 4.9), use the API Key in the web interface to call the endpoints (GET /students, POST /students, POST /backup). |
Practical Tip: Verify that the
StudentUsagePlanis correctly configured with Rate, Burst, and Quota before linking it to theprodstage. Monitor the number of requests via CloudWatch after testing the API.
Conclusion
The StudentUsagePlan has been successfully created in AWS API Gateway, with Rate (5 requests/second), Burst (10 requests), and Quota (1000 requests/day) limits, ready to be linked to the student API and the prod stage.
Next step: Go to Create GET Method to Retrieve Data to continue!