Create a New REST API on API Gateway
Objective: Create a new REST API in AWS API Gateway with the name
studentand the Edge-optimized endpoint type, to integrate with Lambda functions (getStudentData,insertStudentData,BackupDynamoDBAndSendEmail) and the web interface (running on CloudFront). This API will provide endpoints to access, store, and back up student data, while being secured with an API Key and supporting CORS.
Overview of REST API in API Gateway
- AWS API Gateway is a serverless service that allows the creation of RESTful or HTTP APIs, connecting the web interface with backend services like Lambda, DynamoDB, or S3.
- The
studentAPI will include the following endpoints:- GET /students: Calls the
getStudentDatafunction to fetch the student list from the DynamoDBstudentDatatable. - POST /students: Calls the
insertStudentDatafunction to store student information and send a confirmation email via SES. - POST /backup: Calls the
BackupDynamoDBAndSendEmailfunction to back up data to S3 and send an email notification.
- GET /students: Calls the
- The Edge-optimized endpoint uses CloudFront to reduce latency, which is suitable for the web interface deployed via CloudFront.
Prerequisites
You need to complete the steps in section 3 (create Lambda functions getStudentData, insertStudentData, BackupDynamoDBAndSendEmail, DynamoDB table studentData, S3 bucket student-backup-20250706, SES email verification). Ensure your AWS account is set up, and the AWS region is us-east-1.
Detailed Steps
-
Access the AWS Management Console
-
Open your browser and log in to the AWS Management Console with your AWS account.
-
In the search bar at the top, type API Gateway and select the Amazon API Gateway service to go to the management interface.
-
Check the AWS region: Make sure you are working in the primary AWS region (e.g.,
us-east-1), and check the region at the top right corner of the AWS Console. This region should match with the Lambda functions (getStudentData,insertStudentData,BackupDynamoDBAndSendEmail), DynamoDB tablestudentData, S3 bucketstudent-backup-20250706, and SES.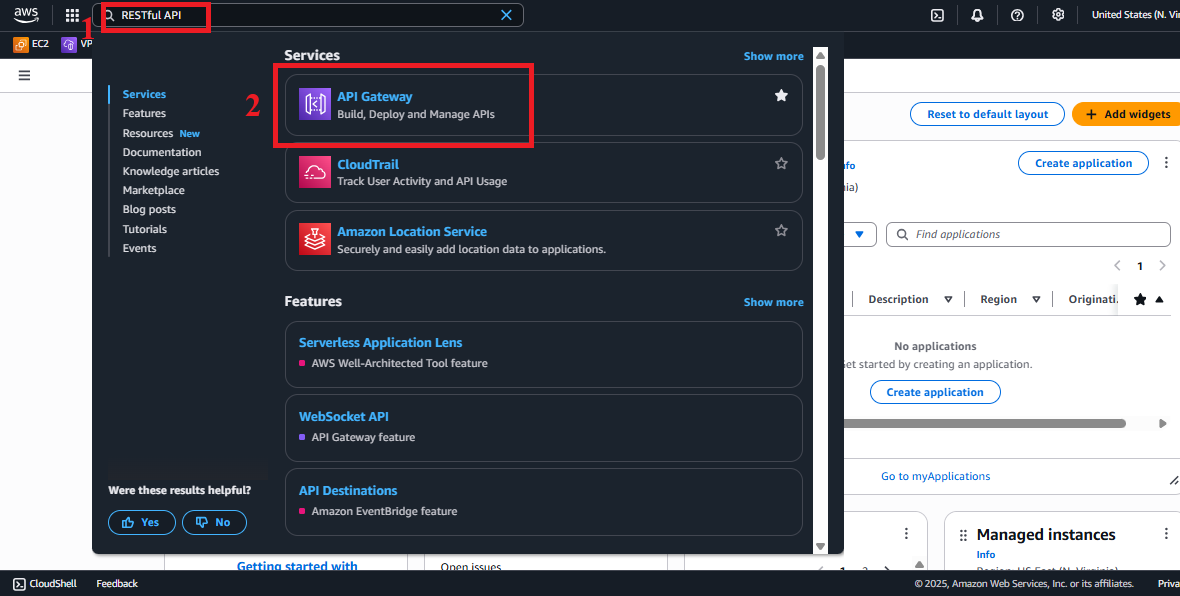 Figure 1: AWS Console Interface with API Gateway Search Bar.
-
-
Navigate to the APIs Section
-
In the main Amazon API Gateway interface, look at the left navigation menu.
-
Select APIs to view the list of existing APIs. If you haven’t created any API, the list will be empty.
-
The interface will show options to create or manage APIs.
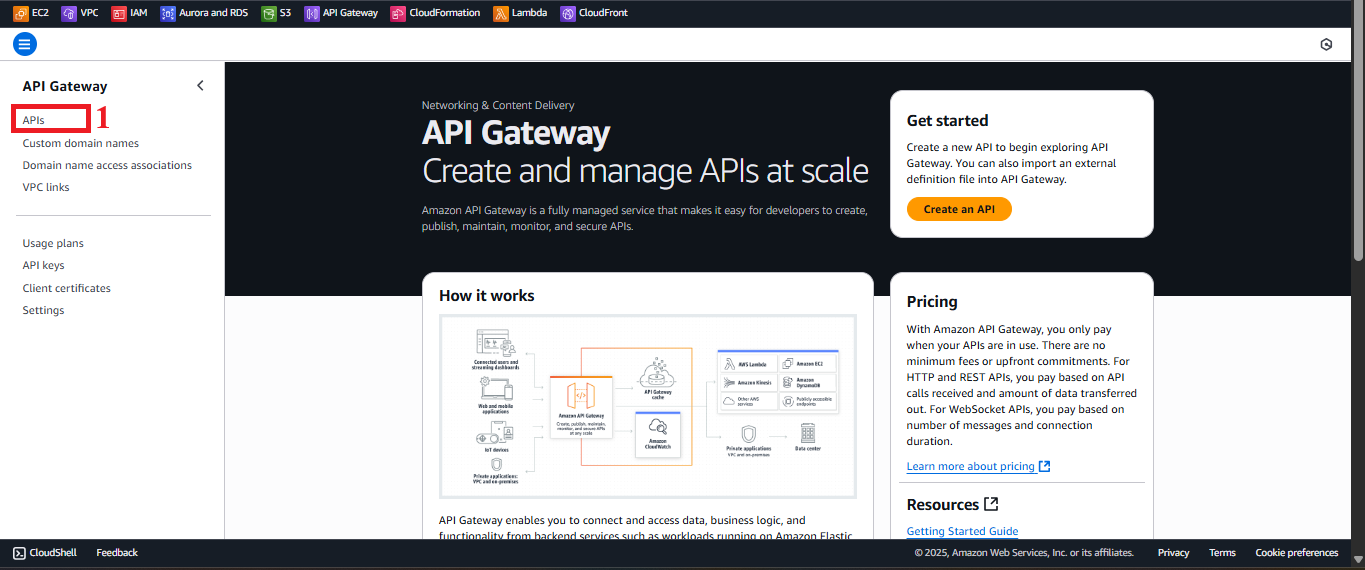 Figure 2: Navigation Menu with APIs Option.
-
-
Initiate the API Creation Process
-
In the APIs interface, click the Create API button at the top right to start creating a new API.
-
If you immediately see the REST API option, move to step 4. If not, the interface will list types of APIs (REST API, HTTP API, WebSocket API).
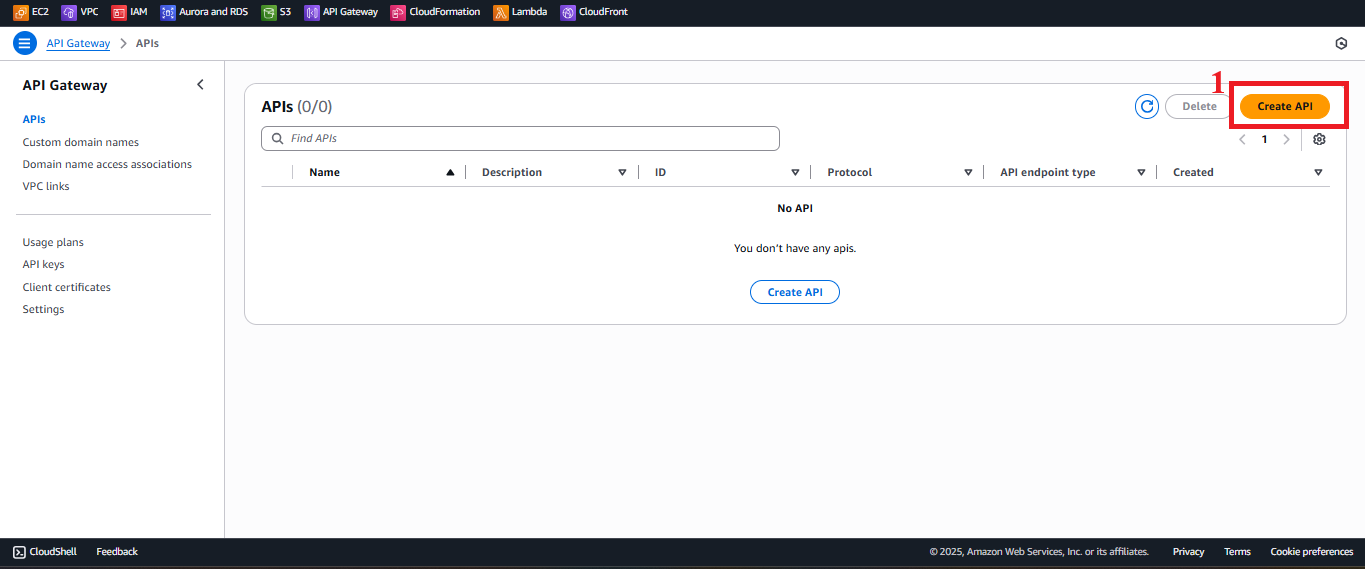 Figure 3: Create API Button in the APIs Interface.
-
-
Choose REST API and Build
-
In the Create API interface, find the REST API option (not REST API Private or HTTP API).
-
Click Build under REST API to begin creating a RESTful API.
-
REST API Notes:
- REST API supports features like API Key, CORS, and Lambda Proxy integration, which are suitable for this system.
- Compared to HTTP API (lighter, cheaper) and REST API Private (only accessible within a VPC), REST API is the best choice for a public application integrated with CloudFront.
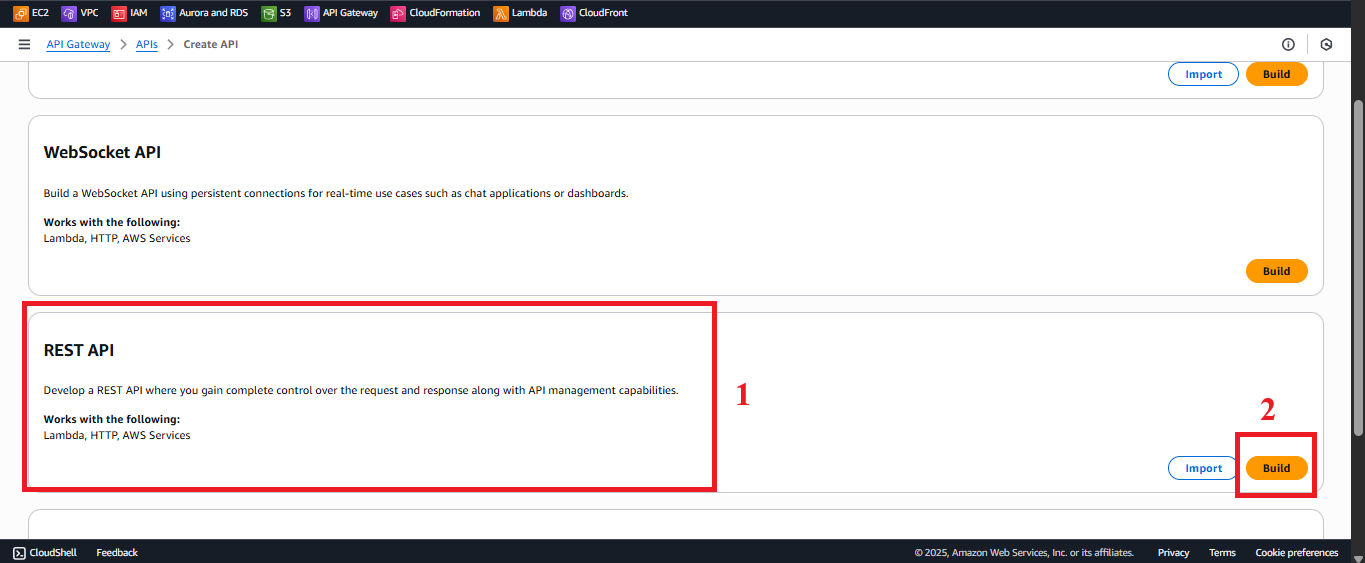 Figure 4: Choose REST API and Click Build.
-
-
Configure the API Details
- In the API Details section:
- Choose New API to create a new API from scratch.
- API name: Enter
student(different fromStudentManagementAPIin section 4 earlier, I will usestudentas requested). - Description: Enter REST API for student management system, integrated with Lambda and CloudFront.
- API endpoint Type: Choose Edge-optimized.
- Explanation:
- Edge-optimized: The API is distributed via CloudFront, using edge locations to reduce latency for global users. Suitable for a web interface running on CloudFront.
- Regional: The API only serves within one AWS region, suitable if global latency optimization is not needed.
- Private: Only accessible within a VPC, not suitable for a public application.
- Explanation:
- Keep other settings at their default values.
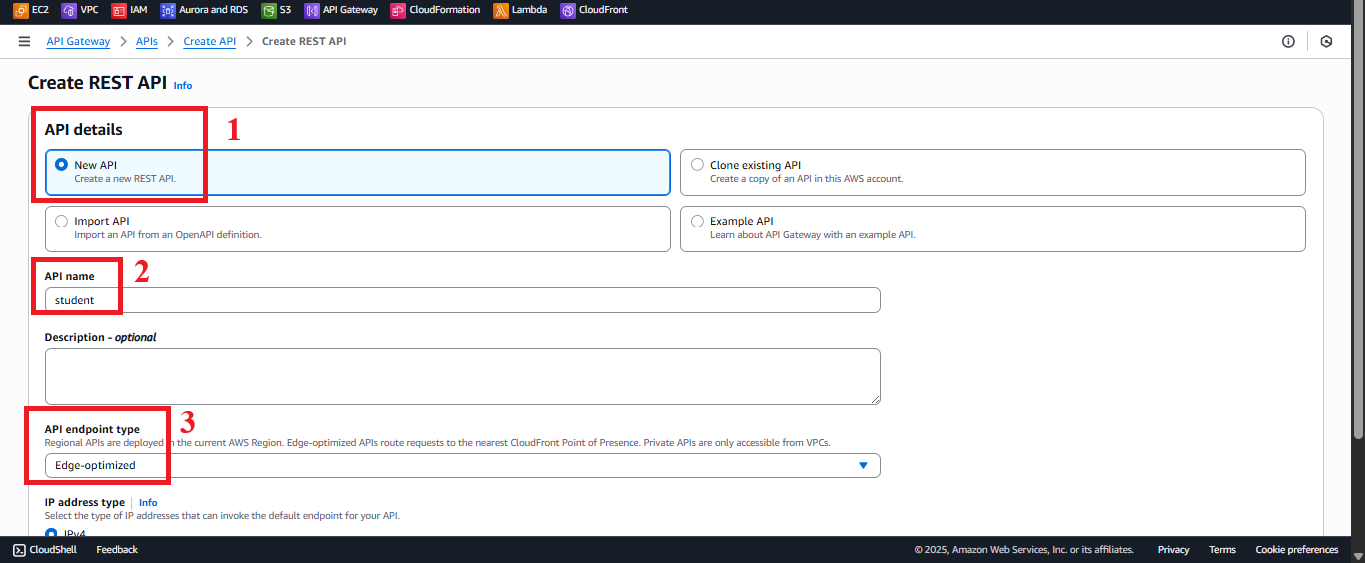 Figure 5: API Configuration Interface.
-
Click Create API to create the API.
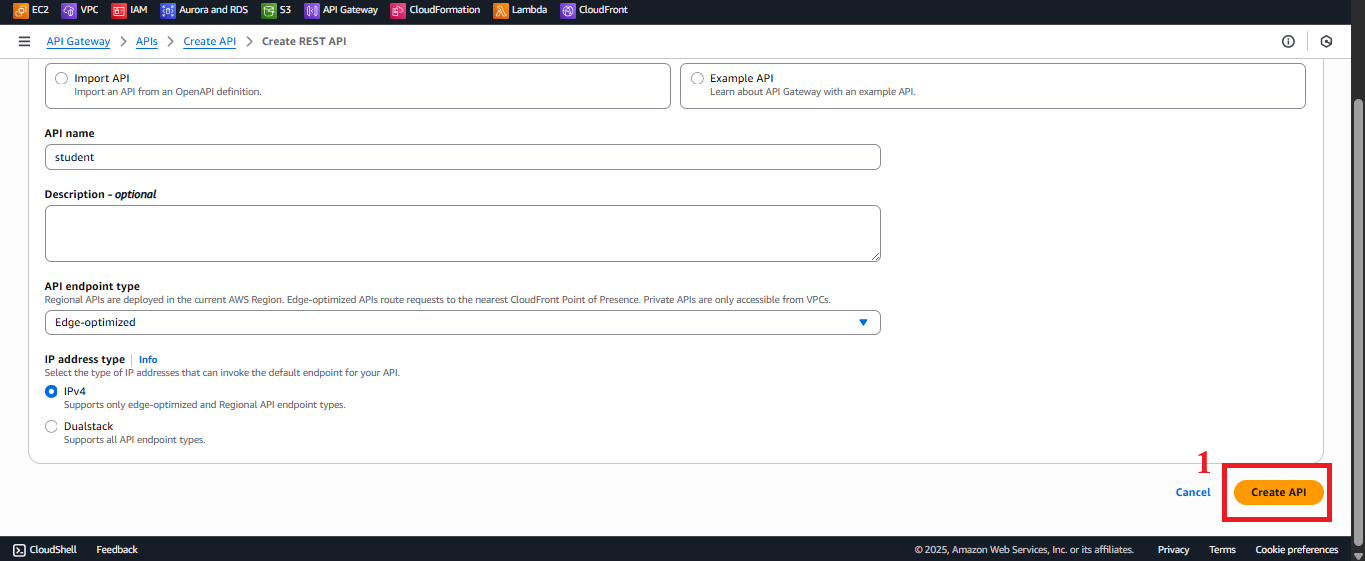 Figure 6: Click Create API Button.
- In the API Details section:
-
Check API Creation Status
- After clicking Create API, you will be redirected to the management page for the
studentAPI. - The interface will display the message: “Successfully created REST API ‘student’.”
- If you don’t see this message or encounter an error:
- Check if your AWS account’s IAM permissions include
apigateway:POSTto create APIs. - Ensure you have selected REST API and Edge-optimized correctly.
- Check if your AWS account’s IAM permissions include
- In the left menu, select Resources to begin configuring the resources and methods (which will be done in steps 4.4, 4.5, and 4.6).
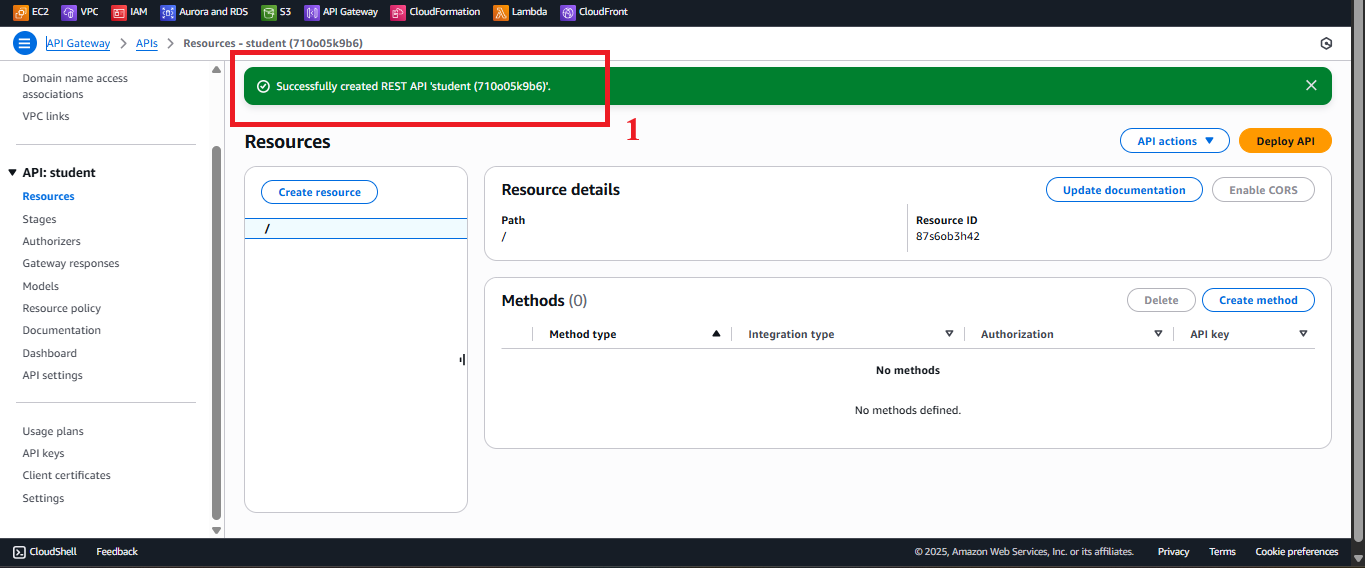 Figure 7: API Management Page for student API after creation.
 - After clicking Create API, you will be redirected to the management page for the
Important Notes
| Element | Details |
|---|---|
| API Name | The name student must be entered exactly as it will appear in the Invoke URL (e.g., https://api-id.execute-api.us-east-1.amazonaws.com/prod). |
| Edge-optimized vs Regional | Edge-optimized is suitable for this system because the web interface uses CloudFront. The Invoke URL will have the format using CloudFront edge locations. If you need to integrate with a custom domain (e.g., api.system.edu.vn), ensure you configure the domain in API Gateway and CloudFront after the API is created. |
| AWS Region | Ensure the region us-east-1 matches with the Lambda functions, DynamoDB studentData table, S3 bucket student-backup-20250706, and SES. If you’re using a different region (e.g., us-west-2), you will need to adjust when configuring Lambda integration (steps 4.4, 4.5, 4.6). |
| Error Handling | If you encounter an “AccessDenied” error, check your AWS account IAM permissions. If the API is not showing up, refresh the page or check the AWS region again. |
| Optimization | After creating the API, you can add more detailed descriptions in Settings (left menu) or enable API Gateway logging for monitoring: - Go to Settings > CloudWatch Logs > Select Enable CloudWatch Logs and set the log level (e.g., INFO). - This helps debug when integrating with Lambda or the web interface. |
| Early Testing | After creating the API, verify that the student API appears in the APIs list and check the Invoke URL after deployment (step 4.8) to ensure the API is ready for integration. |
Practical Tip: Verify that the
studentAPI appears in the APIs list and check the Invoke URL after deployment (step 4.8) to ensure the API is ready for integration.
Conclusion
The student REST API has been successfully created in AWS API Gateway with the Edge-optimized endpoint type, ready to configure resources and methods in the next steps.
Next step: Go to Create API Key to Secure Access to continue!