Configure Amazon SES
Objective: Configure Amazon SES to send confirmation emails for the Lambda function
insertStudentData(confirmation when saving student data) andBackupDynamoDBAndSendEmail(notification with a backup file download link). Verify the email address (e.g.,nguyentribaothang@gmail.com) and exit sandbox mode to send emails to unverified addresses.
Amazon SES is AWS’s email service with high reliability and low cost, used for:
- Sending confirmation emails when adding students to the DynamoDB
studentDatatable. - Sending notification emails containing the pre-signed URL of the backup file from S3.
Note: The default SES account is in sandbox mode, which only allows sending emails to verified addresses. Exiting sandbox mode is necessary to send emails to unverified student addresses.
Detailed Steps
Below are the detailed steps to configure SES:
1. Access the AWS Management Console
-
Open your browser and log in to the AWS Management Console.
-
In the search bar, type SES and select Amazon Simple Email Service (SES).
-
Ensure you are in an AWS region that supports SES (e.g.,
us-east-1), check in the top right corner.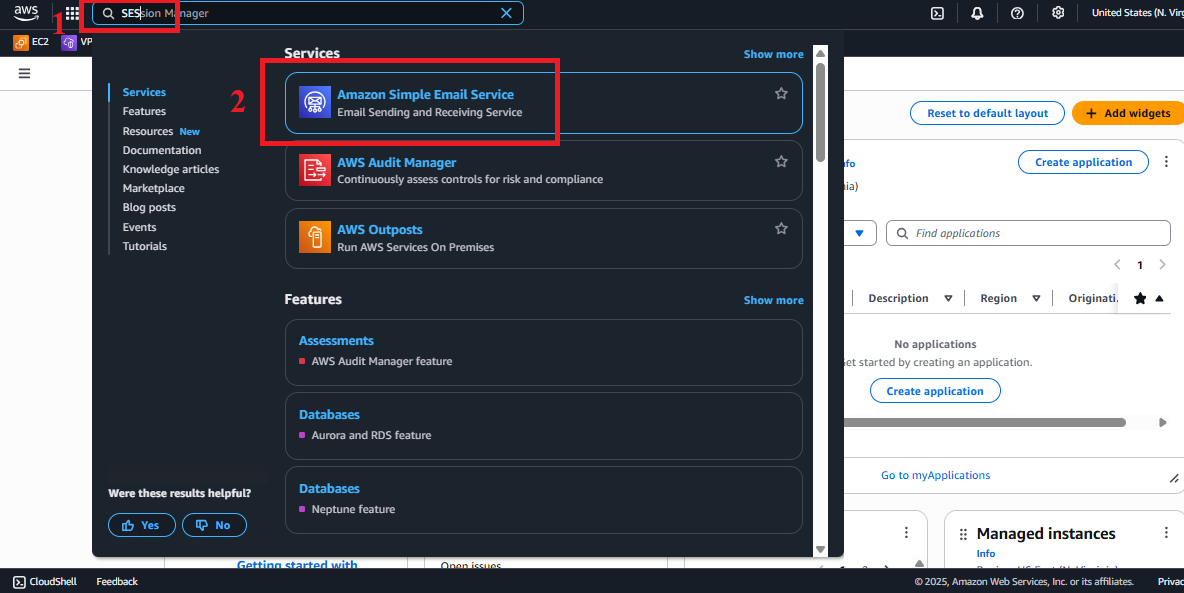 Figure 1: AWS Console interface with the SES search bar.
2. Navigate to Verified Identities
-
In the SES interface, find the left-hand navigation menu.
-
Select Verified identities to view the list of verified email addresses or domains. If none exist, the list will be empty.
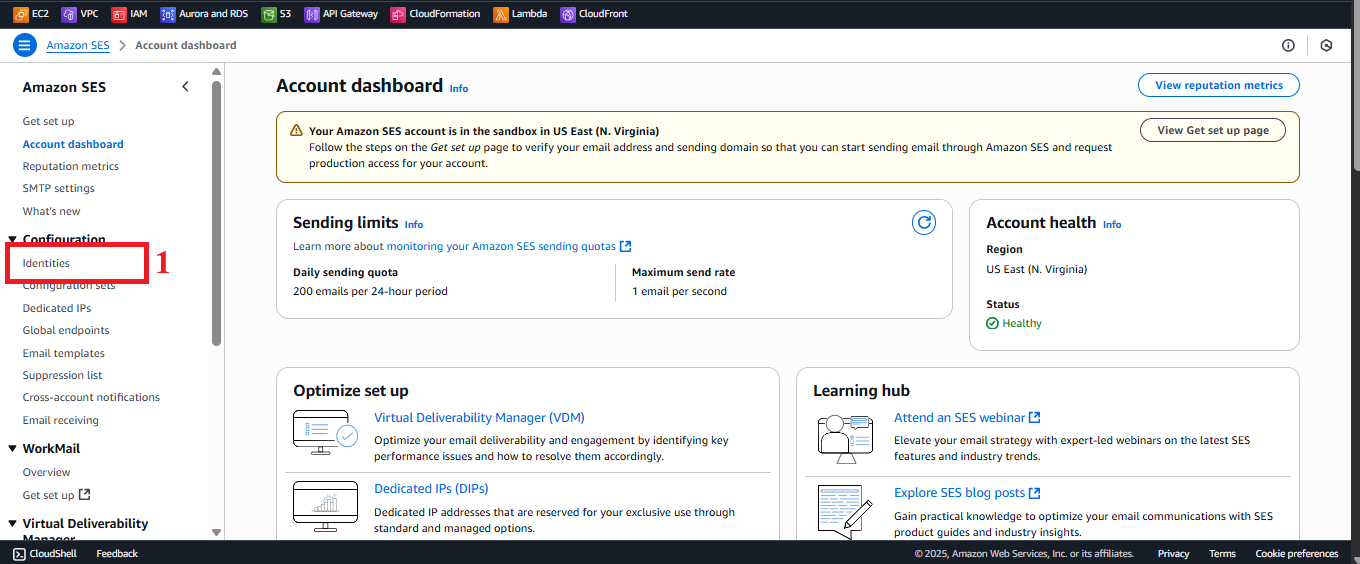 Figure 2: Navigation menu with the Verified identities option.
3. Start the Identity Creation Process
-
In the Verified identities interface, click Create identity in the top-right corner.
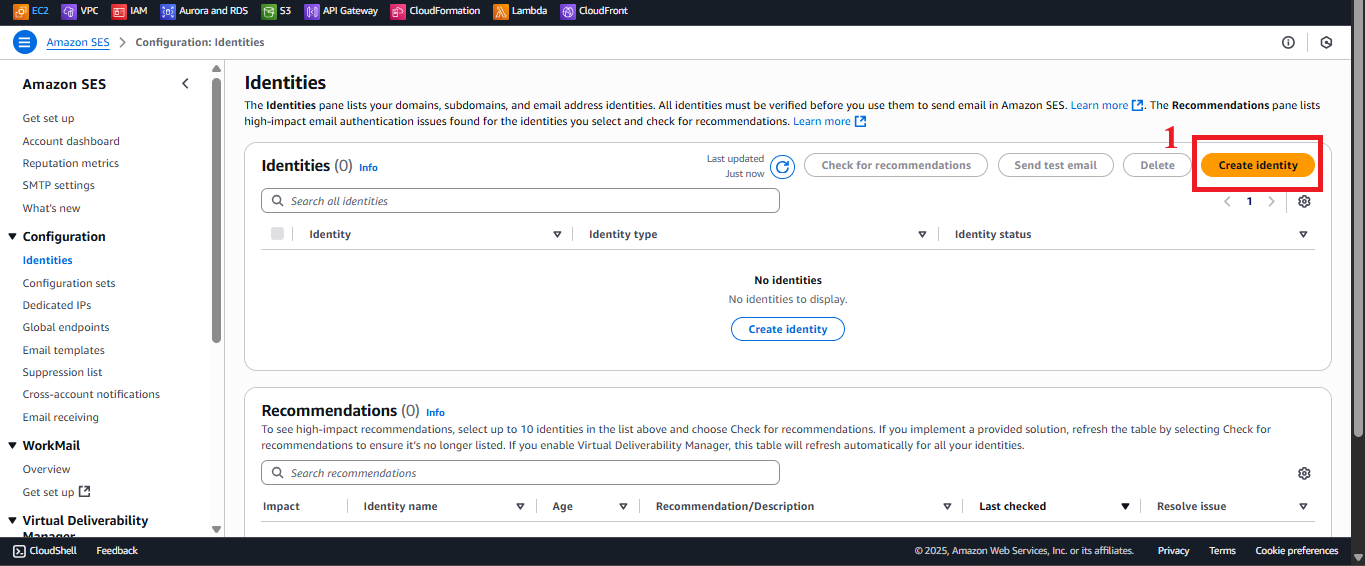 Figure 3: Create Identity button in the Verified identities interface.
4. Configure the Email Address
-
In the Identity type section, select Email address.
-
In the Email address field, enter the source email address (e.g.,
nguyentribaothang@gmail.com).Note: Use an email you have access to for verification. Avoid using sample emails like
example@gmail.com. -
Leave the default settings (no need for Feedback notifications or DKIM settings).
-
Click Create identity to send the verification request.
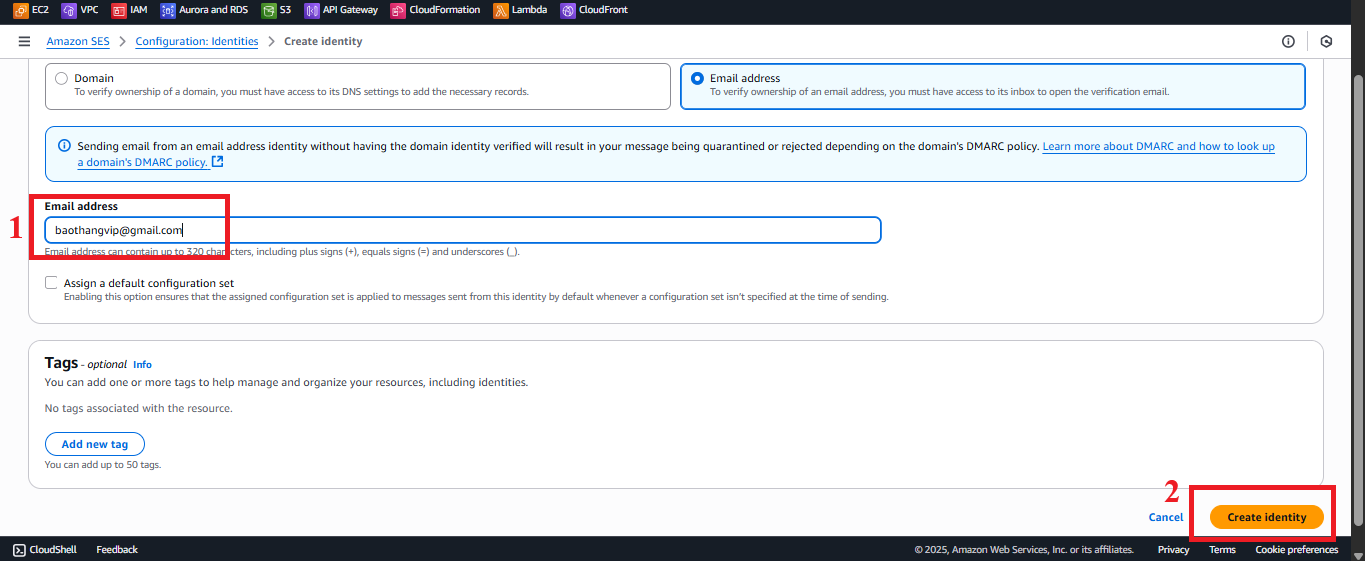 Figure 4: Email configuration interface.
5. Check and Verify the Email
-
AWS SES will send a verification email to the entered address (e.g.,
nguyentribaothang@gmail.com). -
Log in to your email account, check your Inbox or Spam/Junk folder for an email from AWS (subject may be “Amazon Web Services - Email Address Verification Request”).
-
Click the verification link in the email to complete the process.
-
Return to SES and refresh the Verified identities page. Confirm the status is Verified.
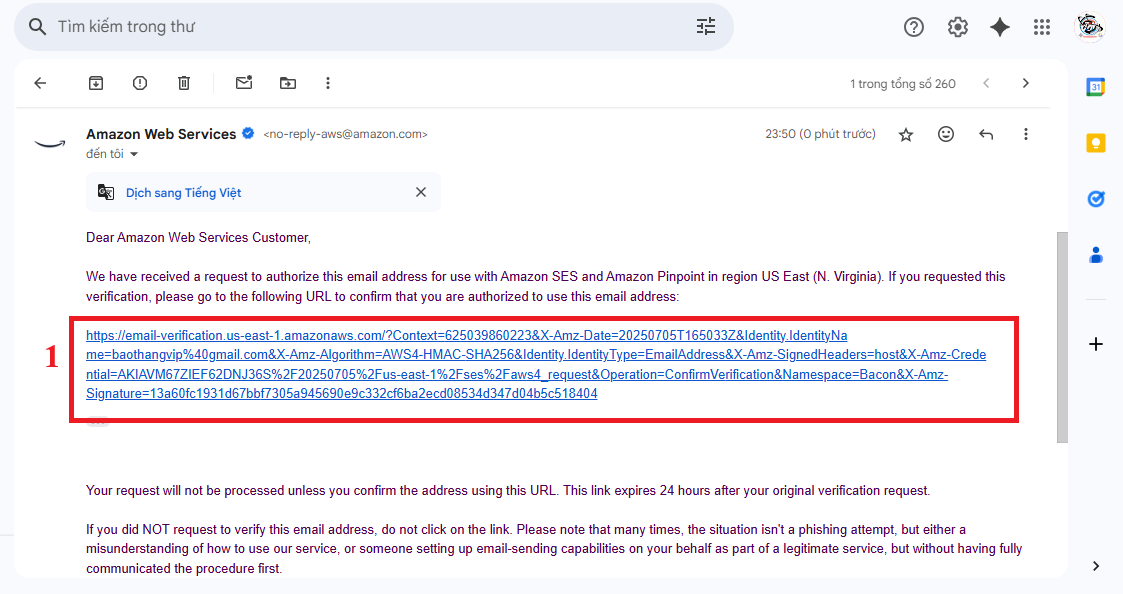 Figure 5: Checking the Verified status of the email.
6. Check Sandbox Mode and Request Exit from Sandbox
- Check sandbox:
- In SES, go to Account dashboard or Sending statistics.
- Check the Account status. If it shows “Your account is in the sandbox”, the account is limited to sending emails to verified addresses only.
- Request to exit sandbox:
- In the Account dashboard, click Edit your account details or Request production access.
- Fill out the form:
- Use case description: “Send confirmation emails when saving student information and backup notifications from DynamoDB.”
- Mail type: Choose Transactional.
- Website URL: Enter the application URL (if available) or write “Website under development.”
- Sender email address: Enter the verified email (e.g.,
nguyentribaothang@gmail.com). - Additional information: “Need to send emails to unverified student addresses for the student information management system.”
- Submit the request. AWS will approve it within 24-48 hours, notifying via email.
- Temporary workaround: In sandbox mode, verify additional receiving emails (follow steps 4–5) or modify the Lambda code to only send emails to verified addresses.
7. Verify and Test SES
-
Go back to Verified identities, check the email status (e.g.,
nguyentribaothang@gmail.com) is Verified. -
In SES, select Send a test email (if available), send a test email to the verified email to test functionality.
-
If the status is still Pending, check your email (Inbox/Spam) or recreate the identity.
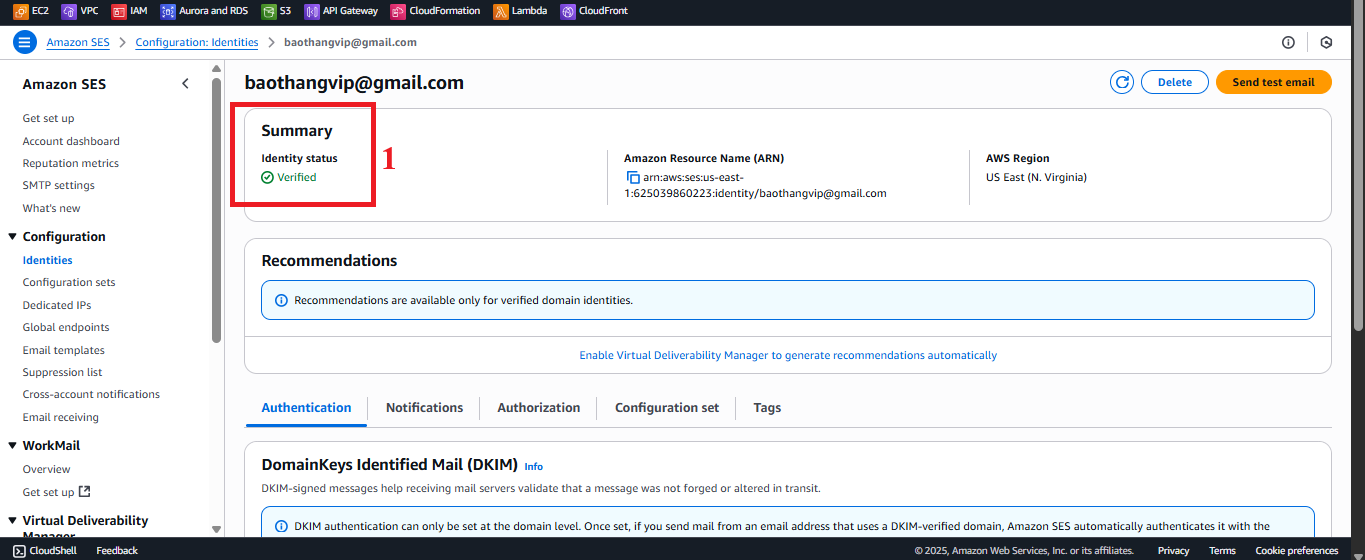 Figure 6: Confirming Verified status and testing email sending.
Important Notes
| Factor | Details |
|---|---|
| Valid Email | Use an email you have access to (e.g., nguyentribaothang@gmail.com). If you don’t receive the verification email within 5-10 minutes, check Spam/Junk or contact AWS Support. |
| Sandbox Mode | In sandbox mode, only send emails to verified addresses. Exit sandbox mode to send emails to student addresses (unverified), or the insertStudentData function will report an AccessDenied error. |
| AWS Region | Configure SES in a region that supports it (e.g., us-east-1), matching with Lambda. Check the list of supported SES regions in AWS SES Documentation. |
| Error Handling | If you don’t receive the verification email, check DNS settings or contact your email provider. If Lambda reports “Email address is not verified”, check the verification status in SES or CloudWatch logs. |
| Optimization | Consider verifying the domain or setting up DKIM for security. See AWS SES Documentation - DKIM. |
| Test Early | Test sending an email from SES before integrating with Lambda to ensure proper functionality. |
Practical Tip: After verifying the email, send a test email from SES to check before running the Lambda functions.
Conclusion
Configuring SES with a verified email (e.g., nguyentribaothang@gmail.com) and exiting sandbox mode (if necessary) ensures that the Lambda functions insertStudentData and BackupDynamoDBAndSendEmail can send confirmation emails and notifications successfully. SES is now ready for integration into the serverless application.
Next Step: Proceed to Configure Lambda Functions to set up the Lambda functions!