Create Table in DynamoDB
Objective: Set up the studentData table in DynamoDB to store student information, including Student ID (studentid), Full Name, Class, Date of Birth, and Email, using studentid (String type) as the primary key to ensure fast and efficient queries in a serverless architecture.
DynamoDB, AWS’ NoSQL database, provides automatic scaling and low latency, ideal for student information management applications. The studentData table will serve as the foundation for integrating with AWS services such as Lambda, API Gateway, and SES.
Detailed Steps
Below are the detailed steps to create and configure the studentData table:
1. Access the AWS Management Console
-
Open your browser and log in to the AWS Management Console.
-
In the search bar, type DynamoDB and select DynamoDB to enter the management interface.
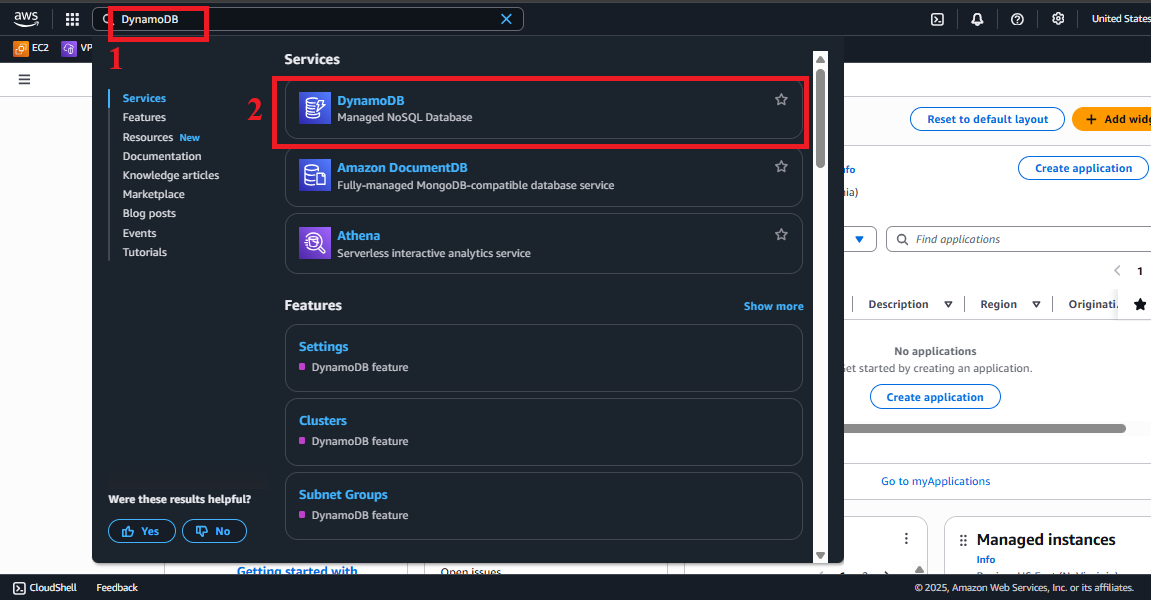 Figure 1: AWS Console interface with the DynamoDB search bar.
2. Navigate to the Tables Section
-
In the DynamoDB interface, find the left-hand navigation menu.
-
Select Tables to view the list of existing tables. If no tables exist, the list will be empty.
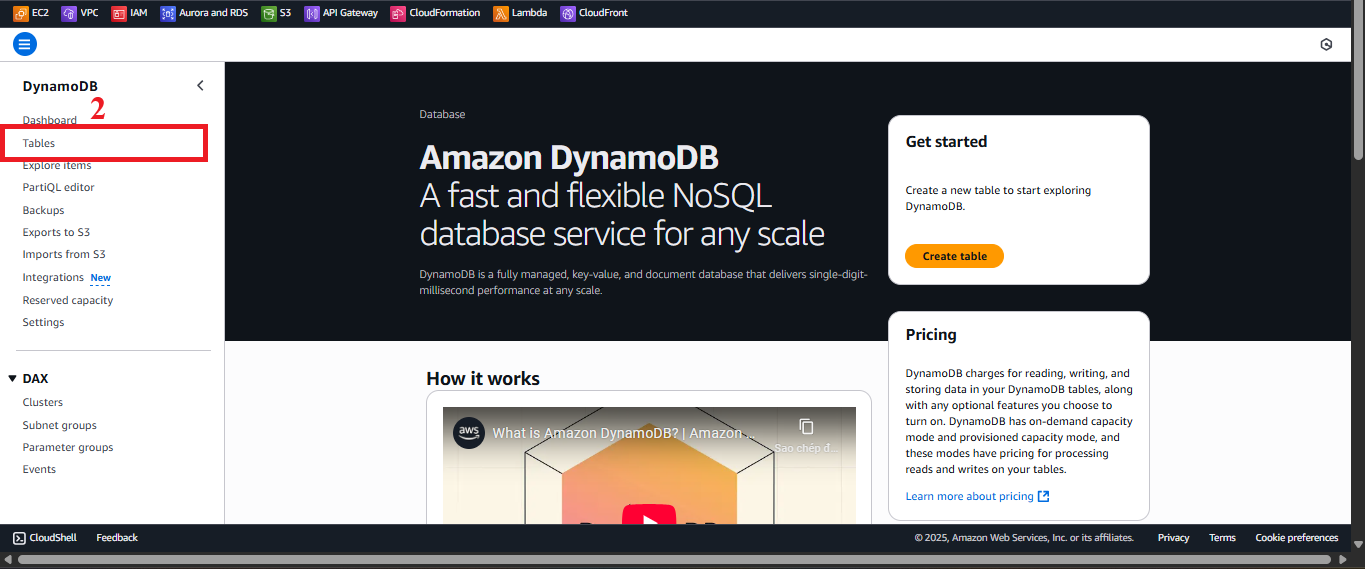 Figure 2: Navigation menu with the Tables option.
3. Start the Table Creation Process
-
In the Tables interface, click the Create Table button in the top-right corner.
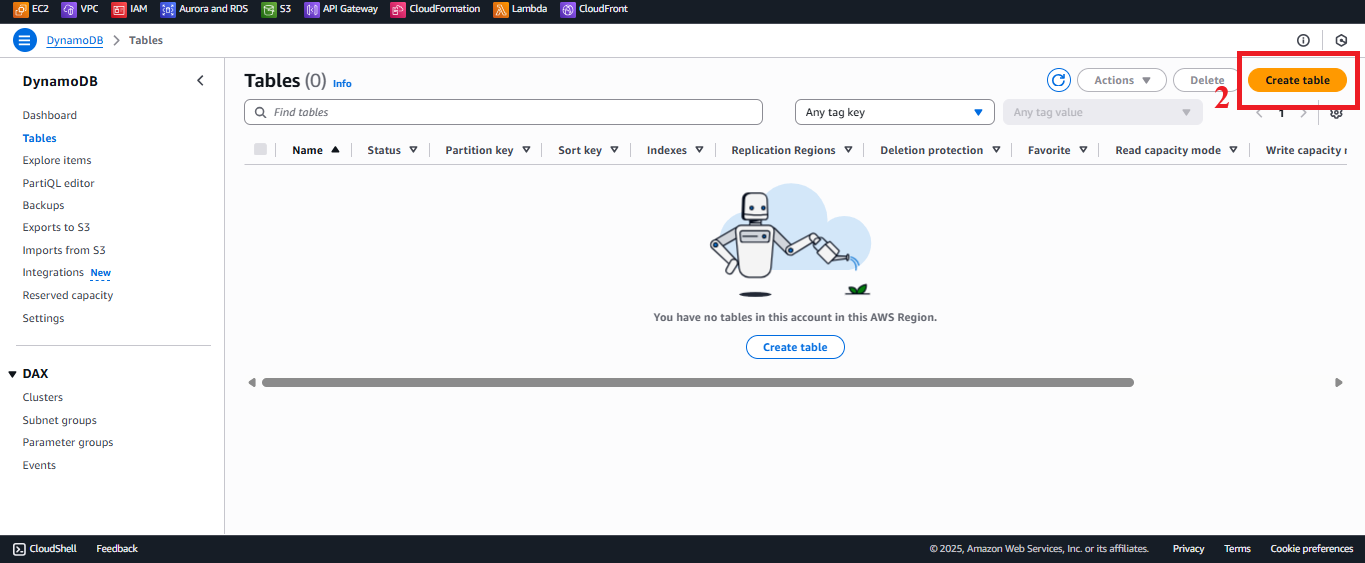 Figure 3: Create Table button in the Tables interface.
4. Configure the Table Details
-
In the Table Details section:
- Table Name: Enter
studentData.Note: The table name must match exactly with the name used in the Lambda functions (
getStudentData,insertStudentData,BackupDynamoDBAndSendEmail). - Partition Key: Enter
studentid, select String as the type.Primary Key: Ensure each student has a unique identifier (e.g.,
SV001,SV002). - Sort Key: Leave blank (not needed, as queries will be based on
studentid).
- Table Name: Enter
-
Settings: Use default options:
- Choose On-Demand for Capacity mode to automatically adjust resources, saving costs and simplifying management.
- No need to add Secondary Indexes or custom Encryption (default is sufficient for this application).
-
Verify the information:
- Table Name:
studentData - Partition Key:
studentid (String)
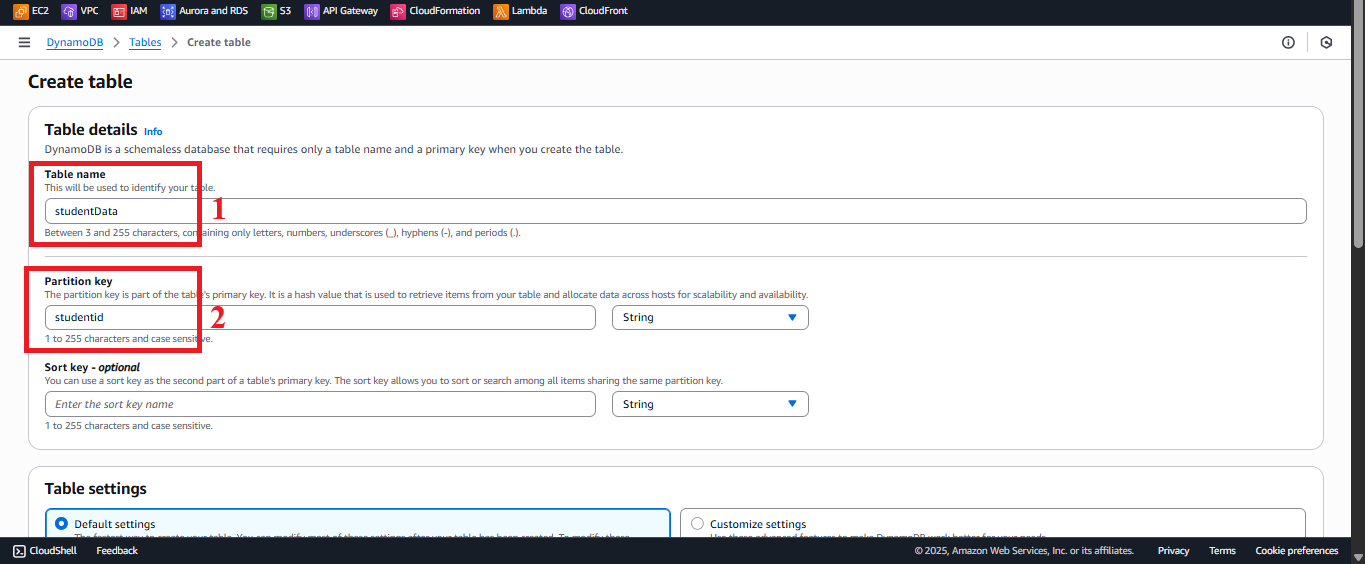
Figure 4: Table configuration interface with Table Name and Partition Key. - Table Name:
5. Create the Table
-
Click Create Table at the bottom of the page.
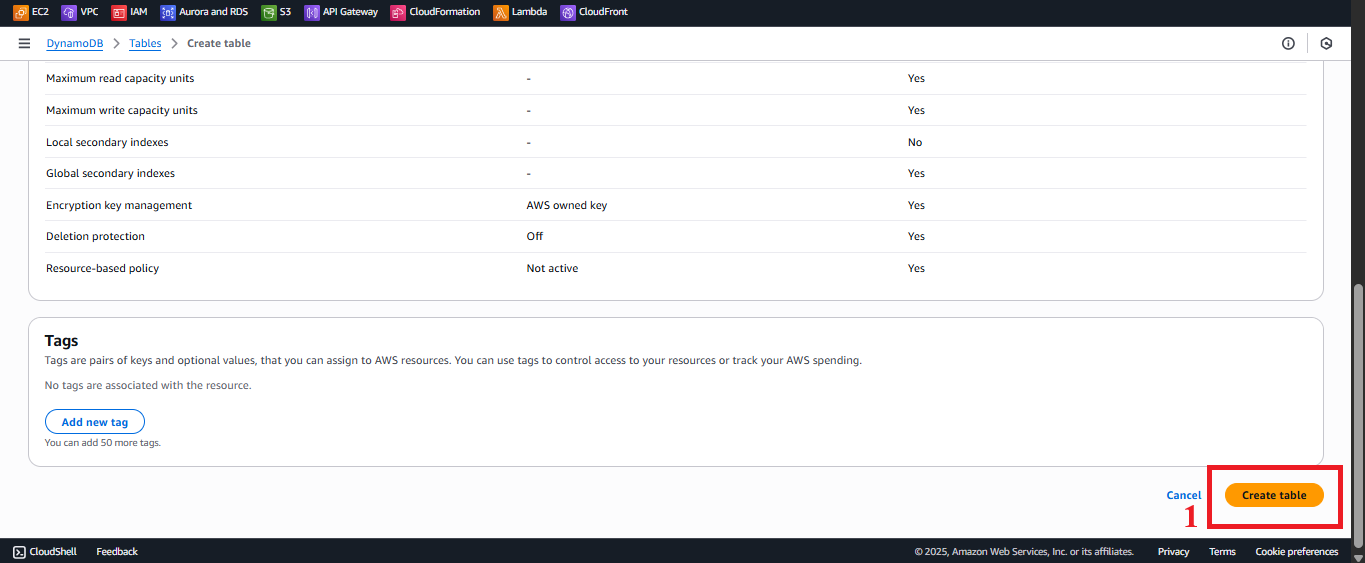 Figure 5: Create Table button to confirm.
 -
DynamoDB will create the table in about 20-30 seconds, depending on the AWS region (e.g.,
us-east-1).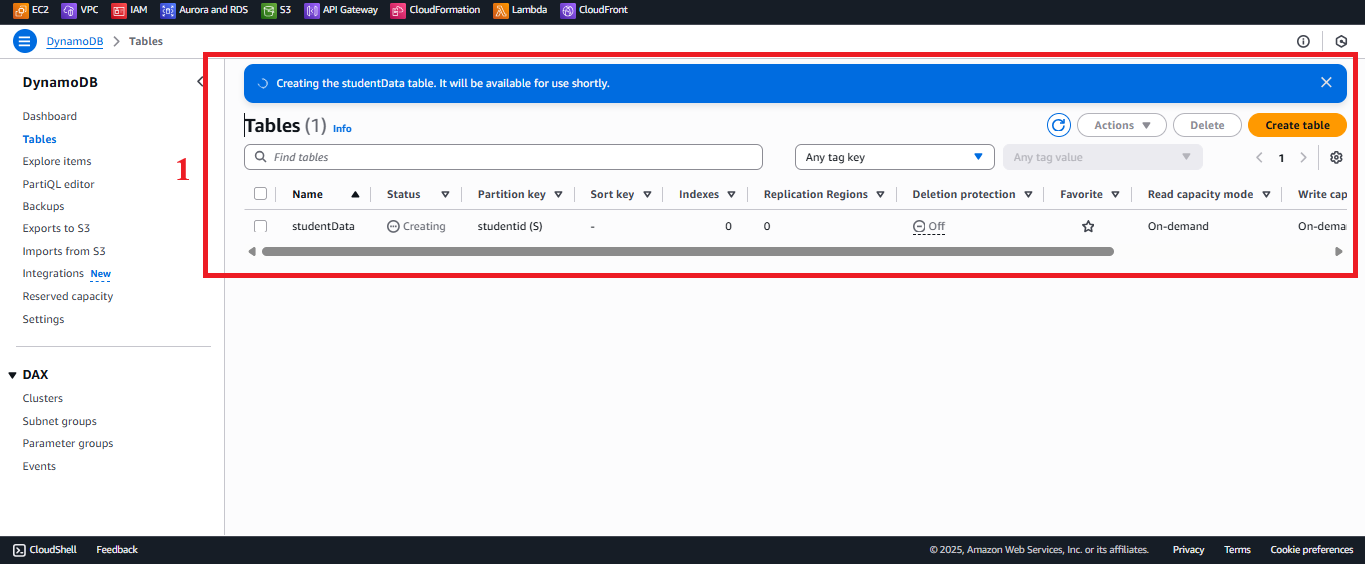 Figure 6: Interface showing table creation status.
6. Check the Table Status
-
After clicking Create Table, you will return to the Tables list.
-
Find the
studentDatatable. The initial status will be Creating. -
Wait for about 30 seconds, then refresh the page (click Refresh or press F5).
-
Once the status changes to Active, the table has been created successfully.
-
Notification: The interface will show “The studentData table was created successfully”.
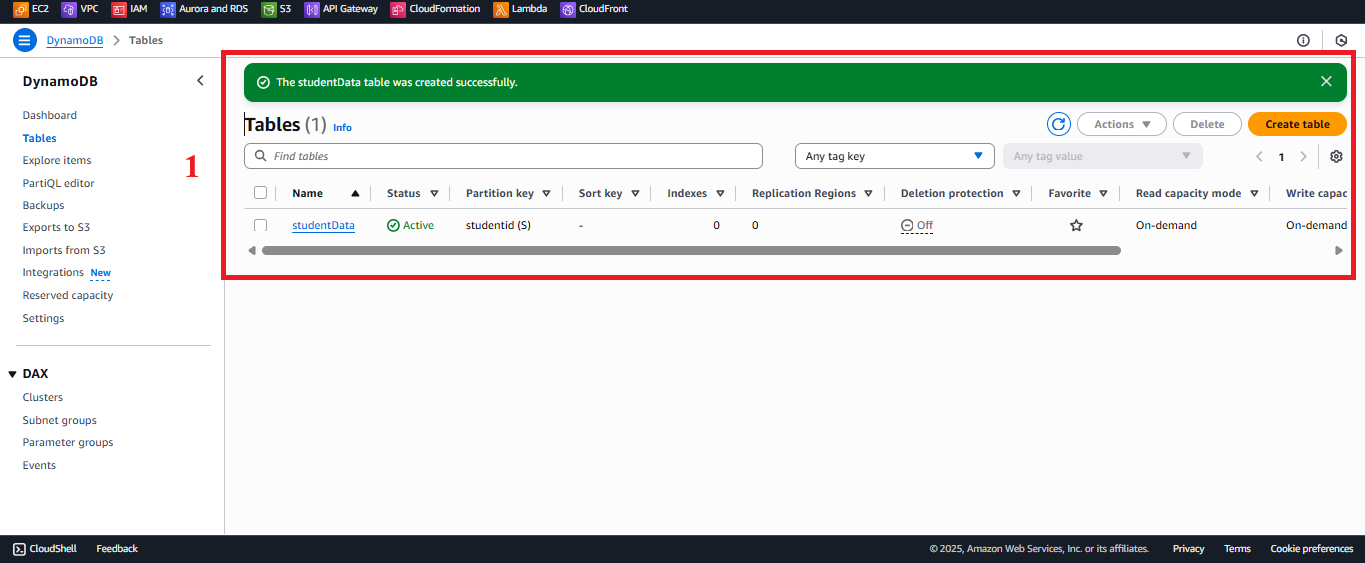 Figure 7: The studentData table with Active status.
7. Verify the Table Configuration
- Click on the
studentDatatable to view details. - Check:
- Table ARN: For example,
arn:aws:dynamodb:us-east-1:your-account-id:table/studentData. - Partition Key:
studentid (String). - Capacity Mode: On-Demand.
- Sort Key: None.
- Table ARN: For example,
- Other attributes (Full Name, Class, Date of Birth, Email) are dynamic attributes, no need for pre-declaration.
Important Notes
| Factor | Details |
|---|---|
| Table Name | Must be studentData (case-sensitive) to match the Lambda code. Incorrect names will cause query errors. |
| AWS Region | Create the table in the same AWS region as other services (e.g., us-east-1). Check the region in the top-right corner of the AWS Console. |
| Creation Time | If the Creating status lasts longer than 30 seconds, check your network connection or refresh the page. If an error occurs, delete the table and try again. |
| Optimization | For large data (>500 MB), consider enabling Point-in-time Recovery (PITR) in the Backups tab for recovery support. Backup via Lambda and S3 is sufficient for this application. |
| Check Early | Once the table is in Active status, go to the Items tab and select Create Item to enter a sample record: - studentid: SV001 - name: Nguyễn Văn A - class: CNTT1 - birthdate: 2000-01-01 - email: example@gmail.com Verify the data displays correctly. |
Practical Tip: Check the table configuration immediately after creation to ensure accuracy before integrating with Lambda.
Conclusion
The studentData table is the foundation for storing and managing student information in the serverless application. With the primary key studentid and On-Demand capacity mode, the table ensures high performance, flexible scaling, and low latency. The table is now ready to integrate with Lambda, API Gateway, and SES.
Next Step: Proceed to Configure SES to set up the email service!